All Florawish Whimstar locations in Infinity Nikki
Where to find every Florawish Whimstar.
Finding every Florawish Whimstar may take you some time in Infinity Nikki, but they will definitely come in handy when you want to unlock something from the Heart of Infinity.
Florawish Whimstars can be earned through a variety of activities, from grooming specific animals to just reaching a specific roof. You'll also need to venture into two Infinity Nikki dungeons to find them all - the Well of Fortune and the Dream Warehouse.
Below you'll find all of the Florawish Whimstar locations in Infinity Nikki, so you can unlock new Outfits faster.
All Florawish Whimstar locations in Infinity Nikki
There are 67 Whimstars in Florawish in Infinity Nikki. These Whimstars are divided between the four found in the Well of Fortune dungeon, three within the Dream Warehouse dungeon and the 60 scattered across the lands of Florawish, which we've outlined below.
You must have reached Chapter 1: Wishes Without Wings - Power Outage Rescue to enter the Well of Fortune dungeon, while, for the Dream Warehouse, you must be at least at Chapter 2: The Lost Wishes - Go to the Dream Warehouse! We've outlined these Whimstar locations in separate guides for the Well of Fortune dungeon and Dream Warehouse dungeon.
Thank you to Map Genie for the below overview map of the Florawish Whimstar locations - make sure you check out their interactive Infinity Nikki map:
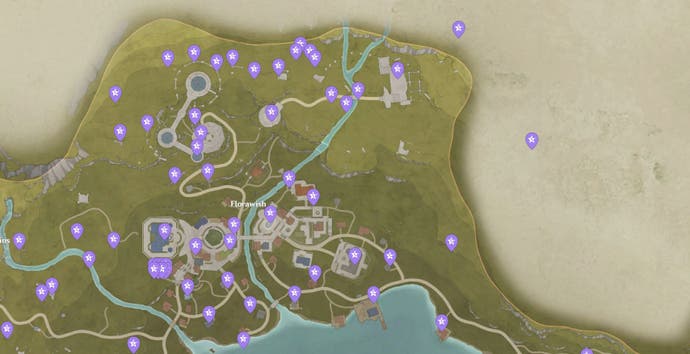
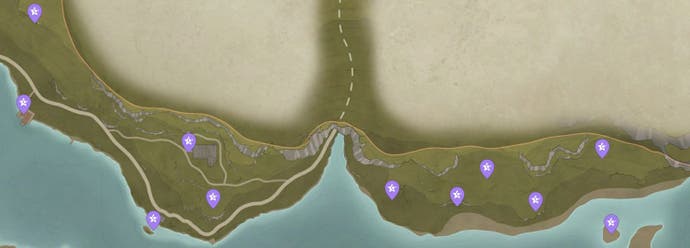
When it comes to the exact Whimstar locations in Florawish, we've organised the below list by those you can find by progressing through the main story, found in specific locations and then those earned by completing specific tasks, such as grooming an animal or catching a bug.
Here's where to find every Florawish Whimstar in Infinity Nikki:
- Complete Chapter 1: Wishes Without Wings
- Florawish Lane Greenhouse
- Wishing Tree Roof
- Above Bibcoon's Chuckle Club
- Atop of Mayor's Residence
- Orange house east of Mayor's Residence
- Roof of Stylist's Guild
- Pillar east of Nonoy's House
- House south of Wishing Tree
- Chest west of Florawish Stylist Guild
- Dream Warehouse Hidden Room
- Atop pillar near Dream Warehouse Warp Spire
- Atop the roof of a small building at the Dream Warehouse
- Pillar near Dream Warehouse Rooftop Spire
- In sky northwest of Dream Warehouse
- Near collapsed wall west of Dream Warehouse Tower
- Midair west of the Dream Warehouse
- Secret Base
- Midair near Florawish Ruins
- Florawish Ruins Treasure Chest
- Southeast of Stitch Street Warp Spire
- Midair south of the Sanctum of the Obervant
- Inside crate southeast of Wish Pass Office Warp Spire
- Treasure chest on beach southeast of Wish Pass Office Warp Spire
- Midair near Well of Fortune entrance
- Inside the Riverside Cavern
- Inside the Forest's Edge Cavern
- Inside the Warehouse Cavern
- Inside the Relic Hill Cavern
- Curio Domain, Southeast of Wishing Tree
- Curio Domain, Dream Warehouse
- Curio Domain, Well of Fortune entrance
- Hidden Star, Roof east of Florawish Lane Warp Spire
- Hidden Star, Umbrella east of Wishing Tree
- Hidden Star, House near Kingdom Guard's Office
- Hidden Star, Outside Daisy Inn
- Hidden Star, East of Mayor's Residence
- Time Trail, Daisy Inn
- Time Trail, south of Mayor's Residence
- Time Trail, Dream Warehouse Fountain
- Time Trail, Dream Warehouse Rooftop
- Time Trail, Sanctum of the Observant
- Animal Grooming, West of Florawish Stylist's Guild
- Animal Grooming, Roof of Ray and Wing's in Florawish
- Animal Grooming, Midair east of Wish Pass Office Warp Spire
- Animal Grooming, Island south of Forest's Edge Cavern
- Bug Catching, North of Stitch Street Warp Spire
- Bug Catching, Dream Warehouse Ruins
- Bug Catching, Butterfly near Dream Warehouse Cliff
- Bug Catching, Shack south-west of Sanctum of the Observant
- Fishing, Dock southeast of Florawish Lane Warp Spire
- Fishing, In river southwest of Stylists Guild
- Stray Hatty purchase 1 to 8
Florawish Whimstar location 1 - Complete Chapter 1: Wishes Without Wings - Land of Wishes
Simply complete Chapter 1: Wishes Without Wings - Land of Wishes to earn this Whimstar.
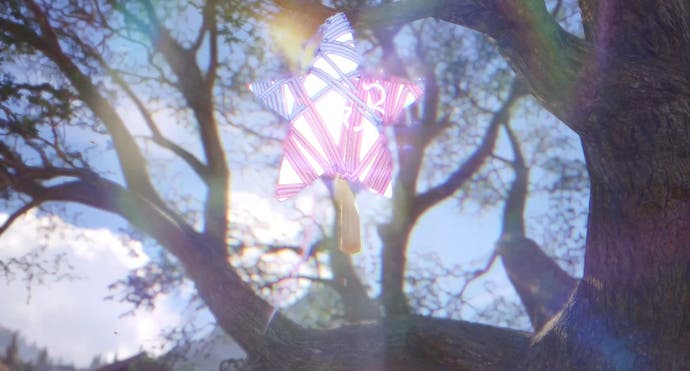
Florawish Whimstar location 2 - Florawish Lane Greenhouse
To find this Whimstar, you need to visit the greenhouse on the right-hand side of Florawish Lane - the path leading directly upwards from the Florawish Lane Warp Spire.
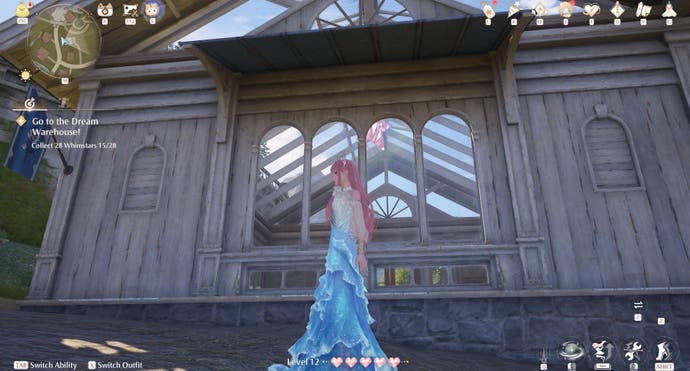
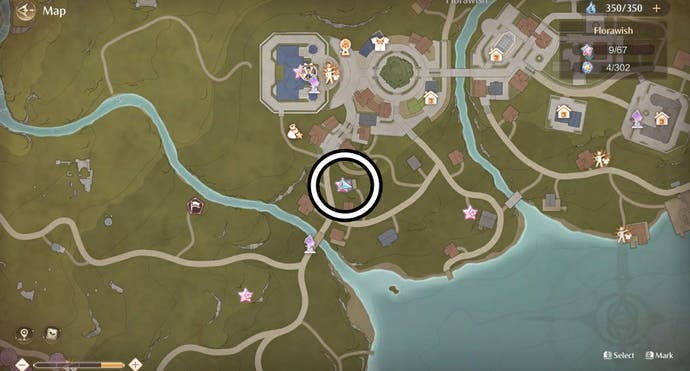
You may already be able to spot the Whimstar inside, but, to reach it, you need to head around the back of the greenhouse and move the crate blocking the door. Now you can go inside and collect the Whimstar.
Florawish Whimstar location 3 - Wishing Tree Roof
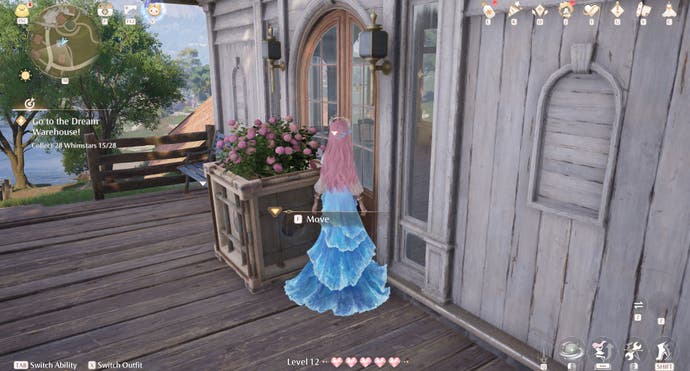
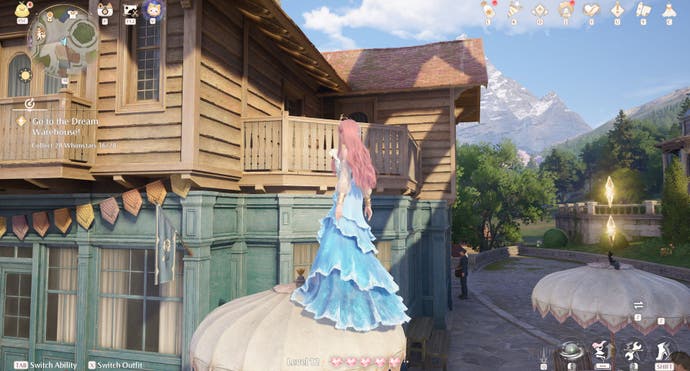
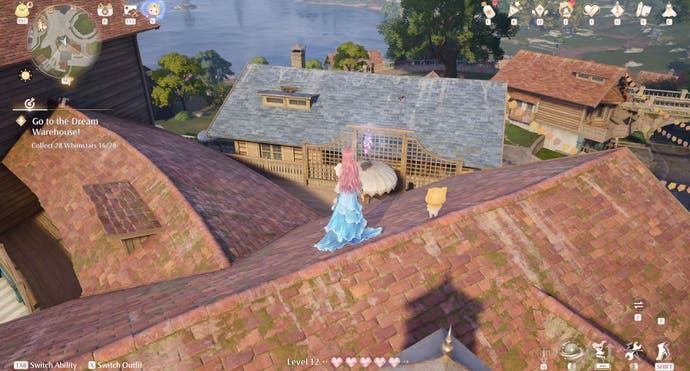
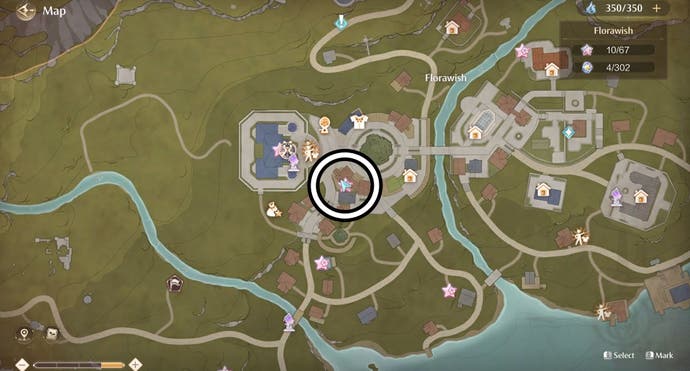
South-west of the Wishing Tree, you'll be able to find a Whimstar sitting atop an umbrella on the patio of the blue and brown buildings. It's a bit hidden though so you'll need to jump onto a nearby umbrella to reach a balcony and, from there, head onto the head roof. Now simply walk across the walk until you see the Whimstar.
Florawish Whimstar location 4 - Above Bibcoon's Chuckle Club
There's a Whimstar floating above Bibcoon's Chuckle Club and the step to reaching it is to head behind the Chuckle Club itself. There you should find a wooden staircase, which will lead you to an area where Pavri stands beneath a stall.
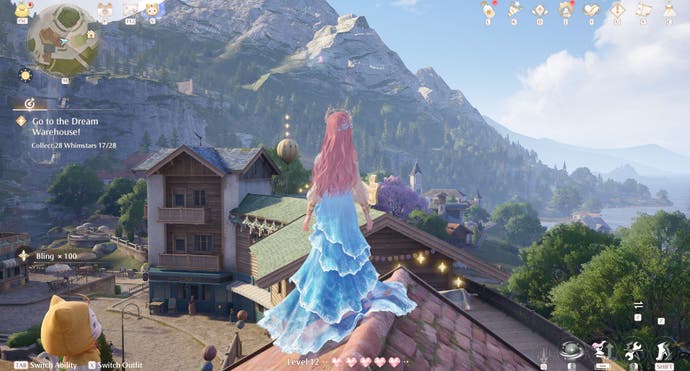

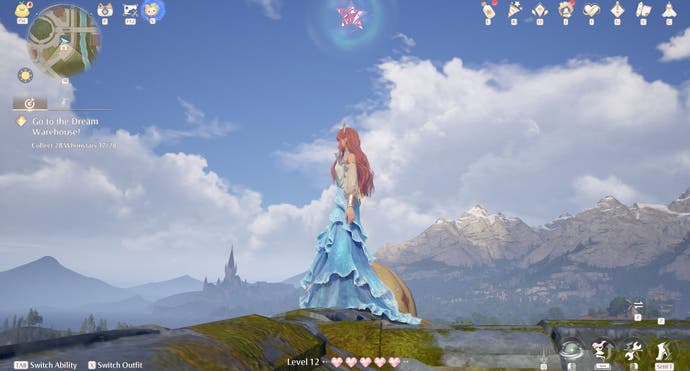
The next step is to jump atop this stall, then, from there, you'll be able to jump onto the Chuckle Club's roof. This will allow you to jump even further onto a blue roof where you'll find a brown balloon, which, when jumped on (lot's of jumping from this one), lets you glide over to the Whimstar.

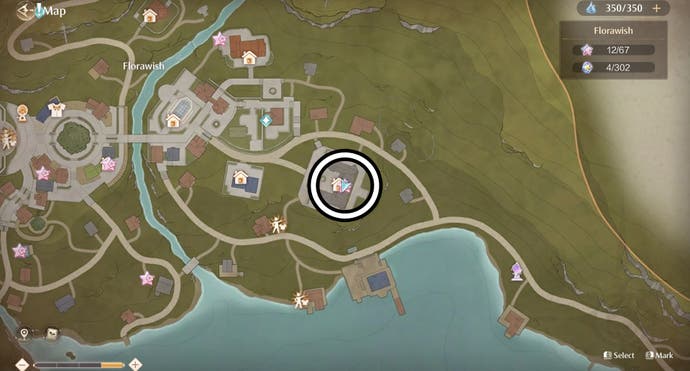
Florawish Whimstar location 5 - Atop of Mayor's Residence
We'll begin our journey to this Whimstar at the Mayor's Residence Warp Spire. From here you need to drop atop of the fountain to your left. This will give you the height needed to glide across to the balcony in front of you.
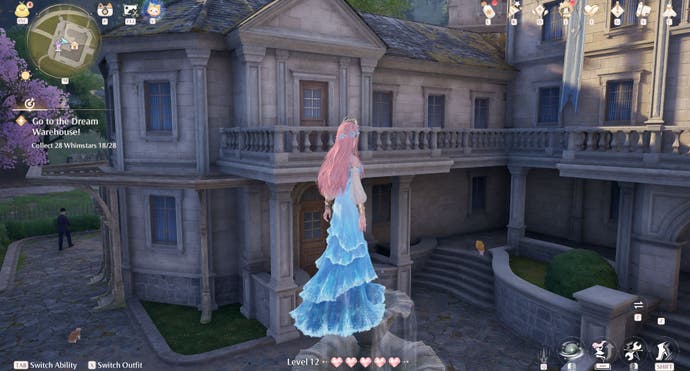
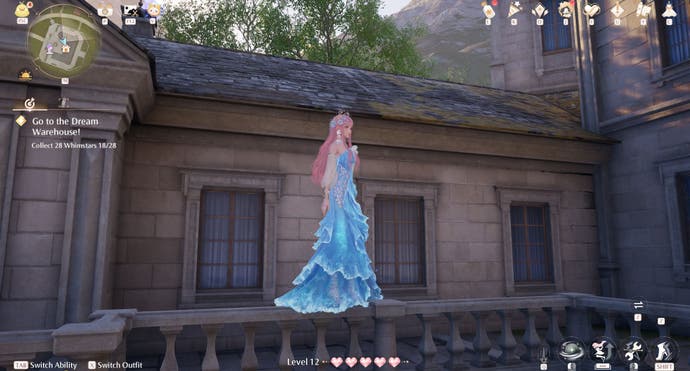
Here you need to jump onto the railing where you can then jump onto the mossy roof to your left. Now all you need to do is jump onto the mossy roof in front of you to reach the Whimstar.
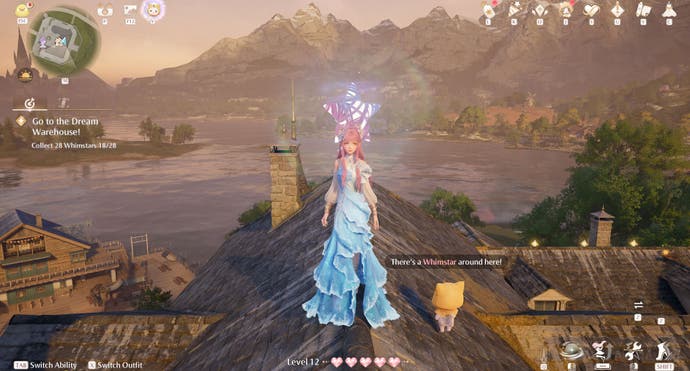
Florawish Whimstar location 6 - Orange house east of Mayor's Residence
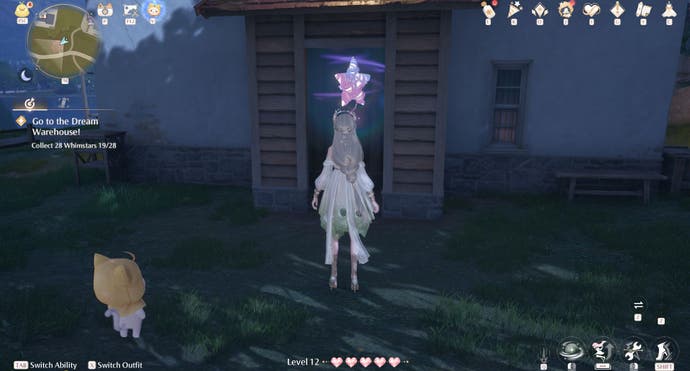
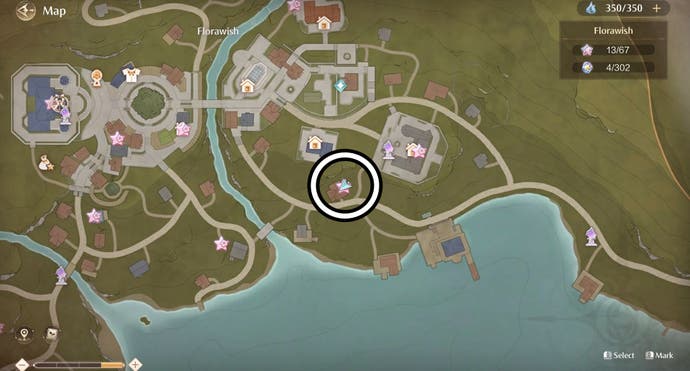
This Whimstar is hidden behind some posters, but you first need to find these posters. Starting at the Mayor's Residence, take the entrance furthest to the left. Even just standing in this entrance will give you a good view of a small shed, the entrance of which is hidden by some posters.
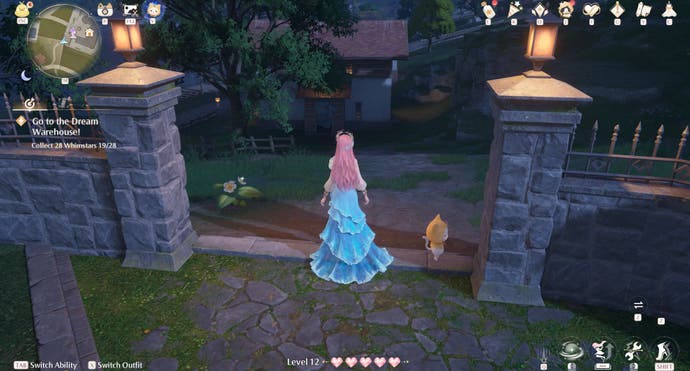
Simply head down the hill and blow the posters away using Nikki's purifying power to find this Whimstar.
Florawish Whimstar location 7 - Roof of Stylist's Guild
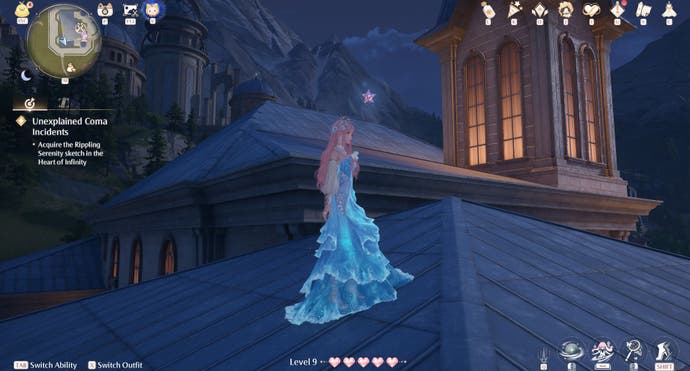
Of course there's a Whimstar on the roof of the Stylist's Guild! To reach it, go around the back of the Stylist Guild and jump onto the southernmost umbrella.
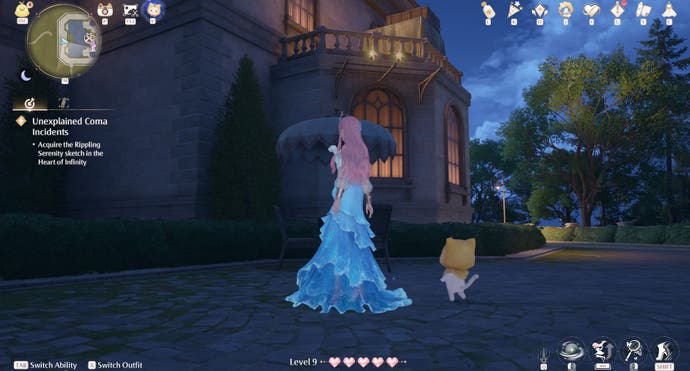
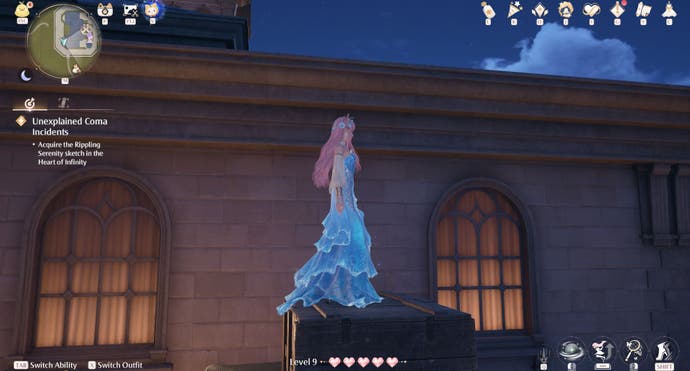
From here you'll be able to reach (by jumping) a small wooden platform beneath a window. This new position will then let you reach some wooden boxes sitting on a nearby balcony. Once there, you use the boxes to jump atop the roof where you'll need to make one final jump to grab the Whimstar.
Florawish Whimstar location 8 - Pillar east of Nonoy's House
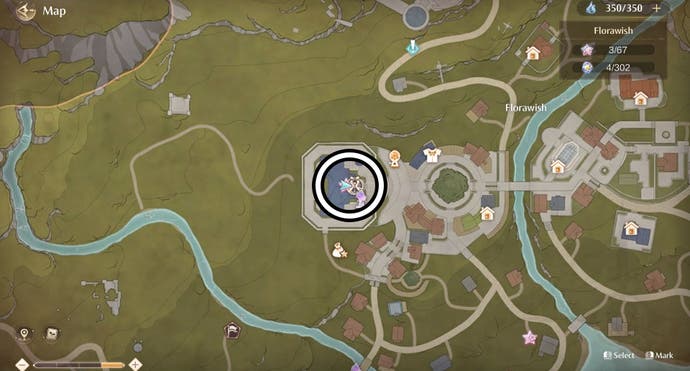
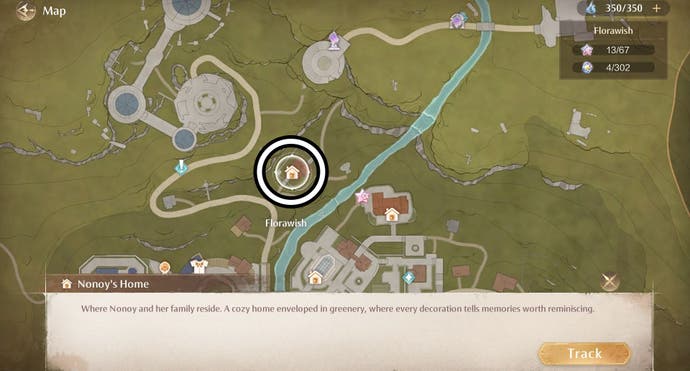
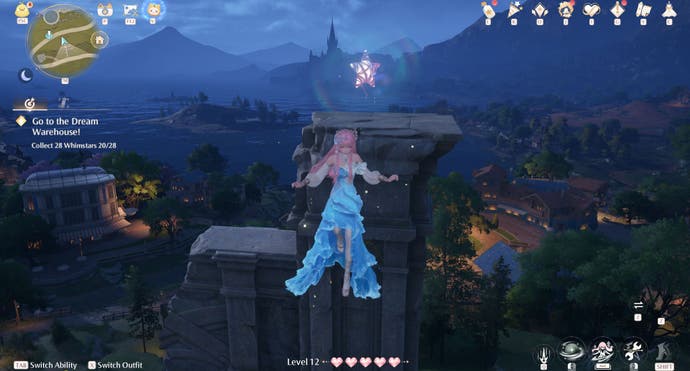
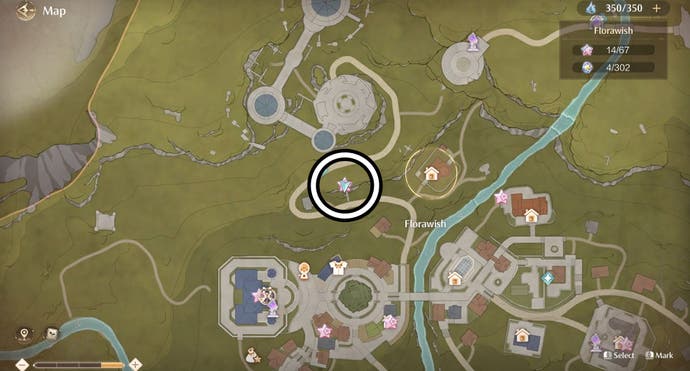
For this Whimstar you need to climb atop the pillar east of Nonoy's House. The easiest way to reach this star is to begin your journey at Nonoy's House, going straight up the hill and turning right when a path appears.
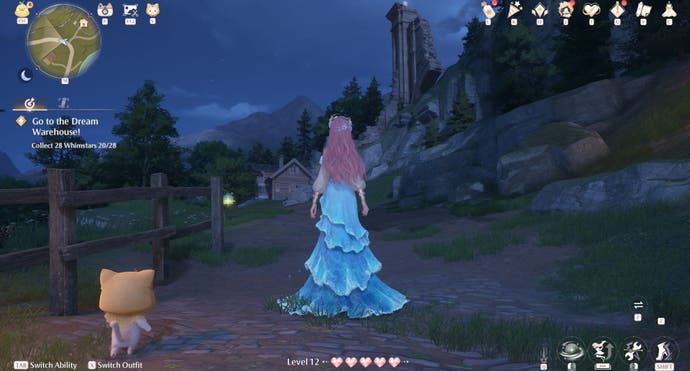
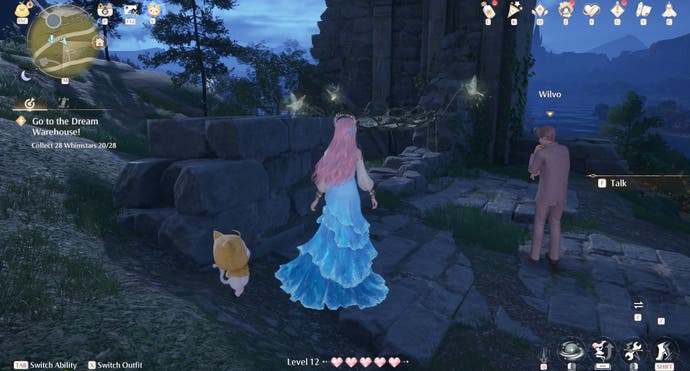
Follow this new path as it takes you past a wooden house to reach the pillar and Wilvo. Next jump onto the bird platform and bounce upwards where you'll hopefully land on the pillar for the Whimstar.
Florawish Whimstar location 9 - House south of Wishing Tree
This Florawish Whimstar is hidden within a crate and, to get it, you need to head to a house south of the Wishing Tree. One way to find this building is, starting at the Florawish Lane Warp Spire, cross the bridge and take the first right path. You'll then want to head down this path until you find a small brown house.
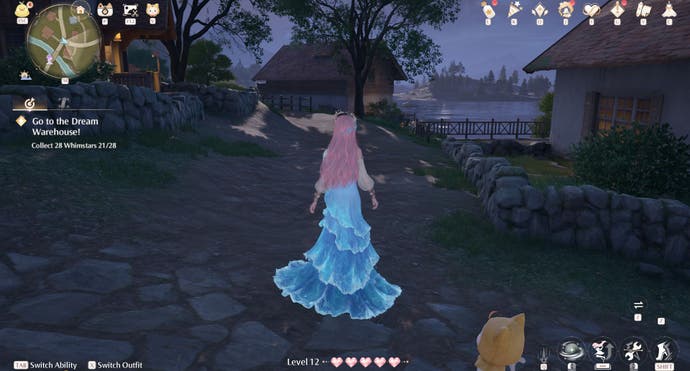
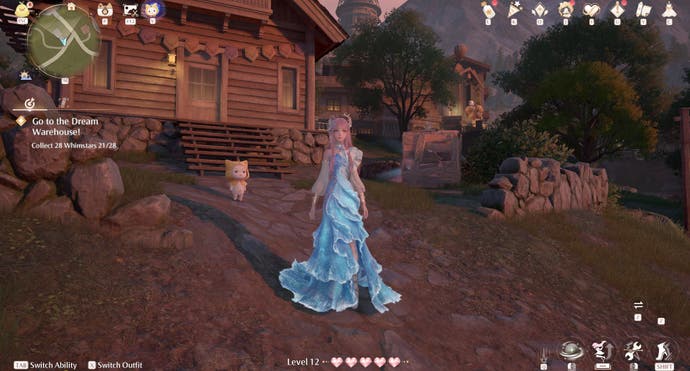
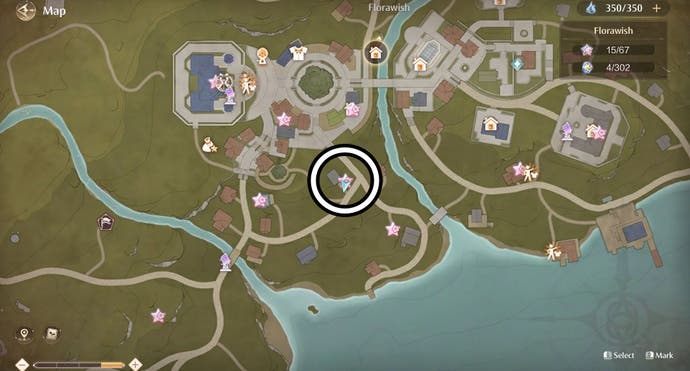
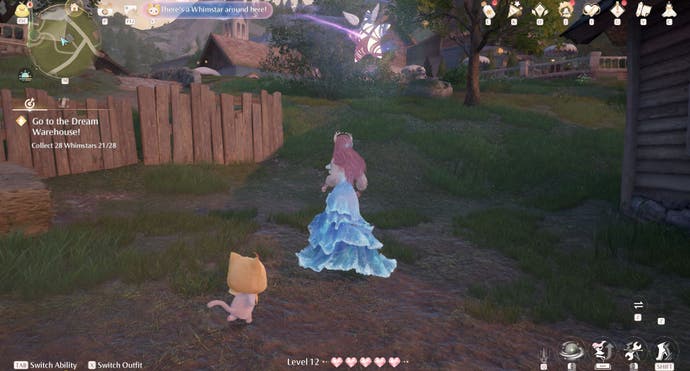
Outside said house is the crate you need to break using a groundpound. This will release the Whimstar and you'll need to chase it down to collect it.
Florawish Whimstar location 10 - Chest west of Florawish Stylist Guild
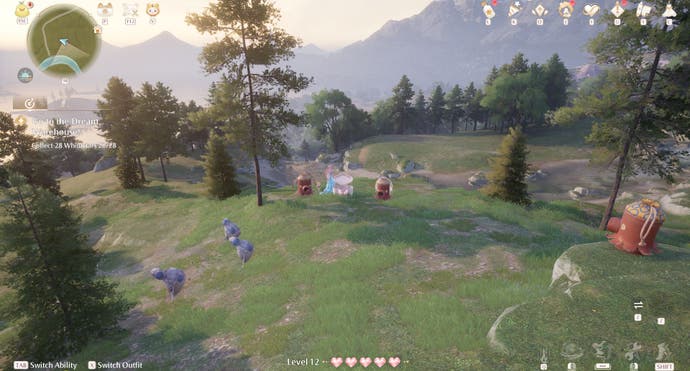
Again you need to head west from the Stylist Guild in Florawish to find this Whimstar. Heading this way, and being slightly north of the river, will eventually lead you to a treasure chest. After interacting with it, a group of Esselings will appear and you'll earn the Whimstar after defeating them.
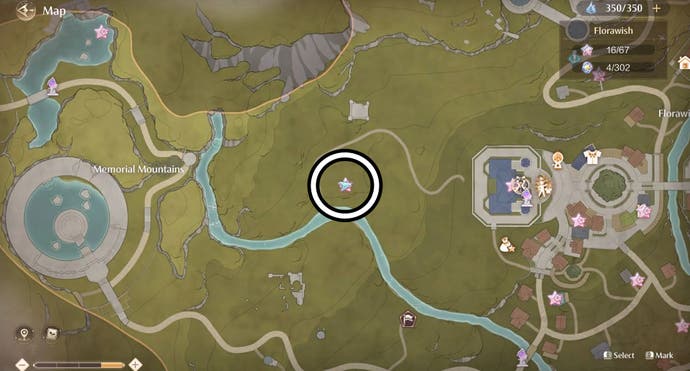
Florawish Whimstar location 11 - Dream Warehouse Hidden Room
There's a hidden room within the Dream Warehouse and, of course, there's a Whimstar within it. Let's begin our journey to reach it at the Dream Warehouse Tower Warp Spire.
Once there, glide over to the fountain to your right. You'll spot a breakable floor as you go, so perform a ground pound to enter the hidden room. Inside you can use the various crates and bookcases to reach the Whimstar in the eastern side of the room.
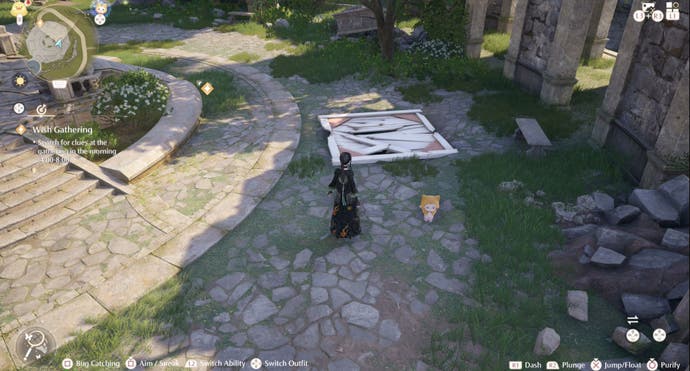
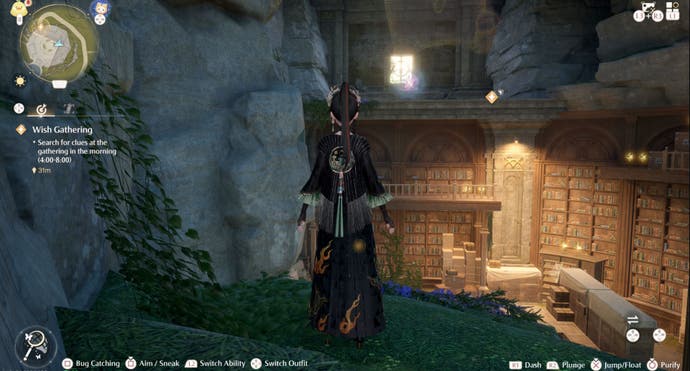
After grabbing the Whimstar, you can pull the nearby lever to open a gate for a shortcut out of there.
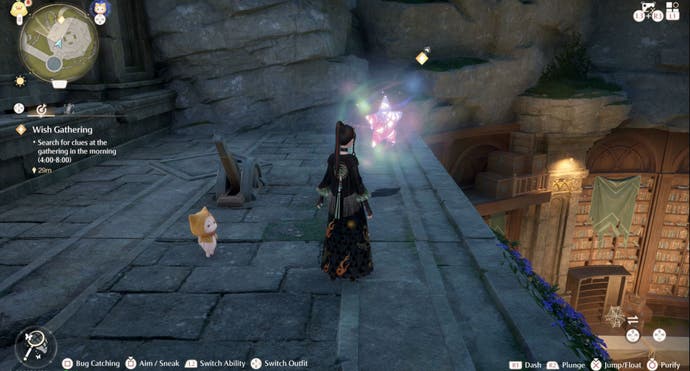
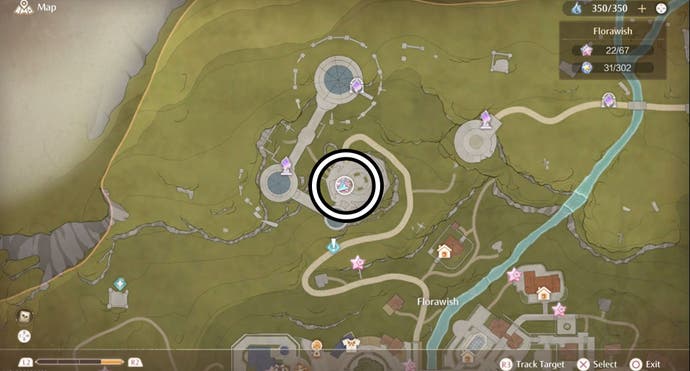
Florawish Whimstar location 12 - Atop pillar near Dream Warehouse Warp Spire
This Whimstar sits atop the pillar west of the Dream Warehouse Tower Warp Spire.
Beginning your journey to it at this Warp Spire, run around the back of the tower. Here you'll see a small pillar, where two Dews of Inspiration sit, that you can reach by gliding and you'll need to do so.
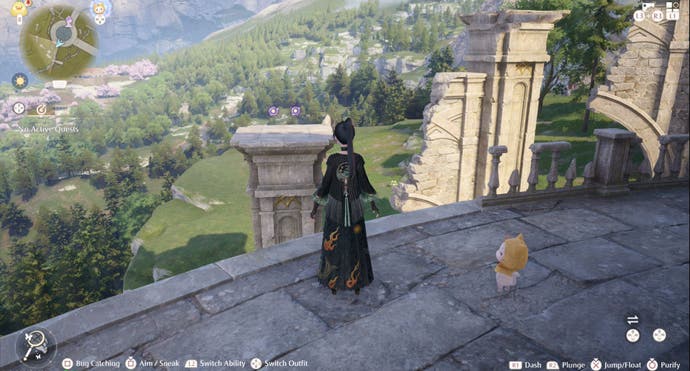
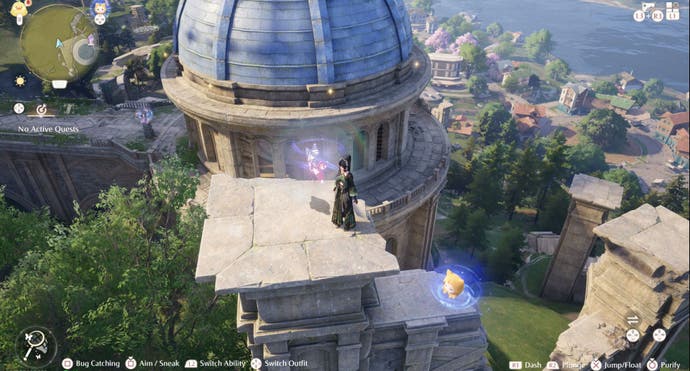
From this pillar, glide to the next and then glide once again over to the bird platform to reach an even higher pillar. From here, you then need to glide to - you guessed it - another pillar where you can finally jump up and grab the Whimstar.
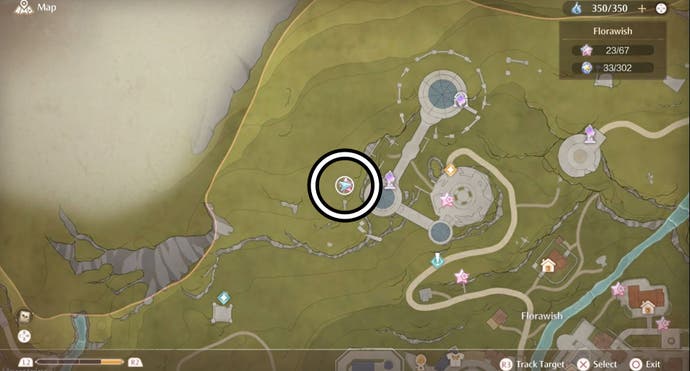
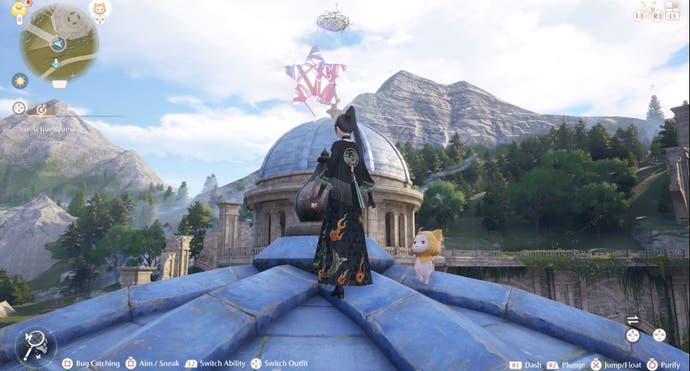
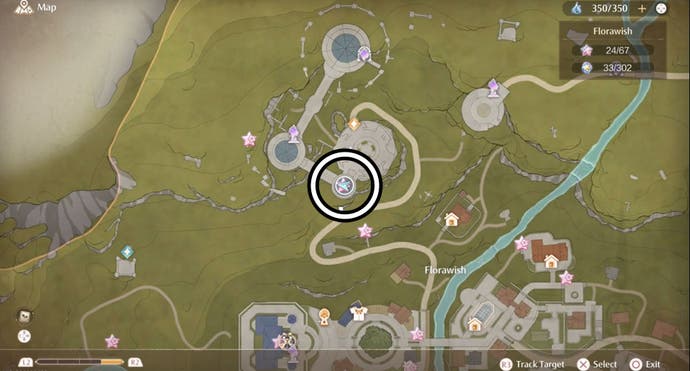
Florawish Whimstar location 13 - Atop the roof of a small building at the Dream Warehouse
An easy way to get this Whimstar is to grab it straight after obtaining the one we cover above as this position will allow you to glide over to the roof over the Dream Warehouse Tower Warp Spire.
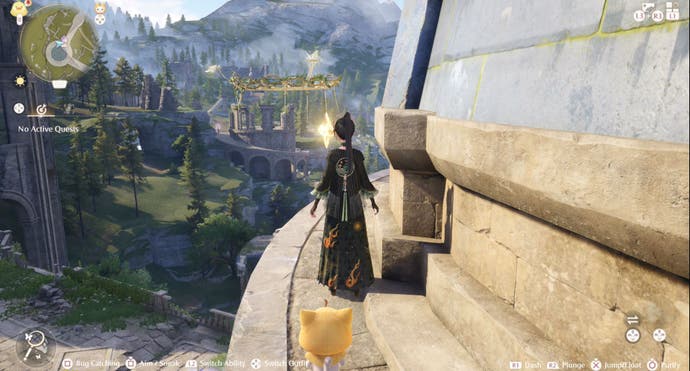
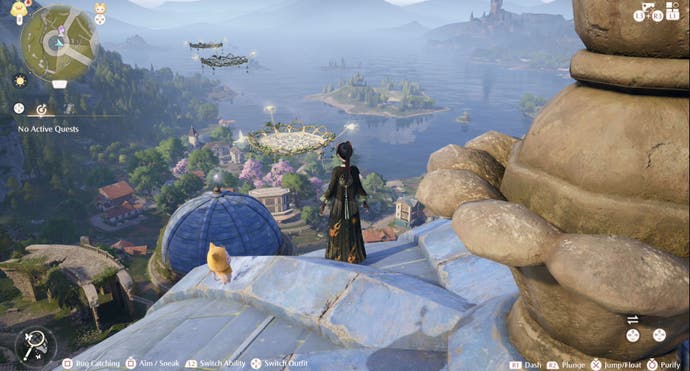
Once there you'll be able to use a bird platform to jump onto the Dream Warehouse Tower Roof. Here you'll spot a three bird platform to the east, near three Dews of Inspiration, which you can use to bounce over to the Whimstar sitting atop the roof of the small building.
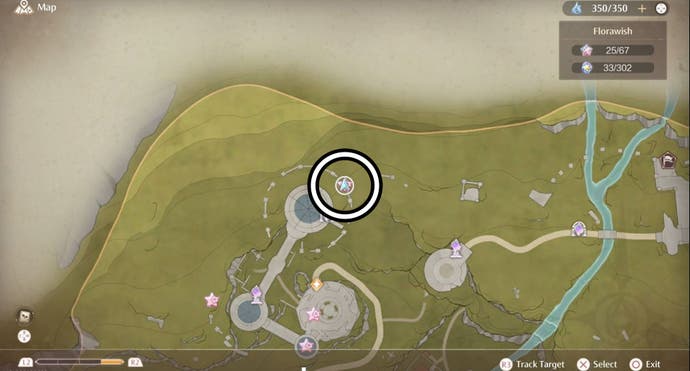
Florawish Whimstar location 14 - Pillar near Dream Warehouse Rooftop Spire
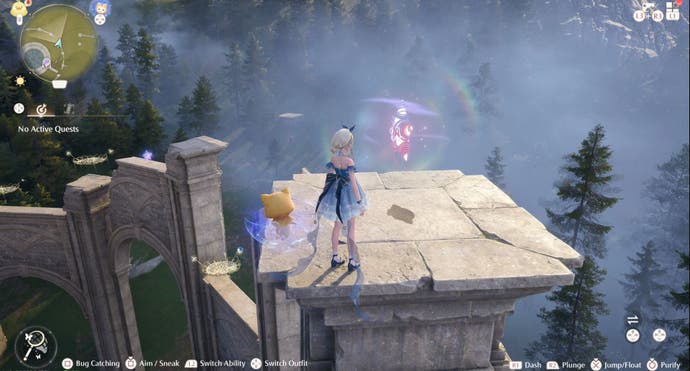
Yet another Whimstar atop a pillar at the Dream Warehouse… For this one, we'll start at the Dream Warehouse Rooftop Spire. Once there, walk along the broken walkway before gliding over to a pillar on your left.
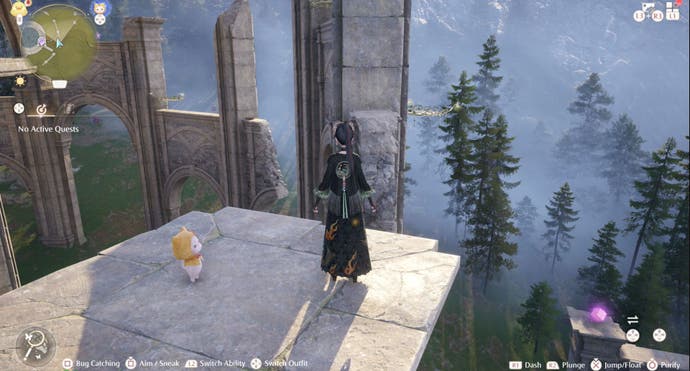
Now you need to glide over to a broken section attached to the pillar directly in front of you. Once you're safely on it, you'll need to glide to the bird platform to your right. After bouncing upwards, defeat the two Esselings you encounter before using a second bird platform to reach the Whimstar.
Florawish Whimstar location 15 - In sky northwest of Dream Warehouse
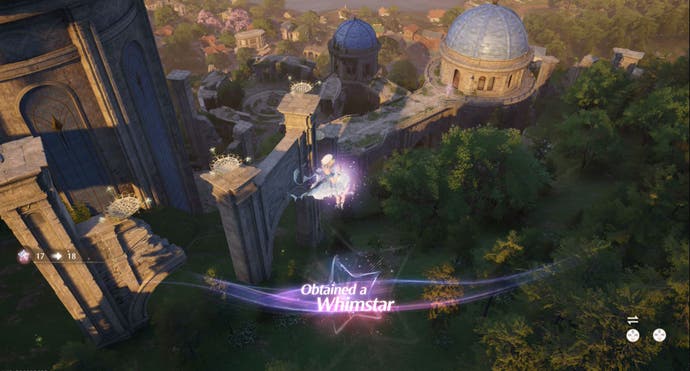
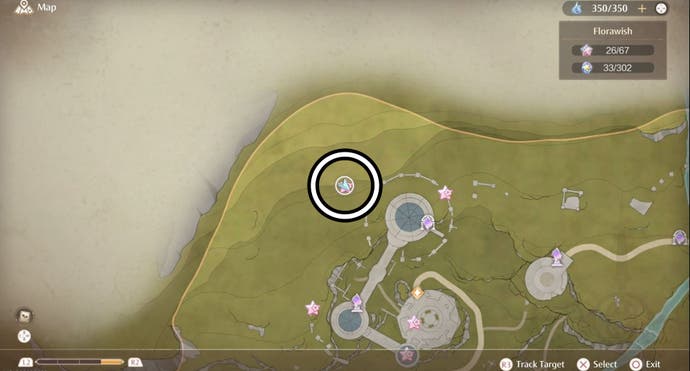
This Whimstar is floating in the sky northwest of the Dream Warehouse. The easiest way to reach it is to head northwest of the Dream Warehouse until you find some Esselings and bird platforms.
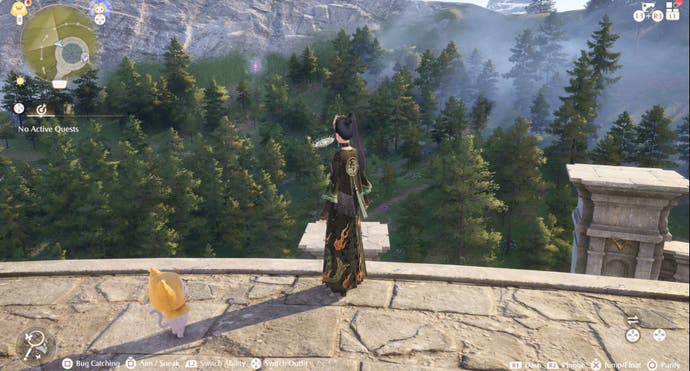
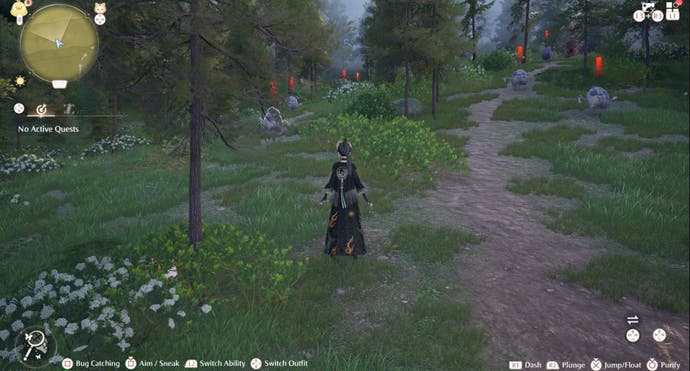
Defeat those Esselings before using the most northerly bird platform to bounce upwards. Now all you need to do is glide and bounce between the bird platforms until you've reached the Whimstar.
Florawish Whimstar location 16 - Near collapsed wall west of Dream Warehouse Tower
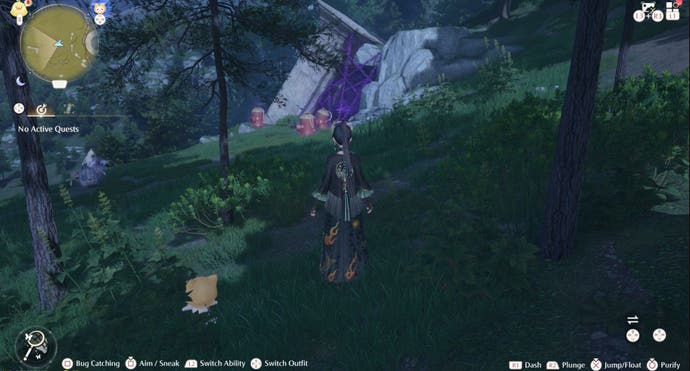
For this Whimstar you'll need to head west of the Dream Warehouse Tower until you find a group of Esselings standing near a collapsed wall. You should also be able to see a Whimstar kept under lock and key by a set of purple chains. All you have to do is defeat the Esselings before attacking the chains to earn the Whimstars.

Florawish Whimstar location 17 - Midair wwest of the Dream Warehouse
There's a Whimstar floating in the air west of the Dream Warehouse. To grab it, you need to head northwest of the Dream Warehouse until you encounter a group of Esselings.
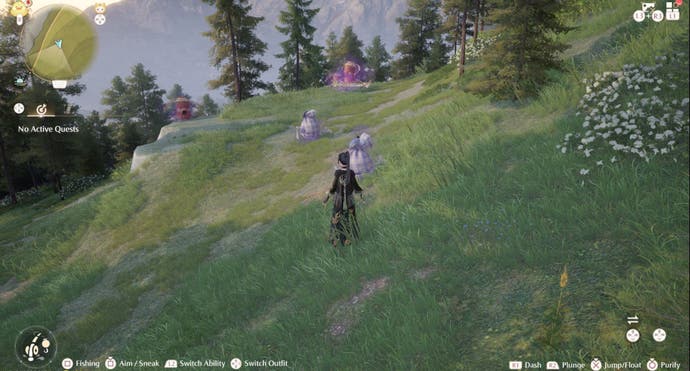
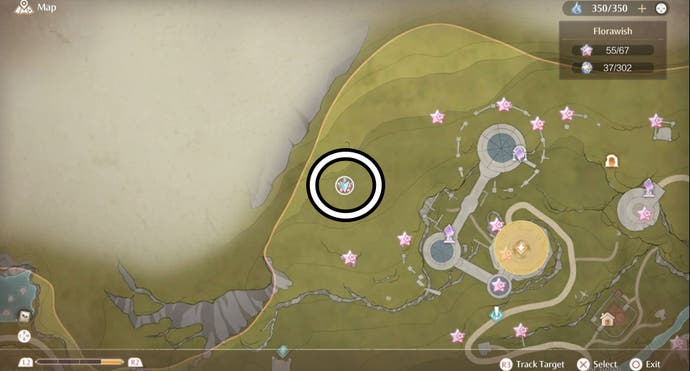
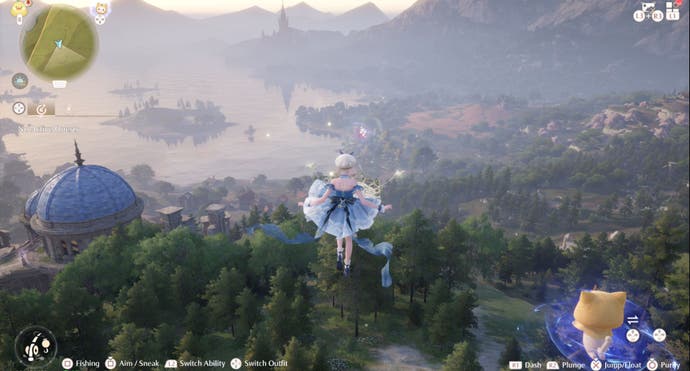
Defeat them to make the nearby bird platform start working again. You can now use this bird platform, and the ones which follow it along with some gliding, to reach the Whimstar.
Florawish Whimstar location 18 - Secret Base
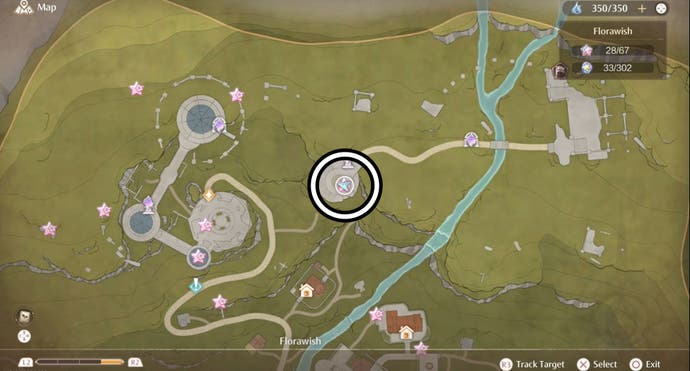
For this Whimstar you need to visit Nonoy's Secret Base, which is north of Florawish. The easiest way to find it is to begin at the Secret Base Warp Spire - walking left until you find two Dews of Inspiration sitting on a broken stone platform.
Glide over to this platform and then jump inside the window to find the Whimstar.

Florawish Whimstar location 19 - Midair near Florawish Ruins
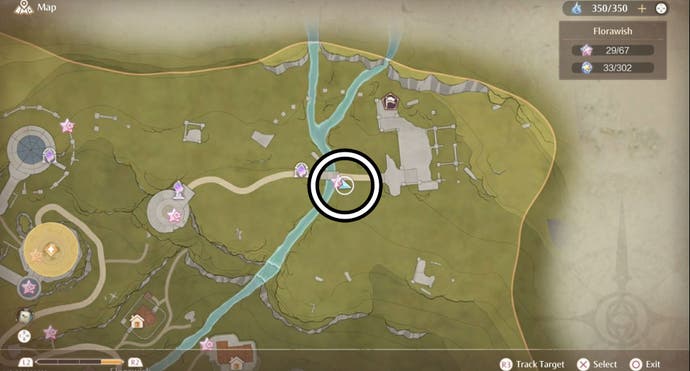
You'll find this Whimstar floating midair northeast of Florawish and southwest of the Hoop Hooper minigame. To reach it, head to the Florawish Ruins and climb atop the pillar containing an Esseling by travelling along the fallen pillar connected to it.
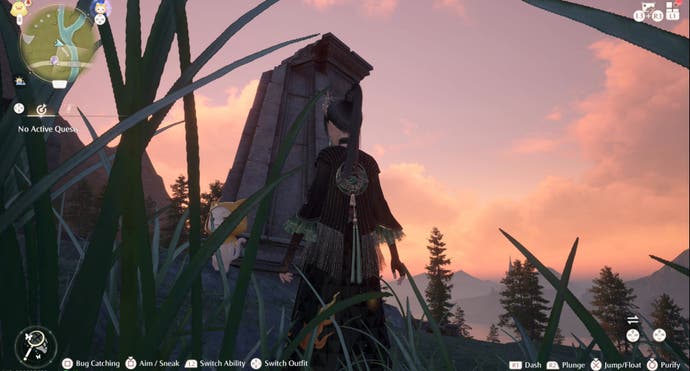
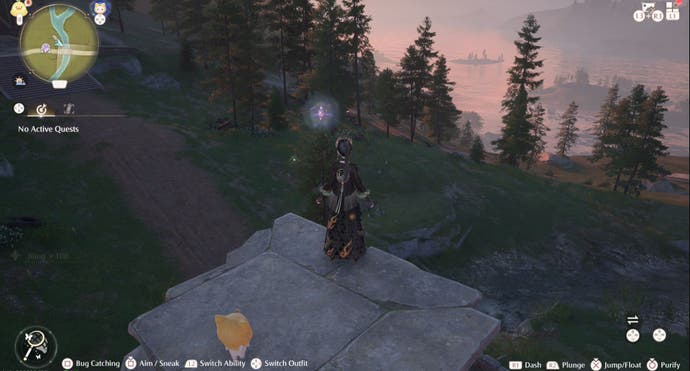
After defeating the Esseling, you should be able to easily glide down and collect the Whimstar.
Florawish Whimstar location 20 - Florawish Ruins Treasure Chest
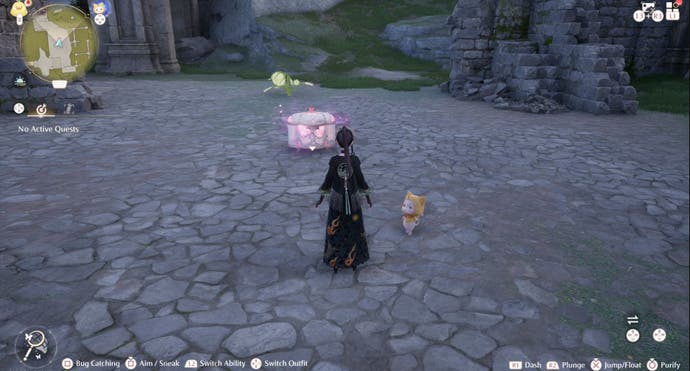
You can find a chest within the Florawish Ruins near the Hoop Hopper minigame, which itself is northeast of Florawish. To get this Whimstar, you first need to open the chest before defeating the Esselings which appear.

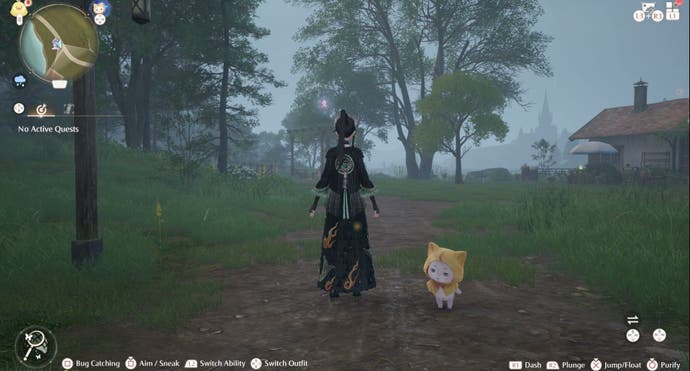
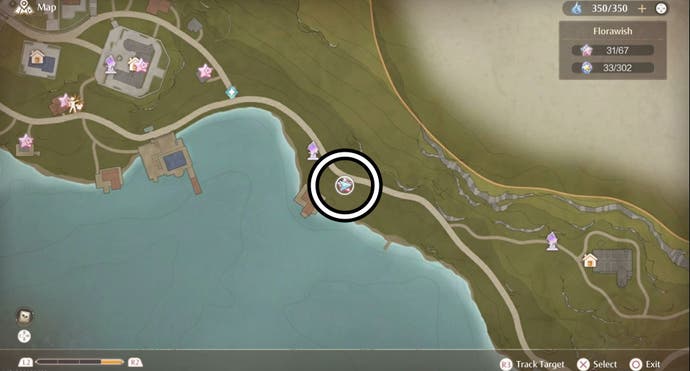
Florawish Whimstar location 21 - Southeast of Stitch Street Warp Spire
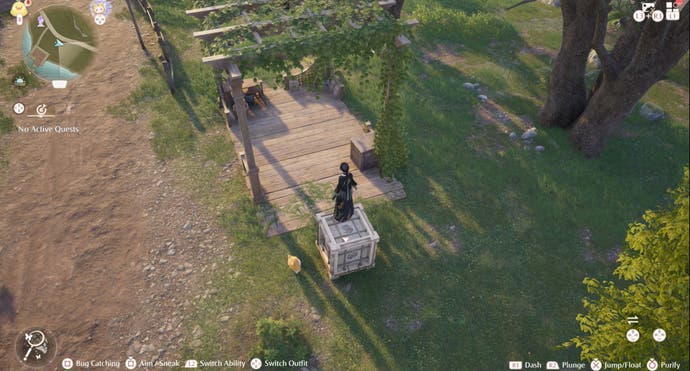
This Whimstar can be found atop of the wooden trellis southeast of the Stitch Street Warp Spire. Starting at said spire, you can reach it by heading forward until you reach a house with the trellis itself being on the left.
Now you simply need to push the nearby crate so it's beneath the trellis before climbing up to grab your Whimstar.
Florawish Whimstar location 22 - Midair south of the Sanctum of the Obervant
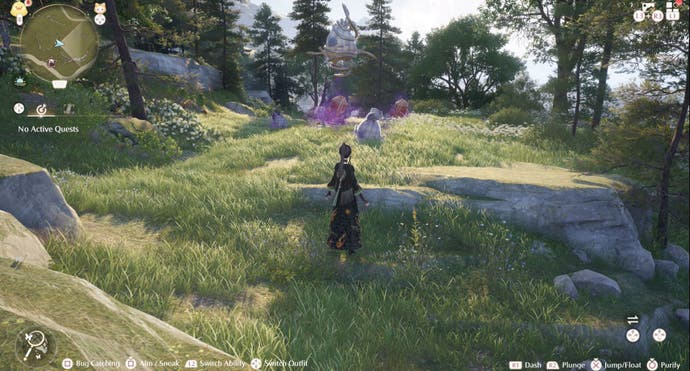
We've got another Whimstar hanging out in mid-air like stars do. This time it's roughly south of the Sanctum of the Observant, northeast of the Hoop Hopper mini-game.
First you'll want to head to that mini-game and then walk northwest until you encounter some Esselings. Defeat them so you can use the bird platform, which will allow you to reach two more platforms and, soon, the Whimstar.
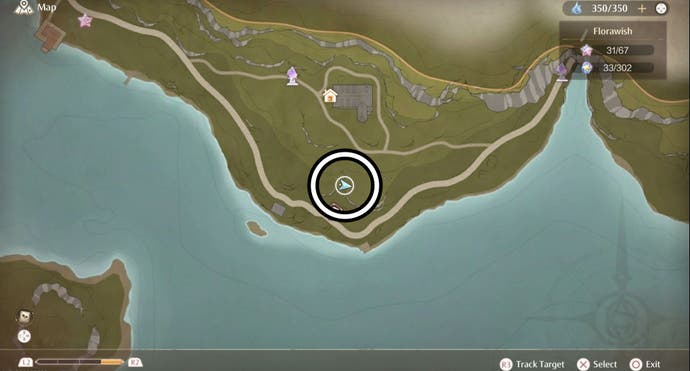
Florawish Whimstar location 23 - Inside crate southeast of Wish Pass Office Warp Spire
For this Whimstar, you first need to head to the Wish Pass Office Warp Spire where you'll want to head left and cross over the water to reach the other side. Now head southeast until you see a glowing crate hanging out in the middle of some boring non-glowing crates.
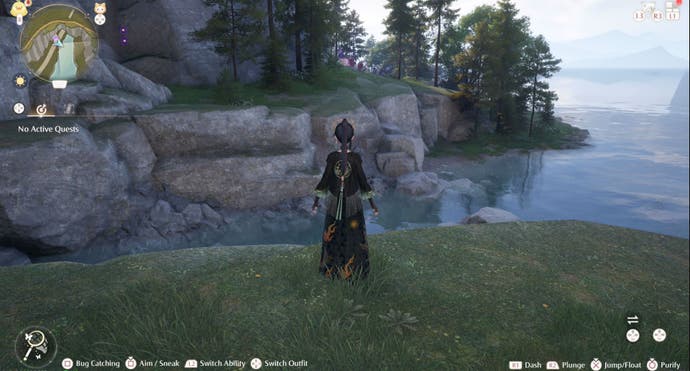
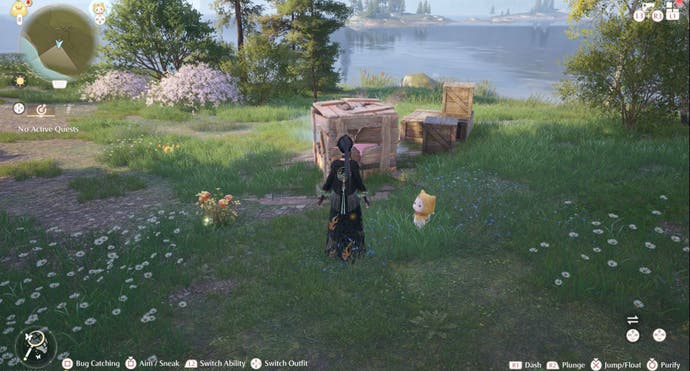
Ground pound that glowing crate into the dust before chasing down your new Whimstar!
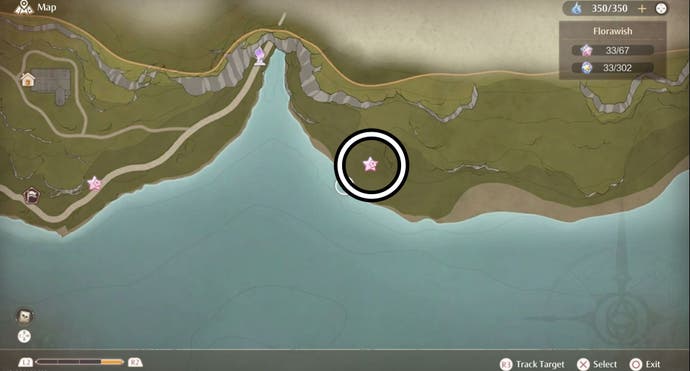
Florawish Whimstar location 24 - Treasure chest on beach southeast of Wish Pass Office Warp Spire
For this Whimstar you need to visit the beach southeast of the Wish Pass Office Warp Spire. To find this beach, head across the water to the right of the Warp Spire and venture southeast to the water's edge.
You'll soon see a treasure chest and, when opened, a group of Esselings will appear. Defeat them to earn your Whimstar.
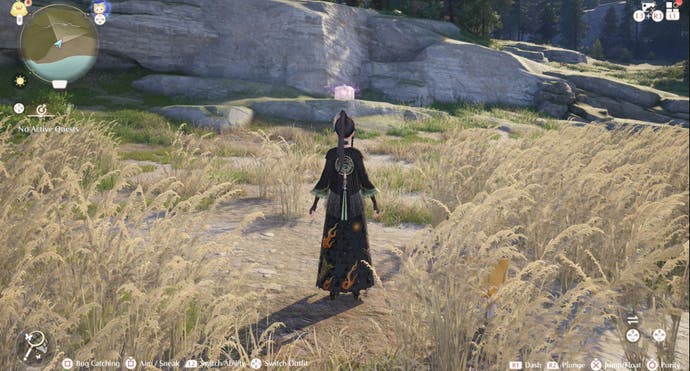

Florawish Whimstar location 25 - Midair near Well of Fortune entrance
This Whimstar is floating in the air to the left of the entrance to the Well of Fortune.
To reach it, turn left at the Well of Fortune Warp Spire where you'll see water flowing from a tunnel and two Dews of Inspiration. Head up the stairs to the left of the tunnel until you see a water vat and a pipe with a wooden platform holding two barrels.
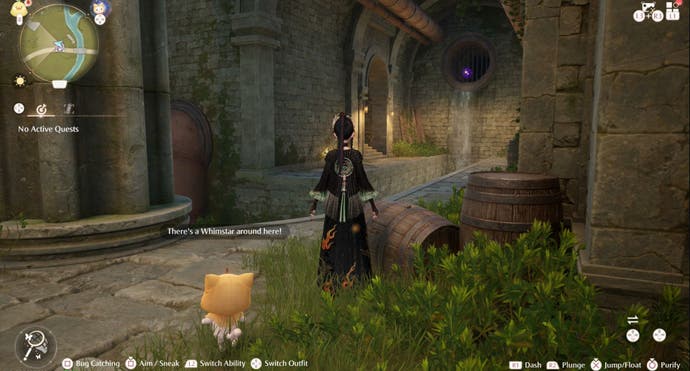
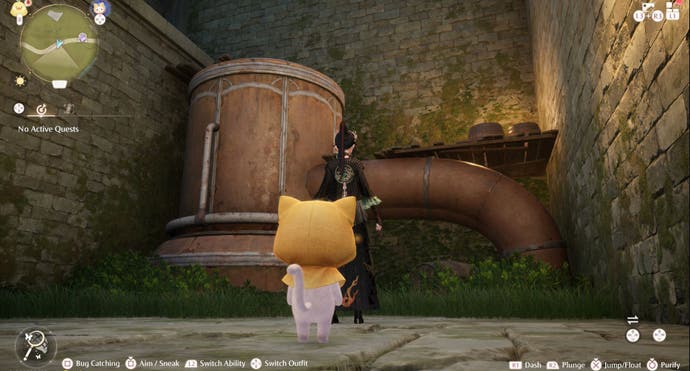
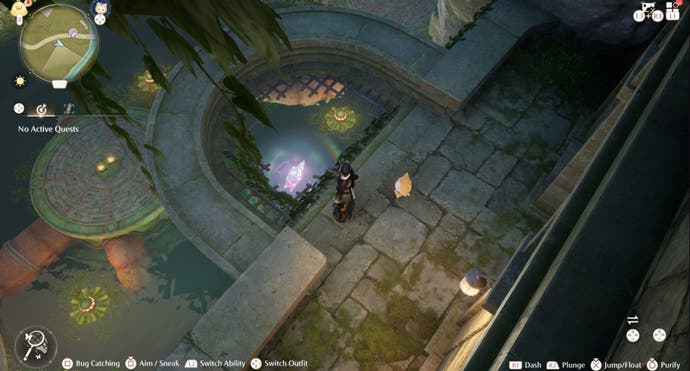
Jump up onto the wooden platform, then onto the vat and, finally, up onto the stone wall. Next head through the doorway and drop through the broken mesh to reach the Whimstar.
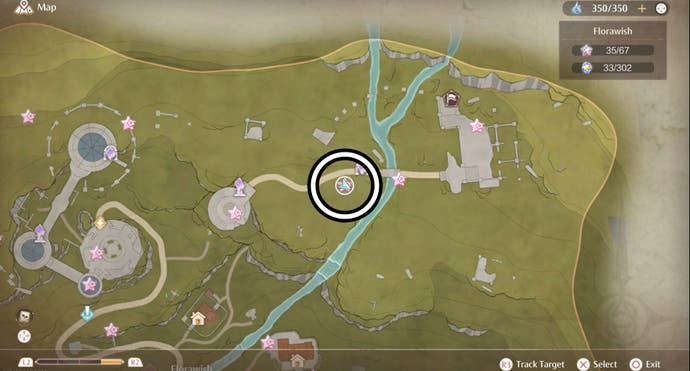
Florawish Whimstar location 26 - Inside the Riverside Cavern
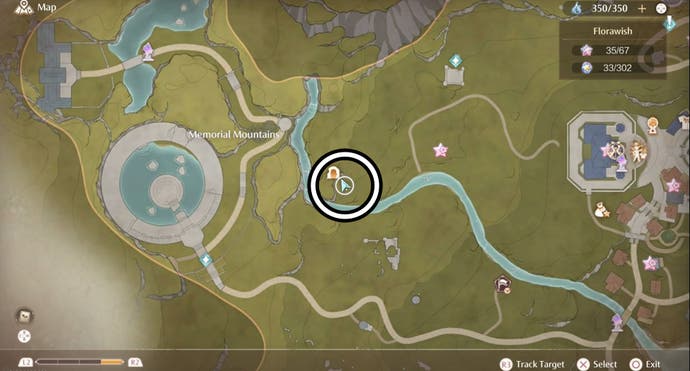
There's a Whimstar hiding within the Riverside Cavern. Don't know where it is? Well, starting at the side of the Florawish Stylist's Guild with the umbrellas and tables, head over the fence and follow the path up the hill westwards. This path ends at a river and following that west will eventually lead you to the Riverside Cavern.
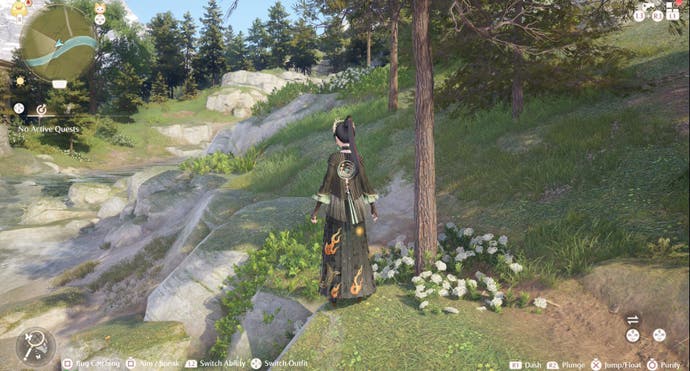
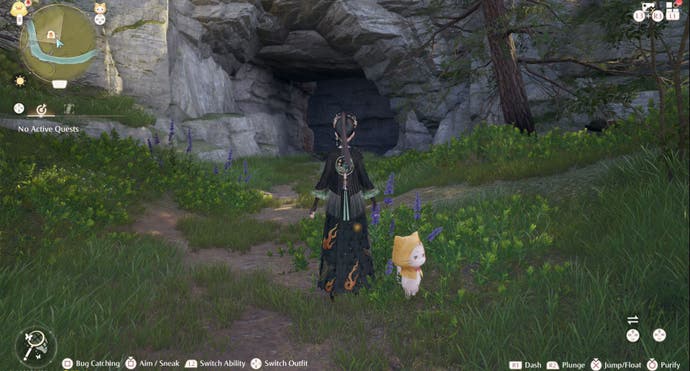
Once you're inside the Riverside, jump onto the large rock to your right. This will let you jump up to another rock where you'll find a small pond. Make sure to defeat the Esselings you encounter!
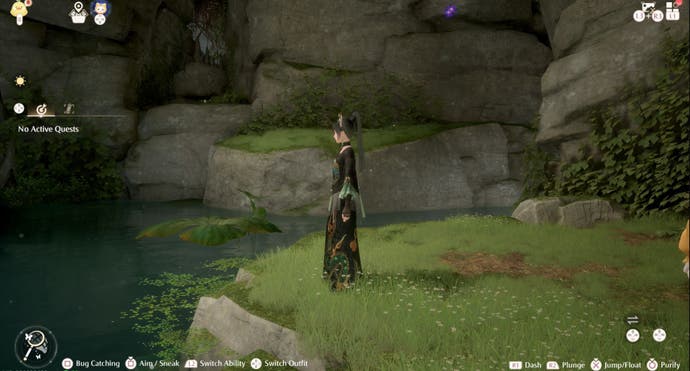
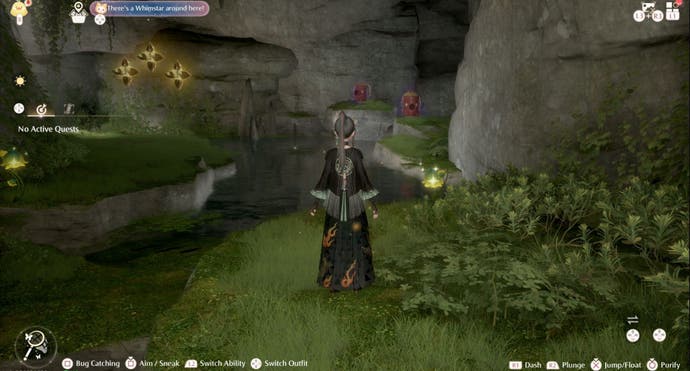
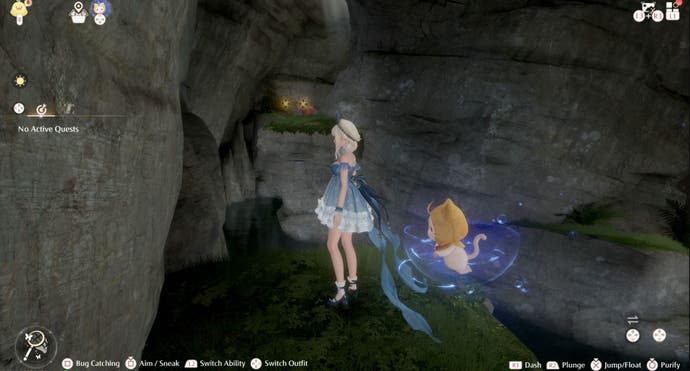
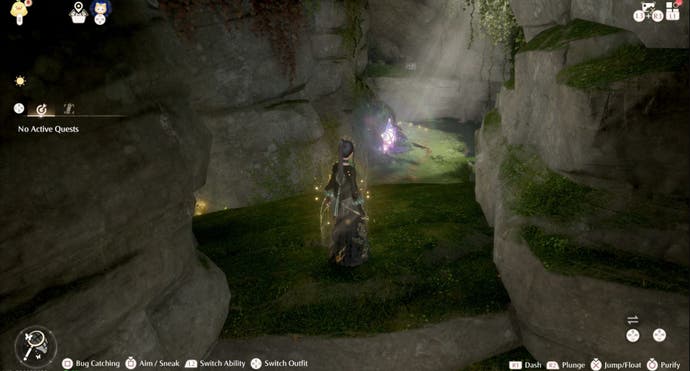
Now jump over to the right-hand side of the pond and, still going right, follow the path until you reach the Whimstar.
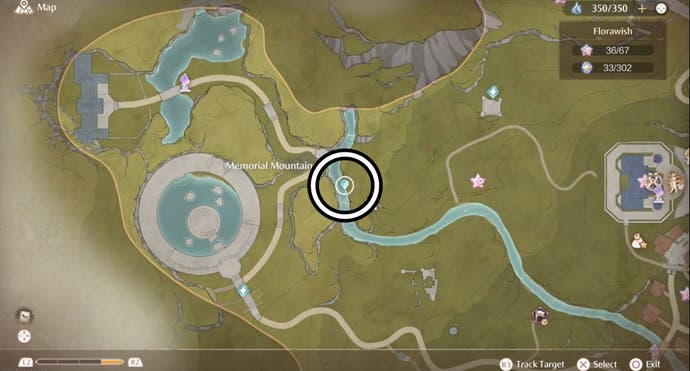
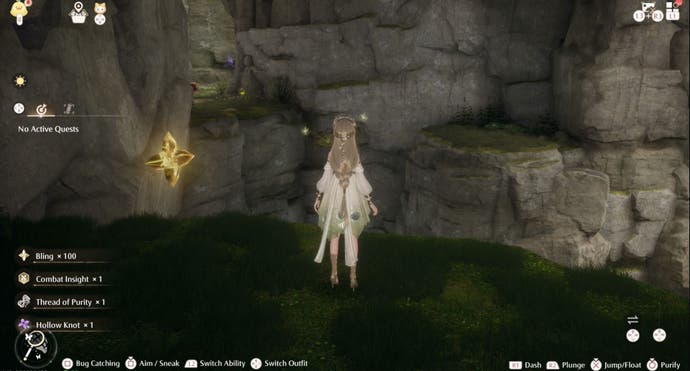
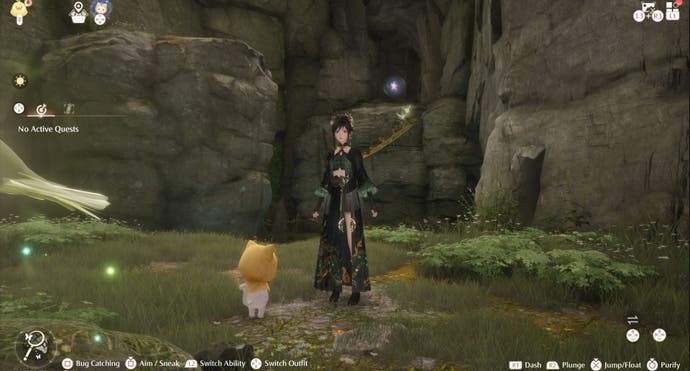
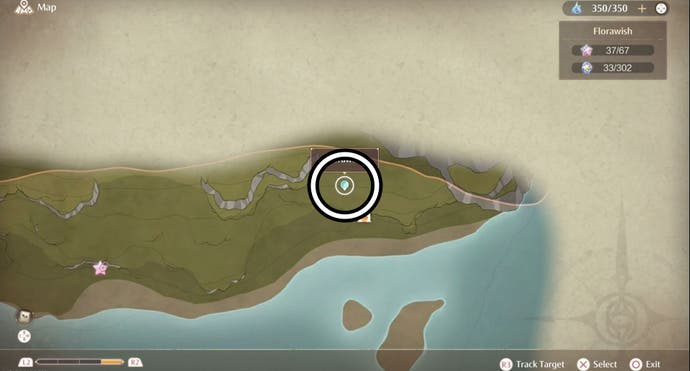
Florawish Whimstar location 27 - Inside the Forest's Edge Cavern
It's time to visit another cavern for a Whimstar. First, however, let's find the Forest's Edge Cavern.
Beginning at the Wish Pass Office Warp Spire, glide over the water to your east. Now continue heading east, walking past the bird nest, until you see a broken rowboat on the beach. The Forest's Edge Cavern sits opposite this boat, so it shouldn't take long for you to find now!
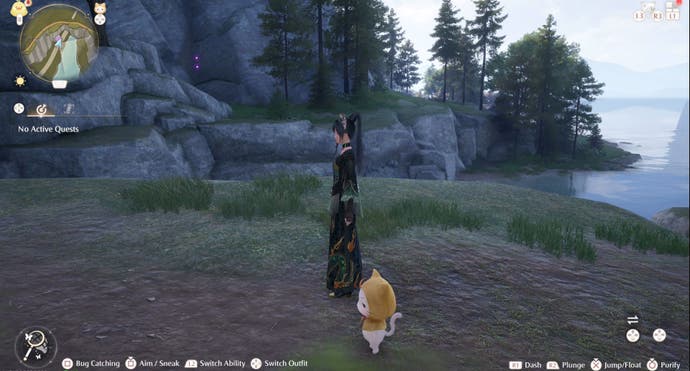
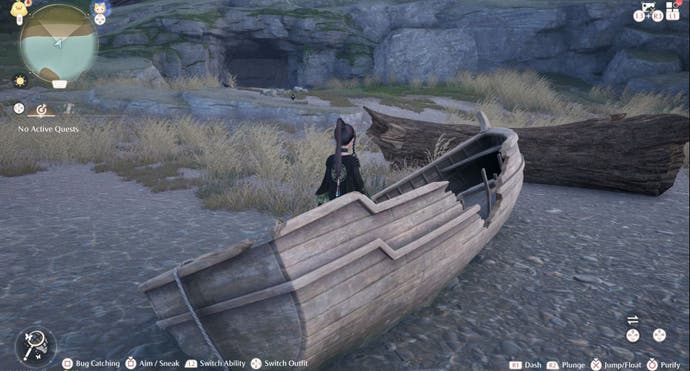
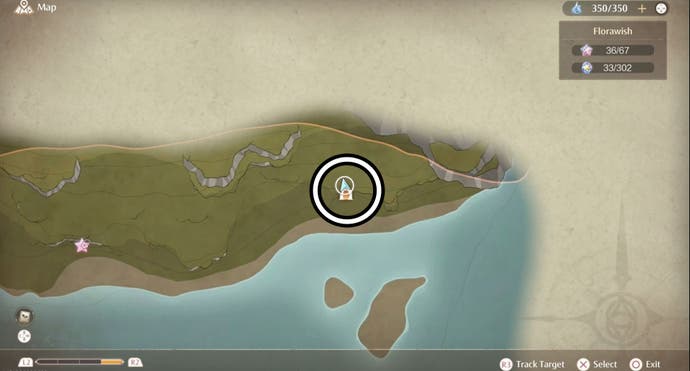
Inside the Forest's Edge Cavern, you'll want to defeat the first group of Esselings you encounter. With them dead, jump onto the bird platform to your right and use it to reach the rock to your left.
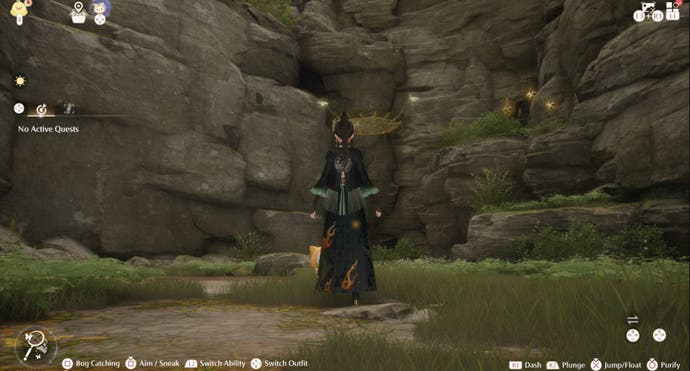
Here you'll find another bird platform to your left - it's slightly below the rock you're standing on so it may take a second to find. Head left this bird platform until you reach a large room containing multiple bird platforms.
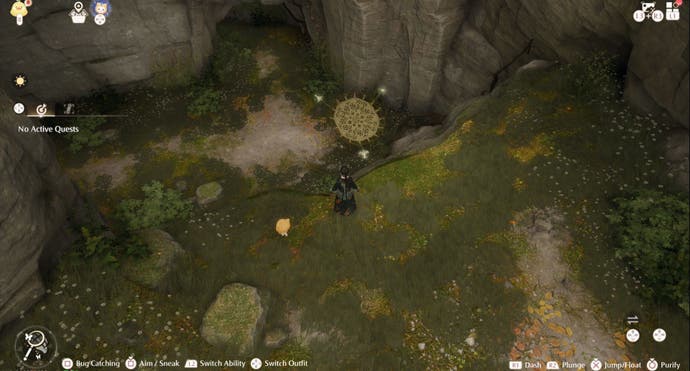
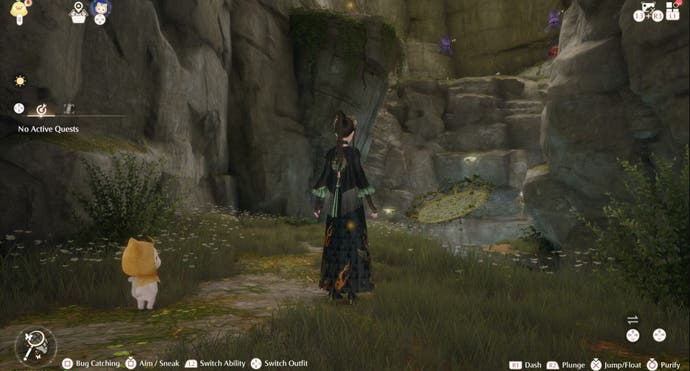
Use these bird platforms to reach left until you reach some Esselings guarding the chest. Defeat them (and open the chest while you're at it), before continuing heading clockwise around the room. Make sure to either defeat the floating Esselings or avoid their acts.
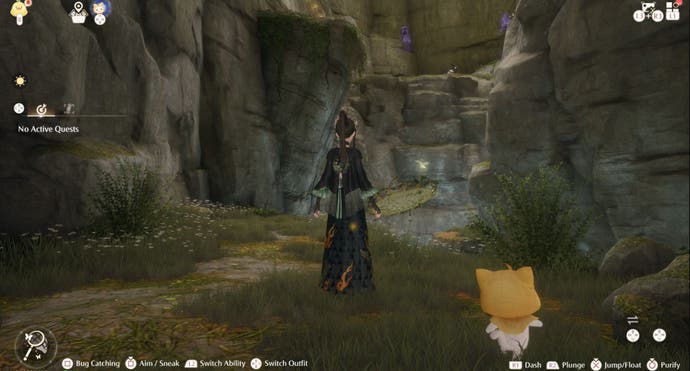
This will begin you another room containing bird platforms and floating Esselings. Once again, you'll want to defeat the Esselings and use the bird platforms to reach a large rock. At this rock, you'll be able to glide over to the Whimstar.
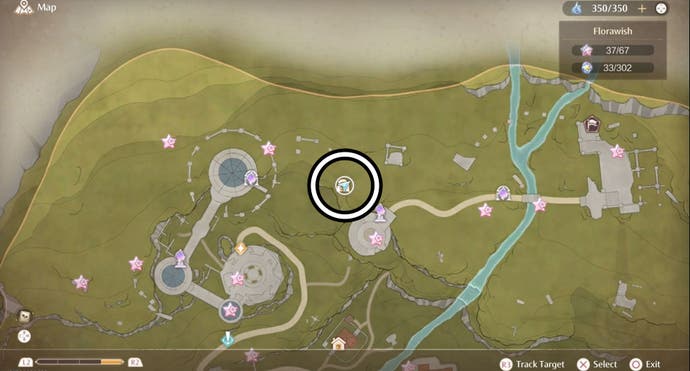
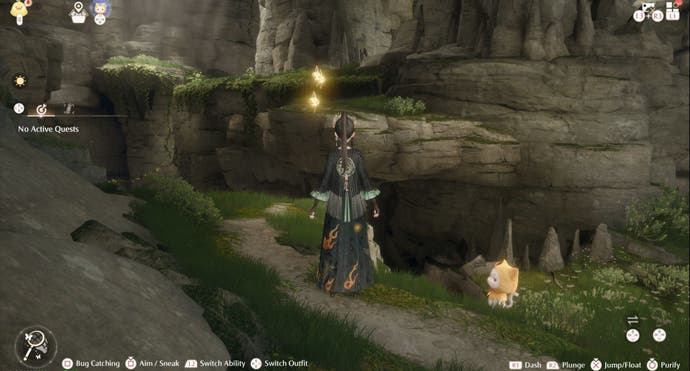
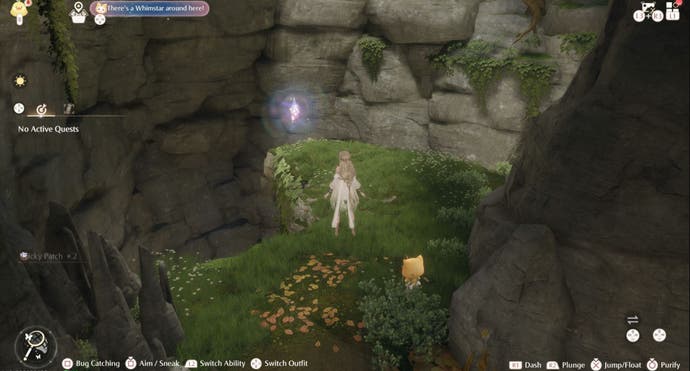
Florawish Whimstar location 28 - Inside the Warehouse Cavern
The first step in finding this Whimstar is knowing where the Warehouse Cavern is. To find it, head northwest from the Secret Base Warp Spire until you see two Dews of Inspiration floating in mid-air. Simply head behind them and you'll find the Warehouse Cavern entrance!
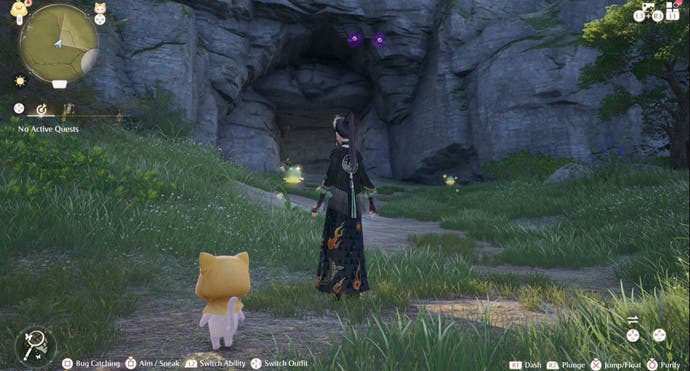
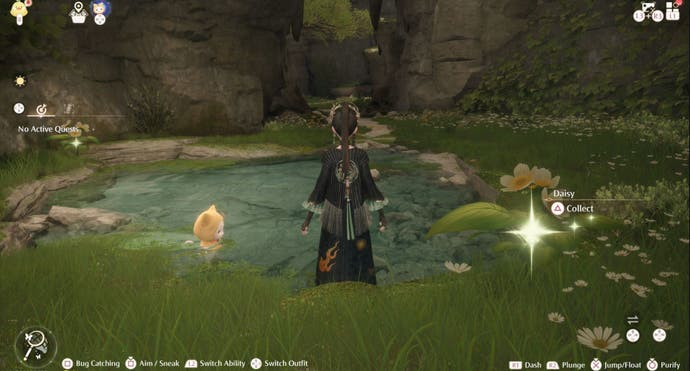
Once inside, follow the path until you reach a treasure chest. You'll want to head left at this point, defeating a group of Esselings beneath an archway and passing past a pond on your way.

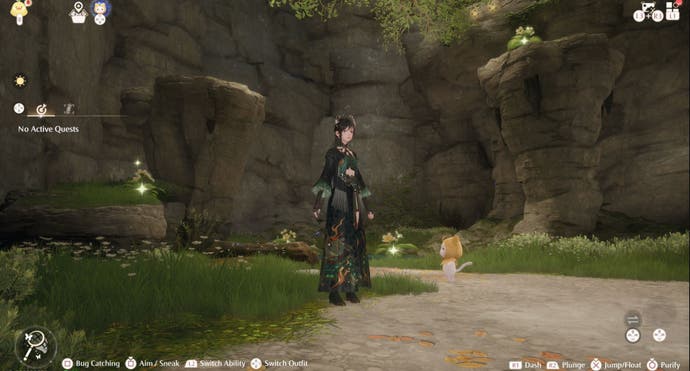
You'll now find yourself in an area containing a tree. Here you'll want to climb up the rocks and use their height to glide over to the large platform above you. Once there, turn right and jump onto the large rock in front now.
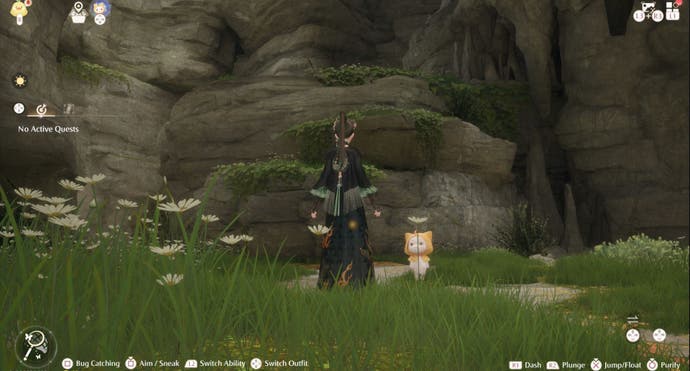
Head right down this new path, defeating Esselings as you go, and jump onto the rock. The Whimstar is now the overhang in front of you and all you have to do is defeat the new set of Esselings to grab it.
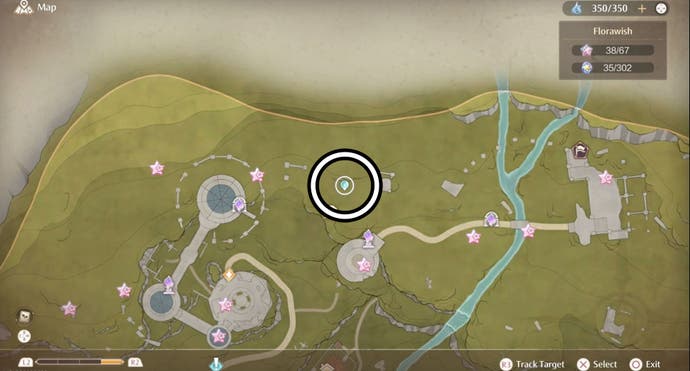
Florawish Whimstar location 29 - Inside the Relic Hill Cavern
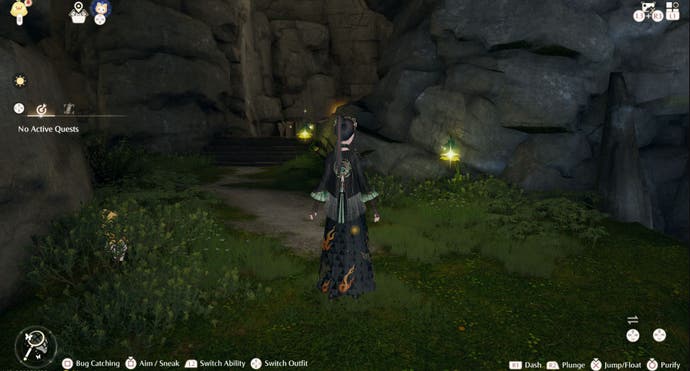
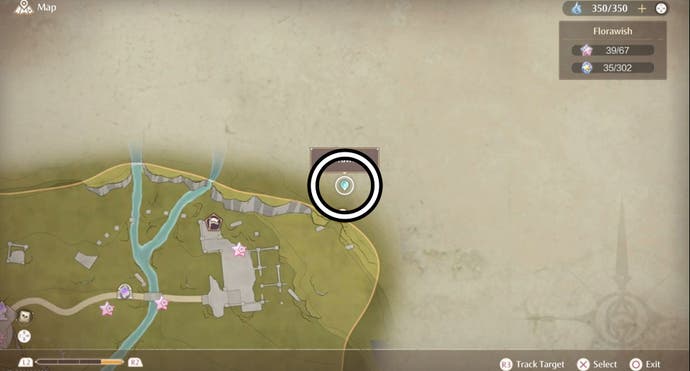
It's a good idea to know where the Relic Hill Cavern is before looking for this Whimstar. One way to reach it is to head eastward from the Hoop Hopper mini-game in the Florawish Ruins. Continue going uphill until you find an entrance in the cliff side - this is the Relic Hill Cavern!
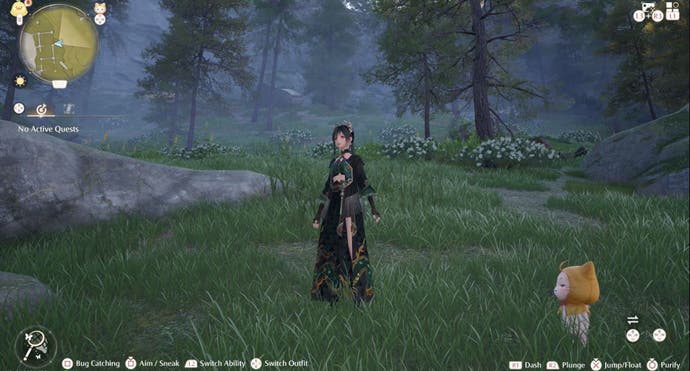
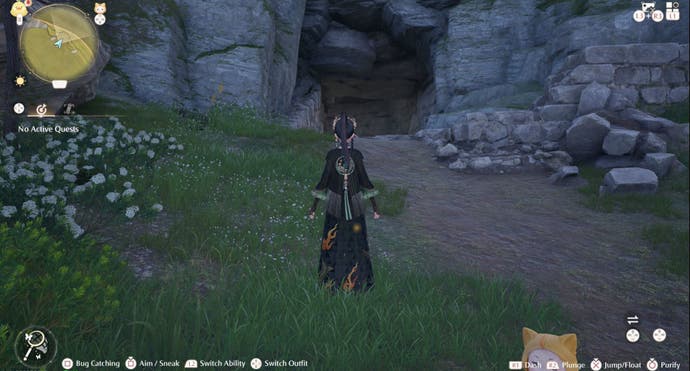
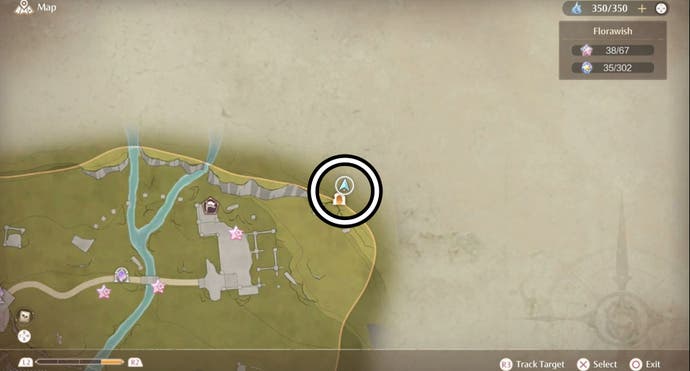
Venture inside the cave until you find the river. Here you'll want to follow the river, jumping from rocky platform to rocky platform, until you can see the Whimstar directly in front of you.
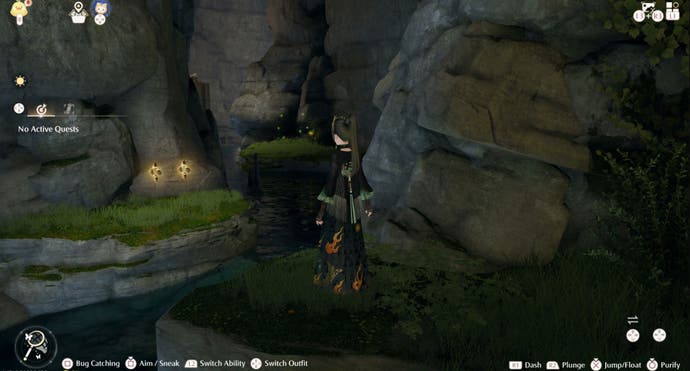
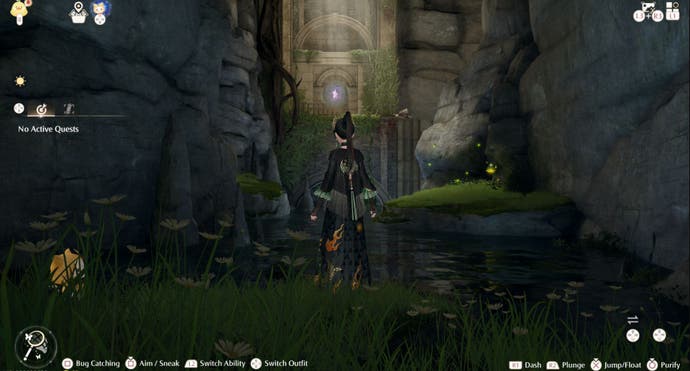
Continue heading from rock to rock until you reach a pathway leading to a set of stairs. Head up the stairs, defeating the Esslings as you go, until you reach the Whimstar!
Florawish Whimstar location 30 - Curio Domain, Southeast of Wishing Tree
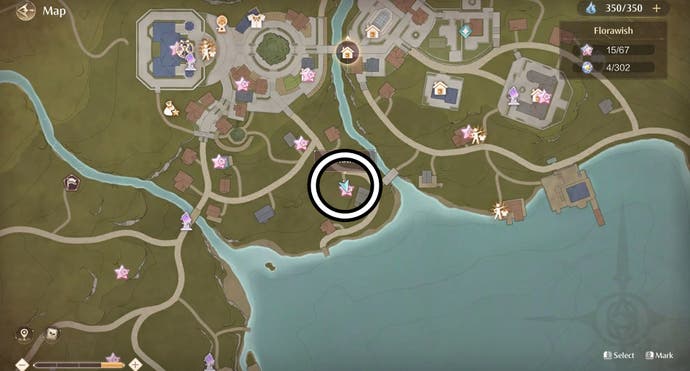
For this Whimstar, you need to complete the Curio Domain southeast of the Wishing Tree. First, however, let's find the Curio Domain - staring at the Wishing Tree, head south Timido and go down the stairs. Continue down the next set of stairs and follow the path downhill to reach the house directly in front of you. Here you'll find a pink cube - simply interact with it to reach the Curio Domain.
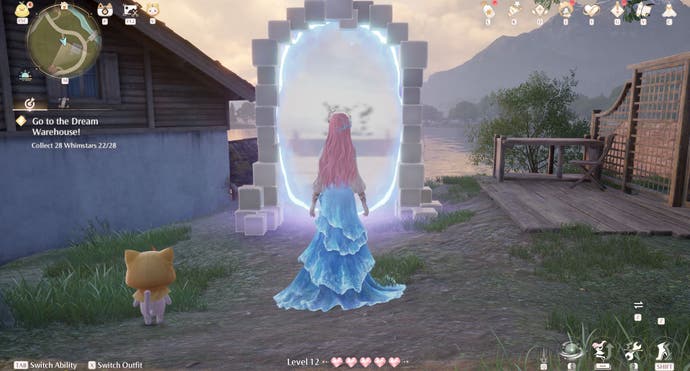
This Curio Domain is incredibly easy to solve - you simply need to make your way across the three moving platforms to reach the other side. The first two can be jumped between, but you will need to glide to reach the final moving platform. You'll get your Whimstar once you reach the other side.
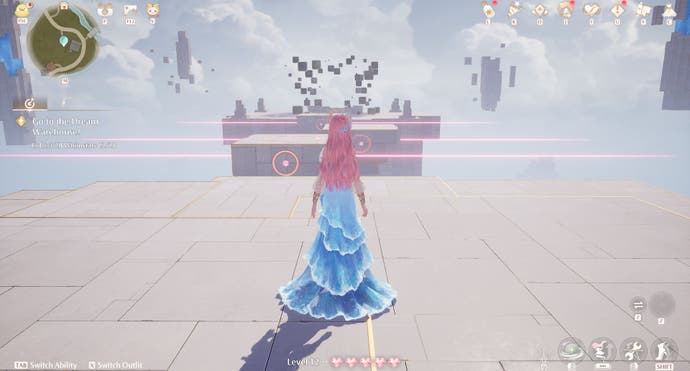
Florawish Whimstar location 31 - Curio Domain, Dream Warehouse Rooftop Warp Spire
A Curio Domain can be found near the Dream Warehouse Rooftop Warp Spire and it contains a Whimstar! To help how to get it, visit our Dream Warehouse Rooftop Warp Spire Curio Domain guide.
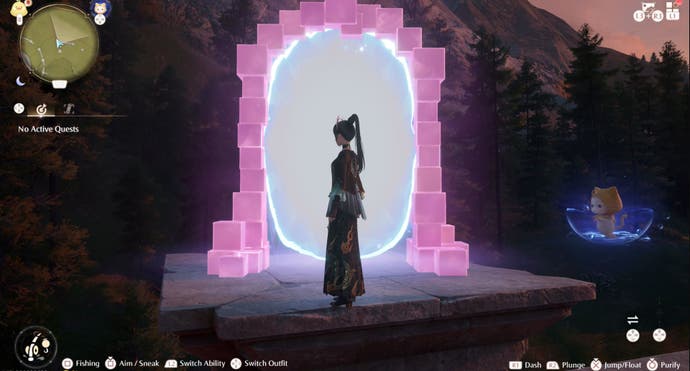
Florawish Whimstar location 32 - Curio Domain, Well of Fortune entrance
A Curio Domain can be found in a small room above the Well of Fortune entrance. You can learn both it's location and how to solve it's puzzle in our Well of Fortune Curio Domain guide.
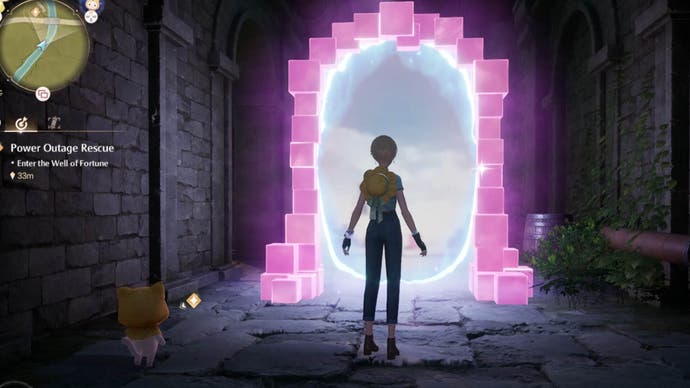
Florawish Whimstar location 33 - Hidden Star, Roof east of Florawish Lane Warp Spire
Some of the Florawish Whimstars can only be found after you've found a hidden star and this is the first. It begins with Nikki touching a piece of purple yarn atop a roof of a building east of the Florawish Lane Warp Spire.
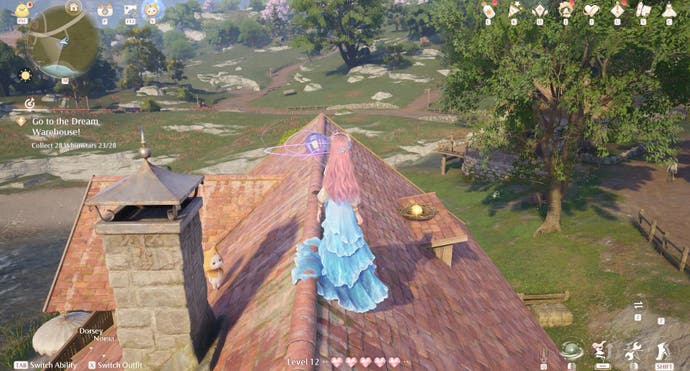
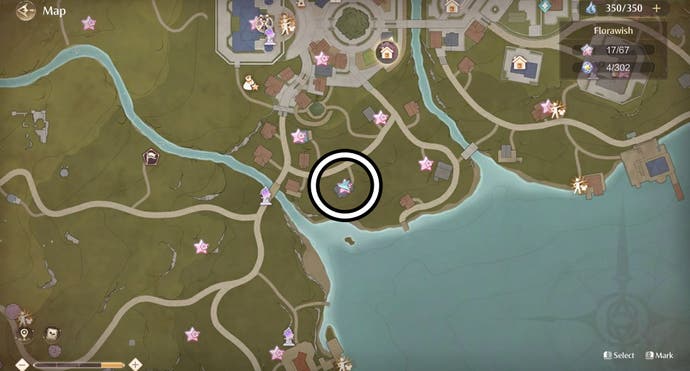
Next, drop down to the deck on the southern side of the house and look at the top of the umbrella you find there. This is where the hidden star lies and, after interacting with it, you can climb back onto the roof to get your Whimstar.
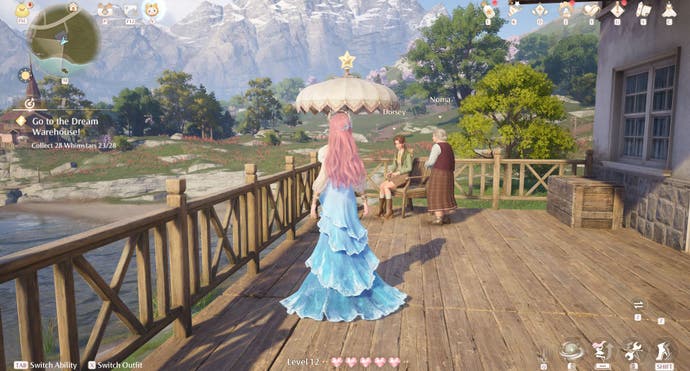
Florawish Whimstar location 34 - Hidden Star, Umbrella east of Wishing Tree
The next hidden star Whimstar location begins by interacting with some purple yarn on the umbrella next to a set of stairs east of the Wishing Tree.
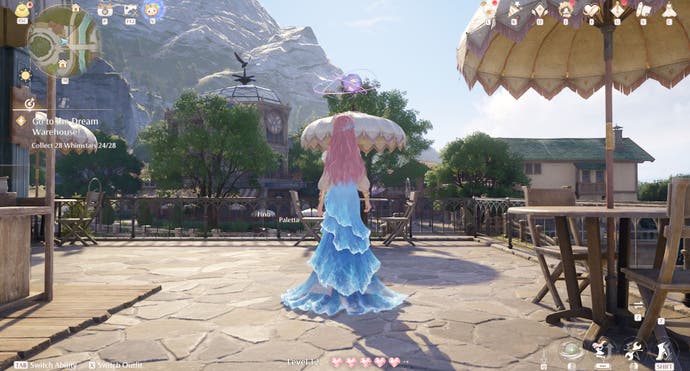
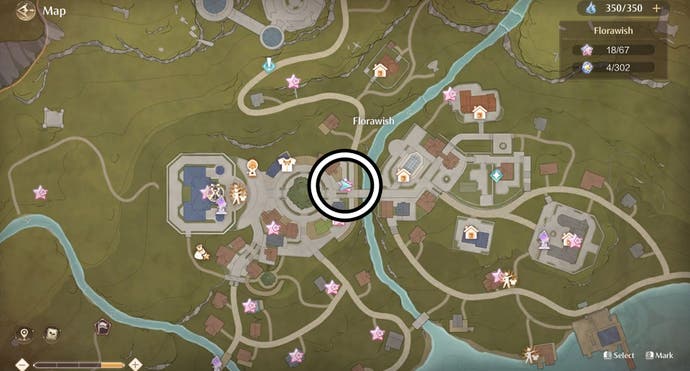
Finding the hidden star is quite easy - simply jump over the umbrella and down to the floor below. Once there, face the wall and you'll see the hidden star is a piece of graffiti art. Simply interact with it to get your Whimstar.

Florawish Whimstar location 35 - Hidden Star, House near Kingdom Guard's Office
For this hidden star Whimstar, you first need to touch the purple yarn on the roof south of the Kingdom Guard's Office, which is just north of the lake.
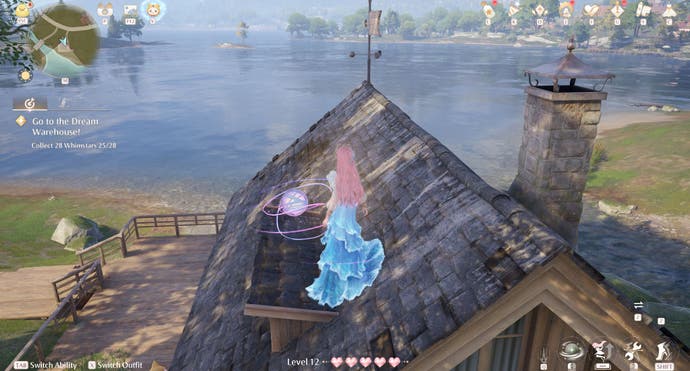
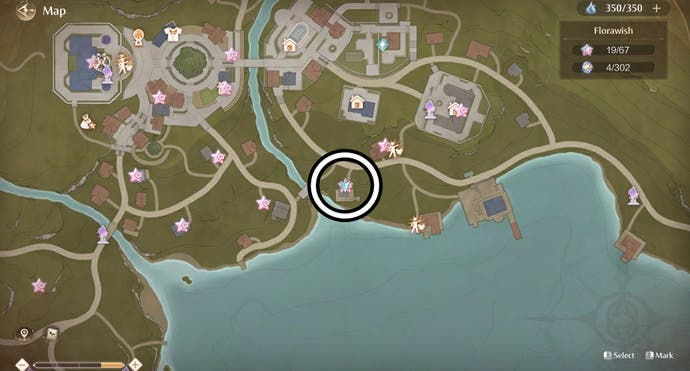
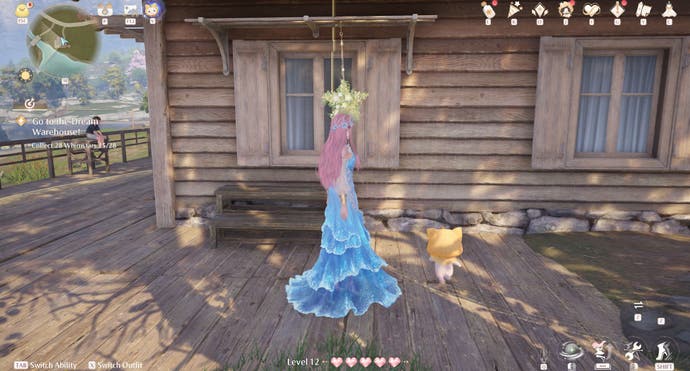
After doing so, jump down onto the patio attached to the left-hand side of the house. Next, face the house and look for some flowers hanging in a star shape near a window. Once found, interact with the star-shaped flowers to get your Whimstar.
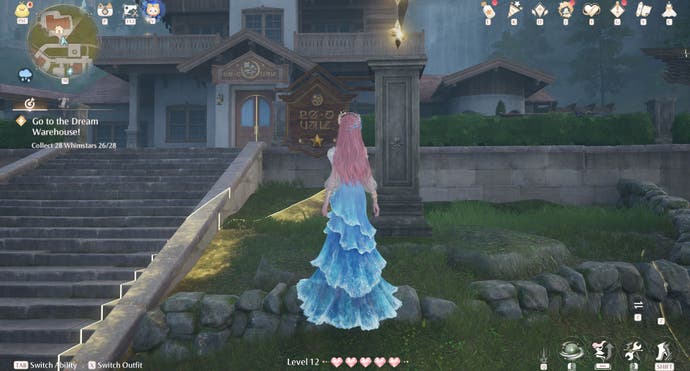
Florawish Whimstar location 36 - Hidden Star, Outside Daisy Inn
Our next hidden star Whimstar quest begins by touching the purple yarn found outside of the Daisy Inn - just east of the stairs.
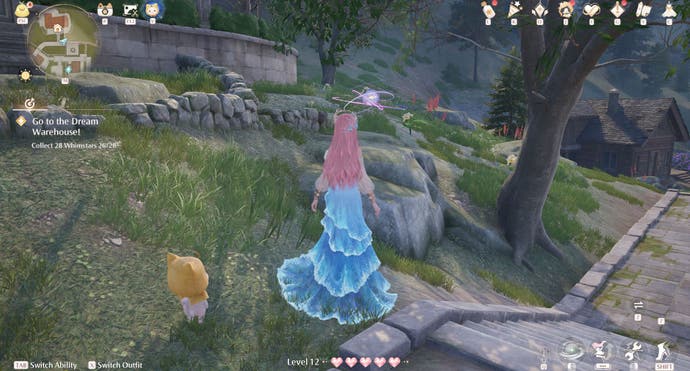
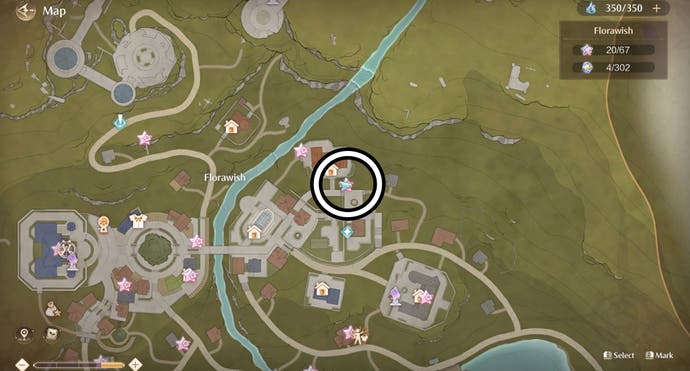
It won't take you long at all to find the hidden star this time; it's just left of purple yarn in the form of a wooden hanging sign. Simply interact with it to get your Whimstar.
Florawish Whimstar location 37 - Hidden Star, East of Mayor's Residence
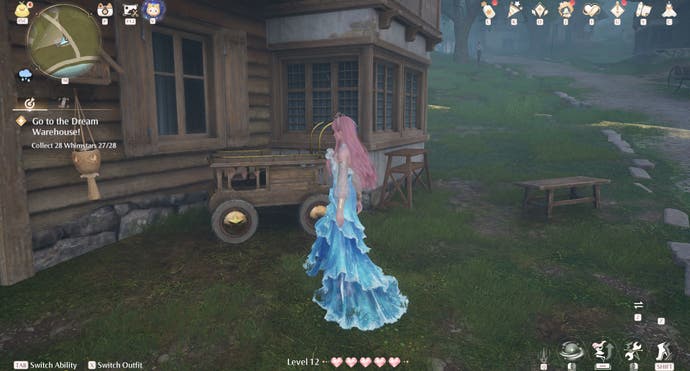
The search for the fifth hidden star Whimstar in Florawish is started by interacting with the purple yarn sitting on the roof of the building directly east of the Mayor's Residence.
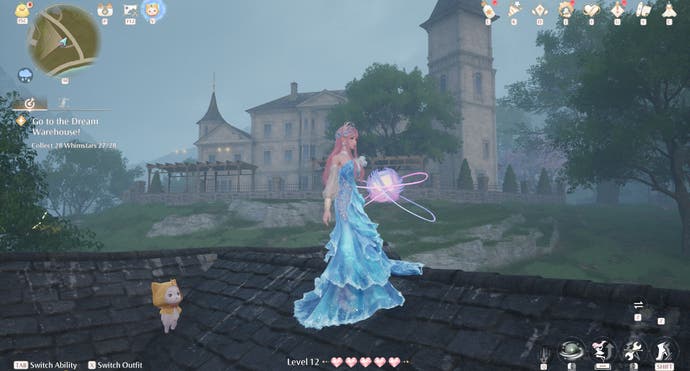
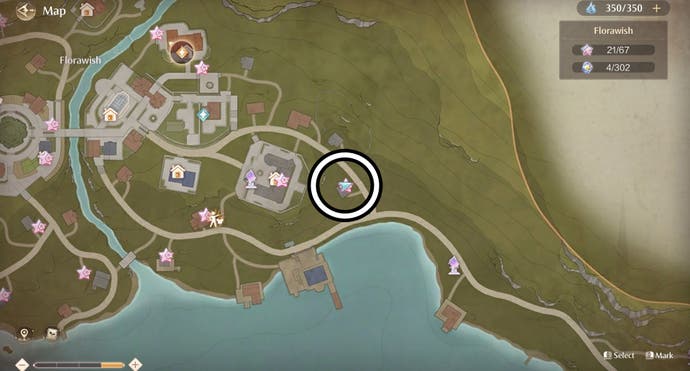
After doing so, drop down the south side of the building where you'll find a wooden wagon. Simply interact with the middle of the wagon's left wheel to nab your Whimstar.
Florawish Whimstar location 38 - Time Trail, Daisy Inn
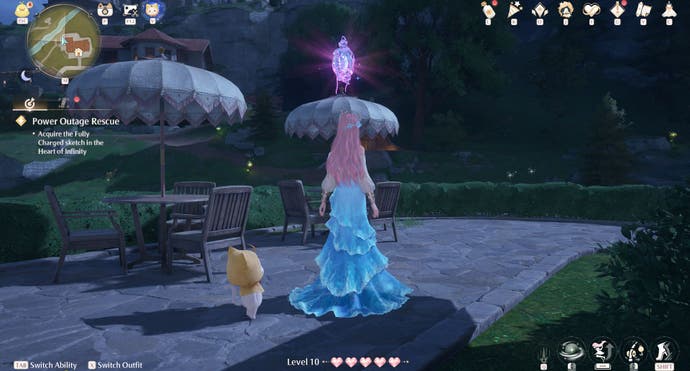
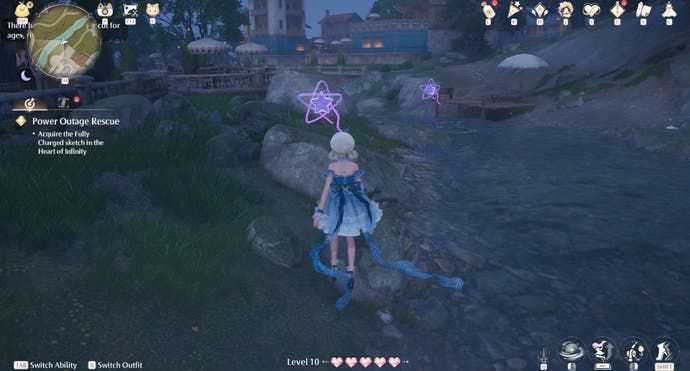
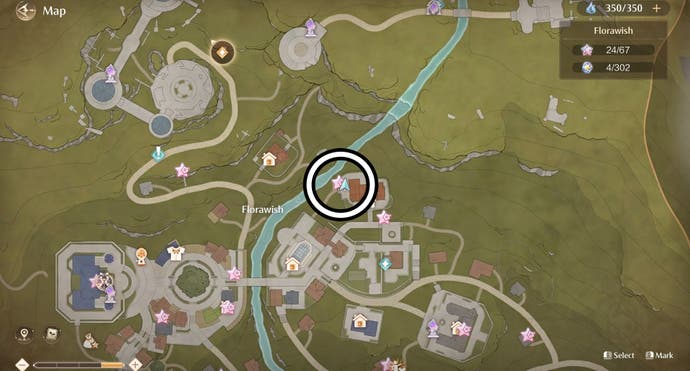
Sitting atop an umbrella on the left-hand side of the Daisy Inn is a time trial, which, when completed, will reward you with a Whimstar. Simply touch the star to begin the trail and collect the six stars scattered along the river before the time is up to get your reward.
Florawish Whimstar location 39 - Time Trail, south of Mayor's Residence
It's time for another time trail - a cloud one this time! It's located by the jetty near the house south of the Mayor's Residence. Once there, you should see a blue archway leading to the jetty and, atop of the arch, will be the purple star with a cloud which begins the time trail.
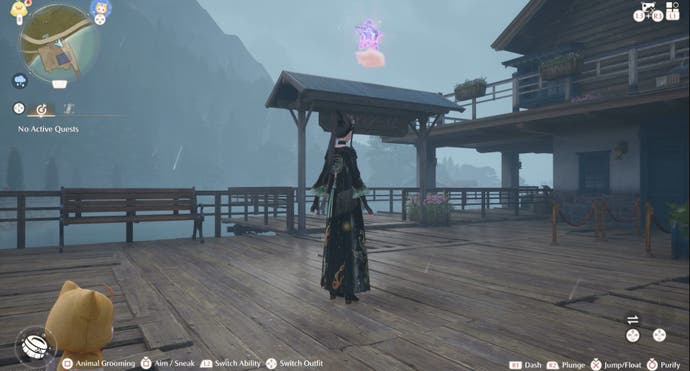
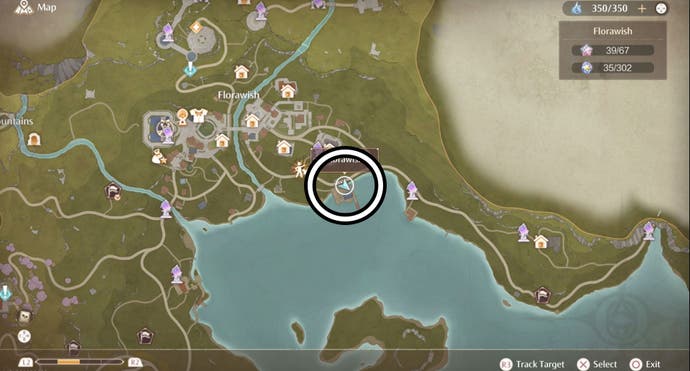
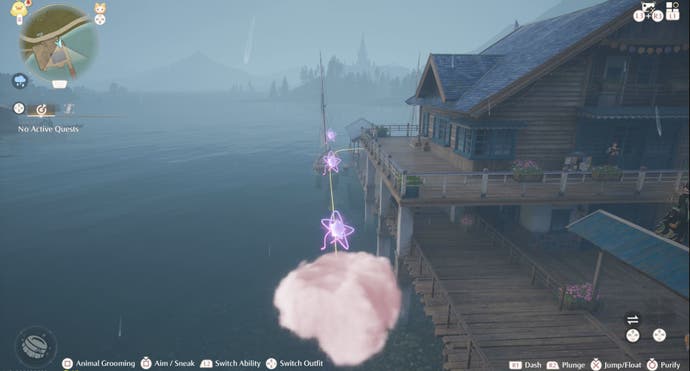
You will need to collect all eight stars to successfully complete the time trail. Make sure you stay on the cloud apart from when you have to jump off of the cloud to grab two stars. Once you've managed to complete the time trial successfully, you'll earn a Whimstar.
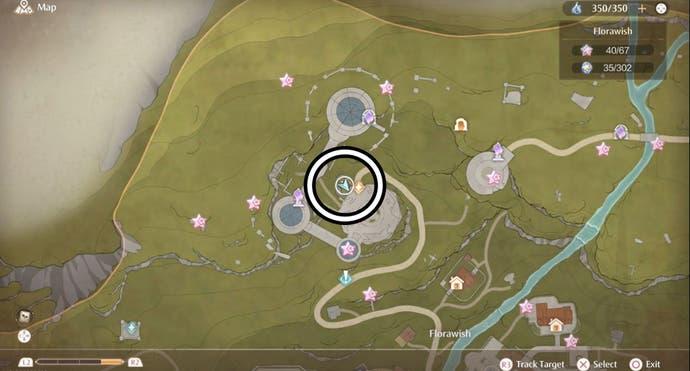
Florawish Whimstar location 40 - Time Trail, Dream Warehouse Fountain
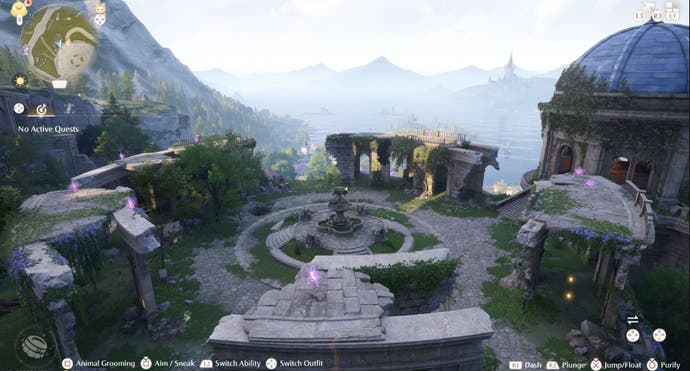
Another Whimstar time trail can be found on a grassy rock northwest of the fountain at the Dream Warehouse, which can be easily reached by gliding down from the Dream Warehouse Tower Warp Spire.
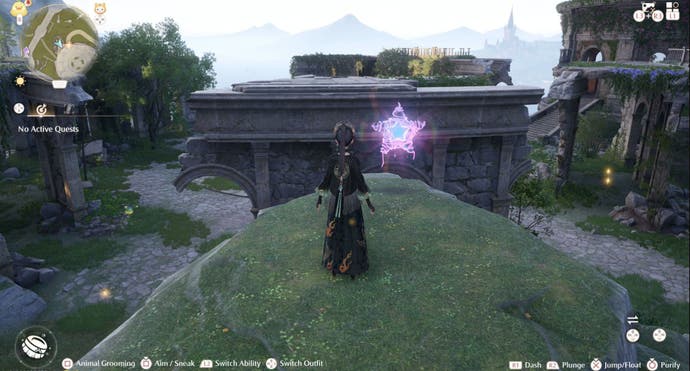
To earn this Whimstar, you need to collect 12 stars from the pillars surrounding the fountain before the time runs out.
Florawish Whimstar location 41 - Time Trail, Dream Warehouse Rooftop
There's a second time trial to collect for a Whimstar near the Dream Warehouse. Though this one is a little harder to reach since it starts atop a pillar northwest of the Dream Warehouse Rooftop Warp Spire.
To reach it we recommend heading north from said Warp Spire until you find some crates. Here you'll be able to see a pillar you can easily reach by gliding. Once you're on that pillar, use the bird platforms to head clockwise from pillar to pillar until you reach the purple star. Remember - once you touch this the time trail will begin!
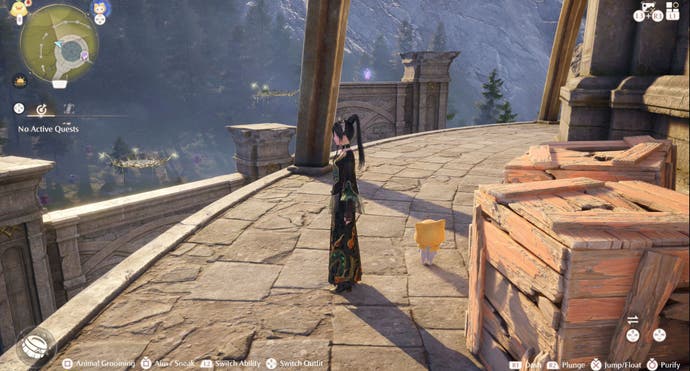
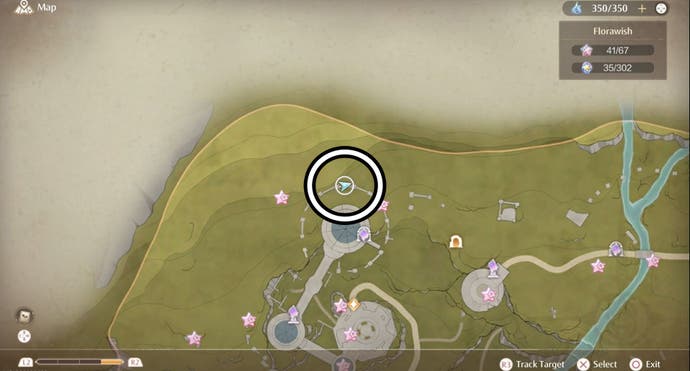
Now all you have to do is collect the stars before the time runs out to earn yourself a Whimstar!
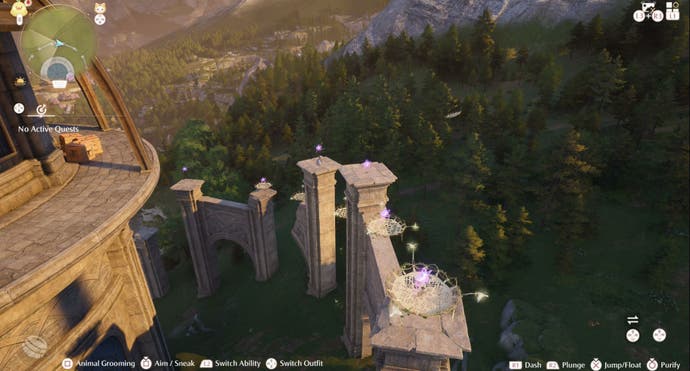
Florawish Whimstar location 42 - Time Trail, Sanctum of the Observant
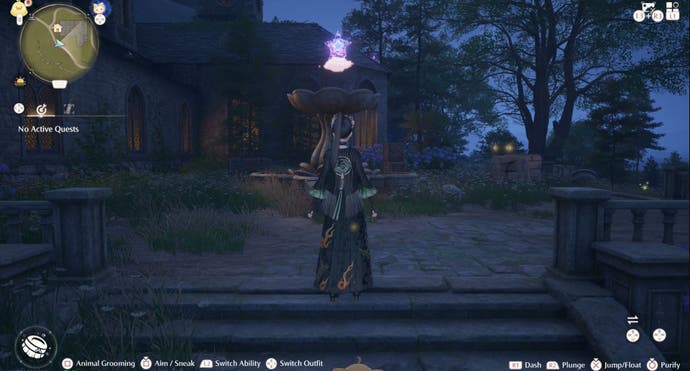
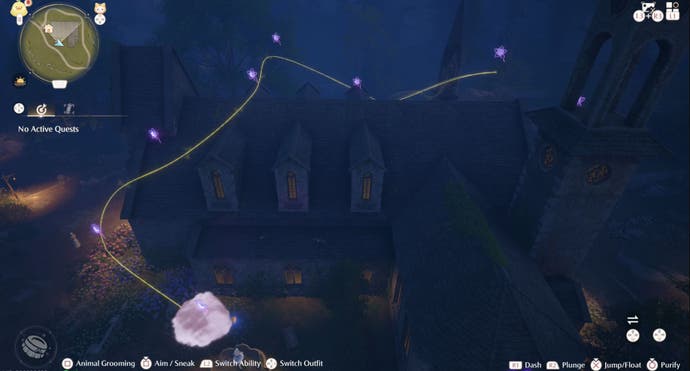
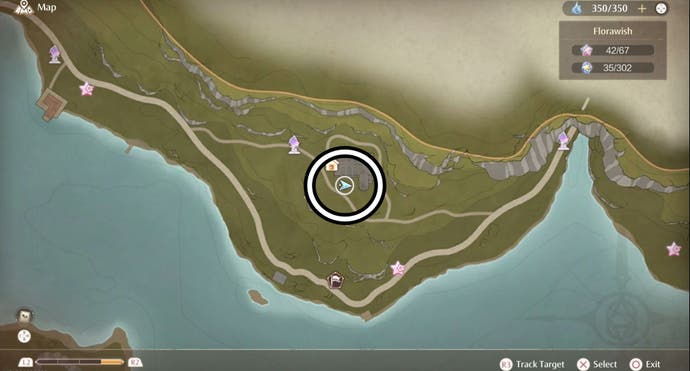
A time trial can be found atop the fountain close to the Sanctum of the Observant. Interacting with the purple star attached to a cloud will cause a cloud to appear. You will then need to travel on the cloud, occasionally jumping off, to grab all eight Whimstars. Got them all? Well now you have a new Whimstar.
Florawish Whimstar location 43 - Animal Grooming, West of Florawish Stylist's Guild
The Animal Grooming Ability Outfit earned during Chapter 1: Wishes Without Wings is required for this Whimstar.
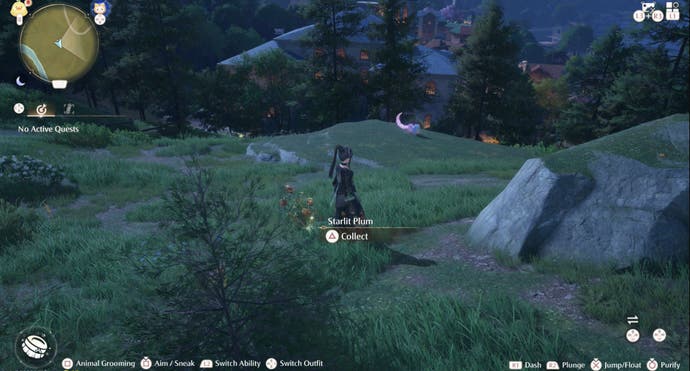
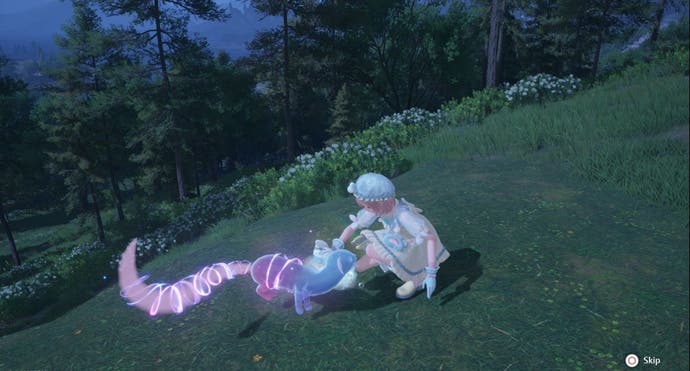
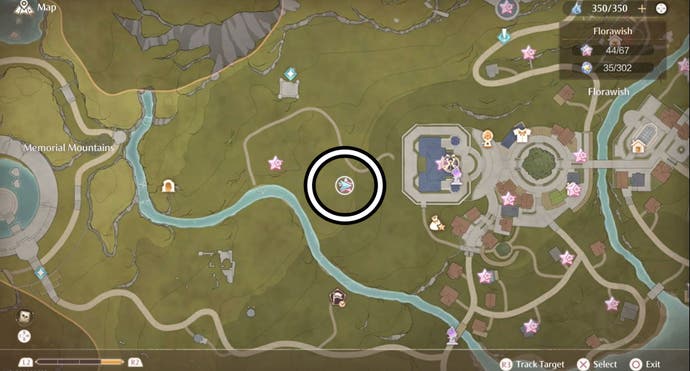
Head west from the Stylist's Guild in Florawish and look for a grassy rock overlooking the guild. Here you should find a glowing ferret, which you'll get a Whimstar in exchange for grooming it. You will need to sneak up on this ferret though.
Florawish Whimstar location 44 - Animal Grooming, Roof of Ray and Wing's in Florawish
The Animal Grooming Ability Outfit earned during Chapter 1: Wishes Without Wings is required for this Whimstar.
This Whimstar is located atop Ray and Wing's in Florawish, but you need to do quite a bit of work to reach it. First head to the entrance of Ray and Wing's and, once there, jump onto the orange and yellow striped cover to your right. Now you can jump over the railing to reach the upper level.
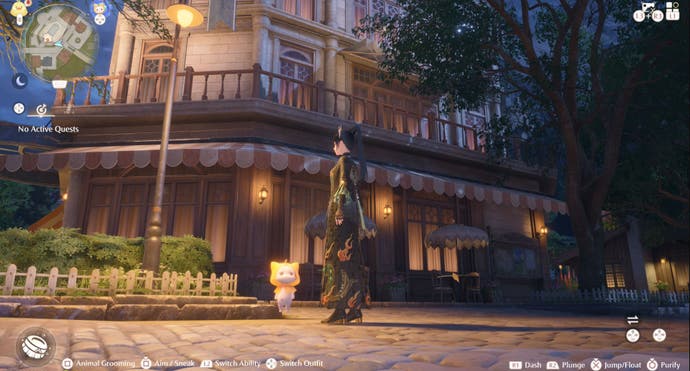
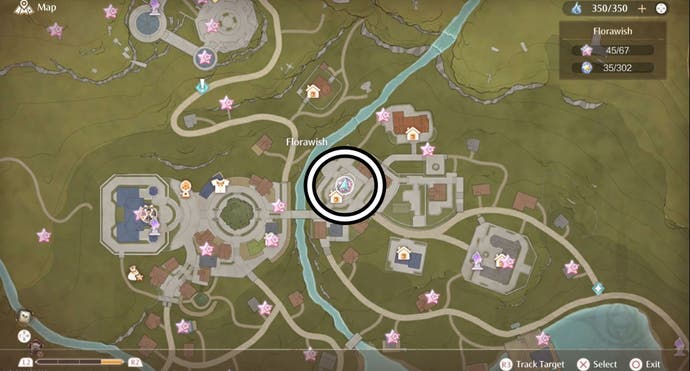
Next, you need to jump onto the blue and white striped cover to your right. Once there, turn around and jump onto the shop sight - it's the blue sign with a gold bird holding a fork. This will give you the height needed to jump onto the glass roof, but prepared to instantly wear the Animal Grooming Ability Outfit.
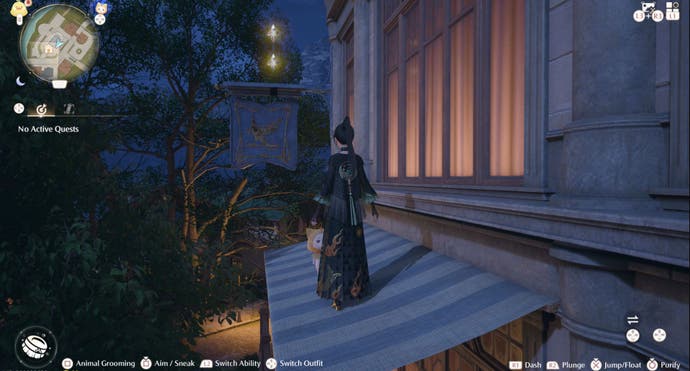
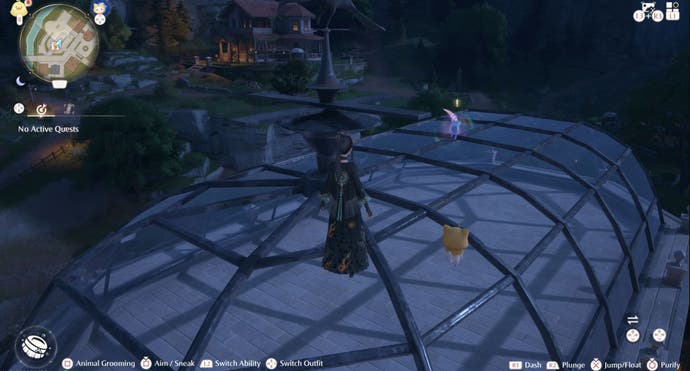
As we mentioned above, you need to put your Animal Grooming Ability Outfit straight away. Wearing it, you need to sneak up to the glowing ferret on the roof and groom it to earn your Whimstar.
Florawish Whimstar location 45 - Animal Grooming, Midair east of Wish Pass Office Warp Spire
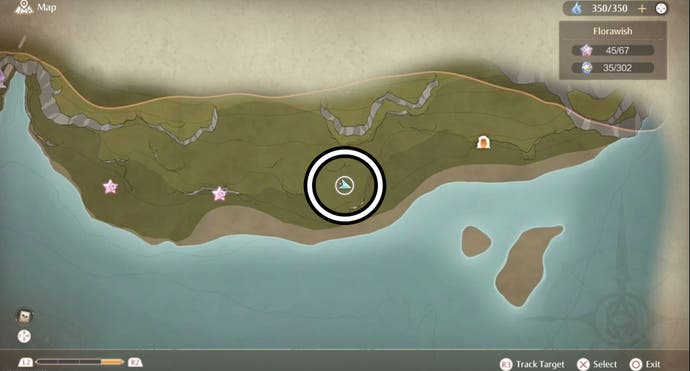
Collecting this Whimstar requires the Animal Grooming Ability Outfit unlocked during Chapter 1: Wishes Without Wings. Once you have this outfit, you'll be able to collect the Whimstar floating in the sky southeast of the Wish Pass Office Warp Spire.
Let's start our journey at the Wish Pass Office Warp Spire, from there you'll be able to glide over the water to the peninsula on your right.

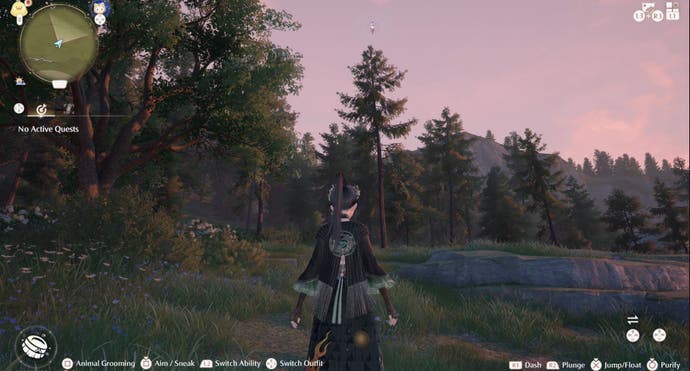
Now continue east, ignoring the floating Whimstar for now, until you find a big bird nest. It's now worth making sure you have the Animal Grooming ability ready to go, so you can groom the nest's owner when they arrive.
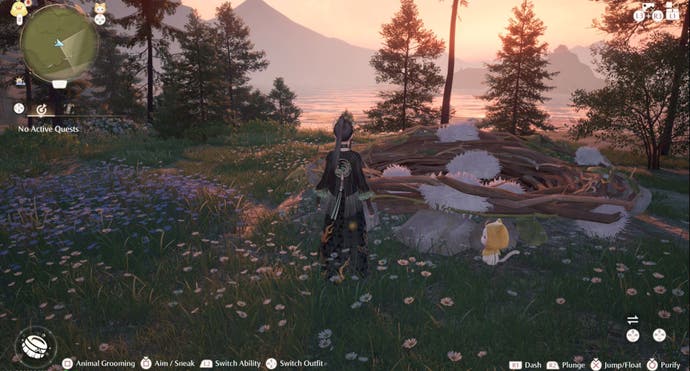
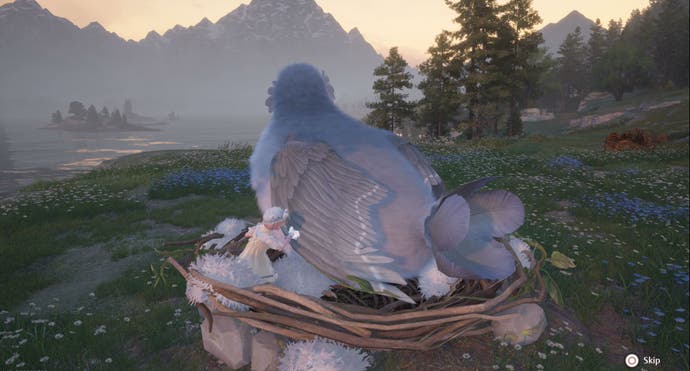
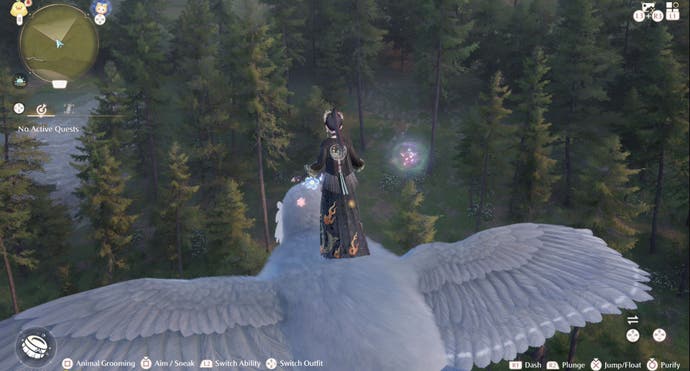
After grooming the bird, Nikki will be able to jump atop it. The bird will soon start flying again and you'll be able to jump off, making sure to glide, when it passes close to the Whimstar.
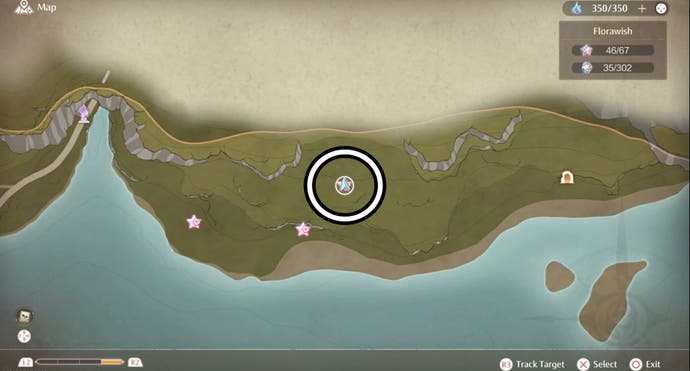
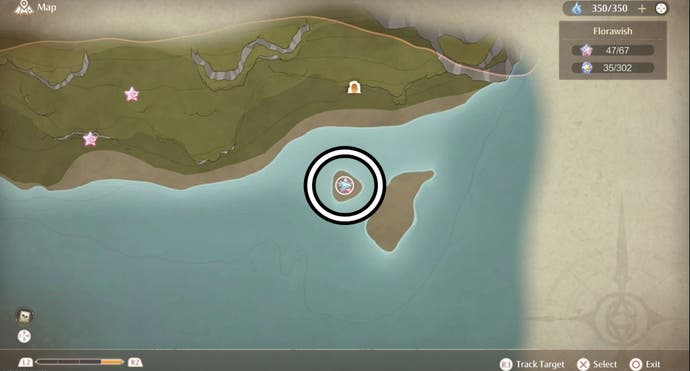
Florawish Whimstar location 46 - Animal Grooming, Island south of Forest's Edge Cavern
This Whimstar also requires the Animal Grooming Ability Outfit unlocked during Chapter 1: Wishes Without Wings. After meeting this requirement, head to the small island south of Forest's Edge Cavern.
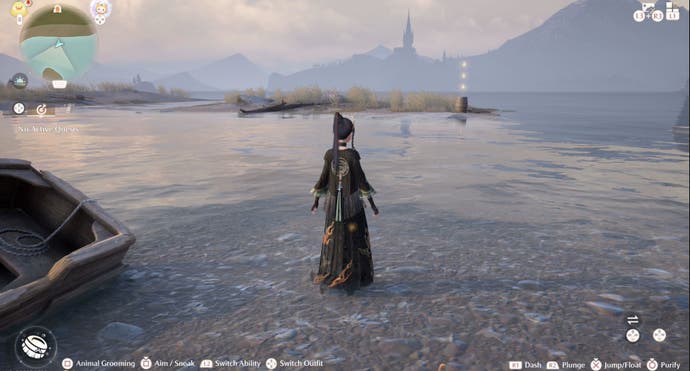
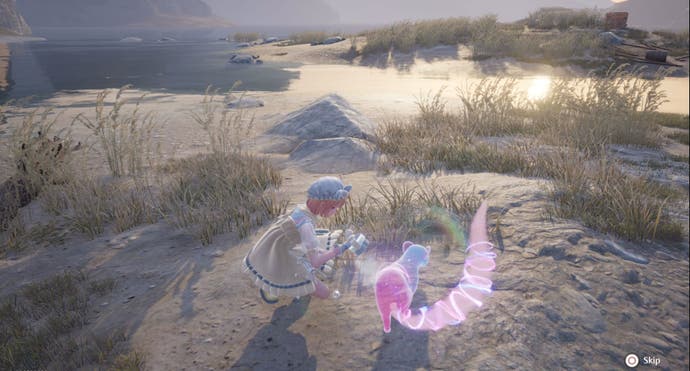
On this island fills a glowing ferret and, once groomed, it will give you a Whimstar. You will have to sneak up on the ferret though. Who would have thought that wild animals aren't fond of surprise groomings?
Florawish Whimstar location 47 - Bug Catching, North of Stitch Street Warp Spire
This Whimstar required the Bug Catching Ability Outfit earned during Chapter 1: Wishes Without Wings - Accident at the Clothing Store.
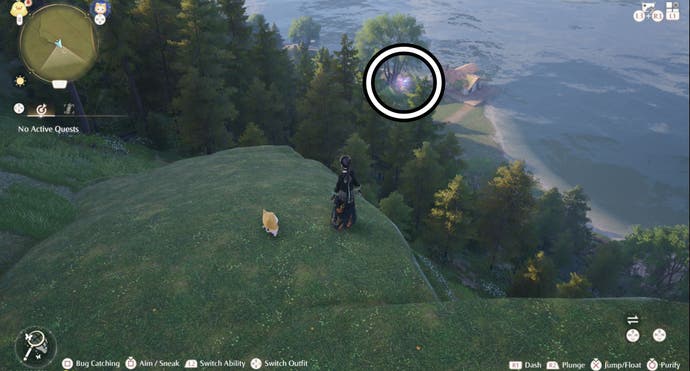
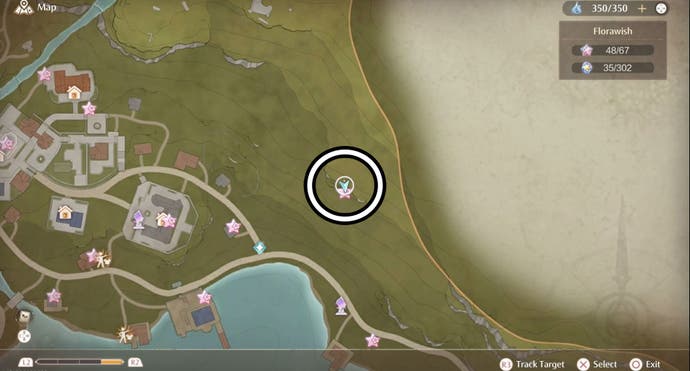
For this Whimstar, you need to head to the cliff north of the Stitch Street Warp Spire. Up here you'll find a glowing butterfly and, once caught, it will give you a Whimstar. If you're having trouble catching it, then try jumping and swinging your bug net at the same time.
Florawish Whimstar location 48 - Bug Catching, Dream Warehouse Ruins
This Whimstar requires the Bug Catching Ability Outfit unlocked during Chapter 1: Wishes Without Wings - Accident at the Clothing Store.
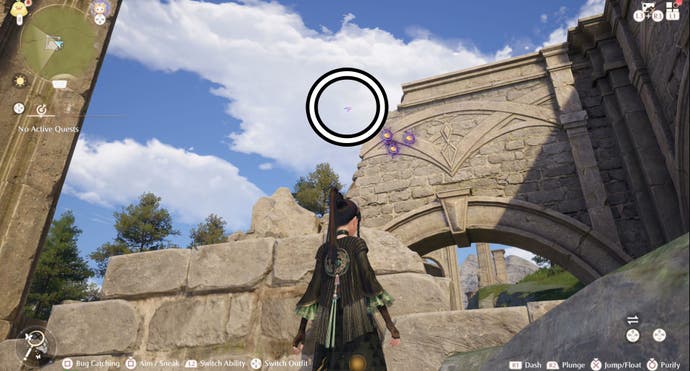
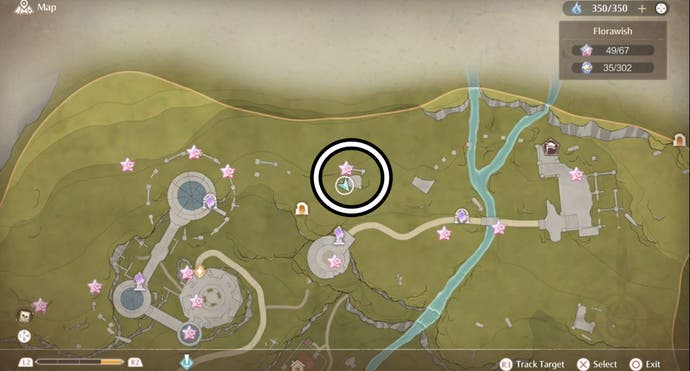
The easiest way to obtain this Whimstar is to head north from the Secret Base Warp Spire. You should soon see a glowing butterfly floating above some ruins - technically you should be within the Dream Warehouse Ruins at this point.
To reach the butterfly, you need to climb up a broken wall before jumping to the top of the ruins. Here you should be able to equip the Outfit and catch the butterfly.
Florawish Whimstar location 49 - Bug Catching, Butterfly near Dream Warehouse Cliff
This Whimstar requires the Bug Catching Ability Outfit earned during Chapter 1: Wishes Without Wings - Accident at the Clothing Store.
For this Whimstar, you need to catch the glowing butterfly south of the Dream Warehouse Tower Warp Spire and north of the Stylist's Guild.
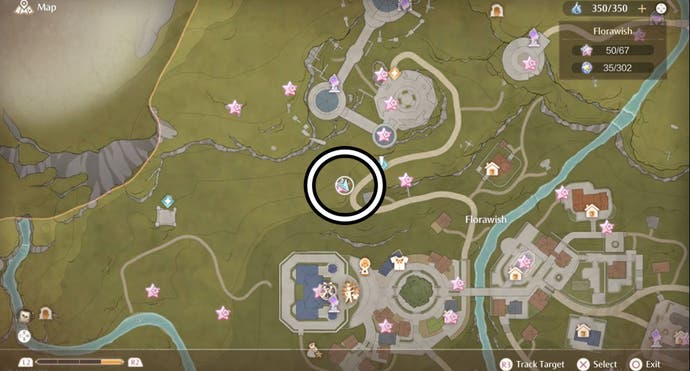
Our recommended route begins at the Stylist's Guild where you need to head left past the Surprise-O-Matic machine. Now climb up the cliffs until you reach a wooden house with a large cliff on its left-hand side. You now need to head past the house's left-hand side and venture up the hill to the top of the cliff.
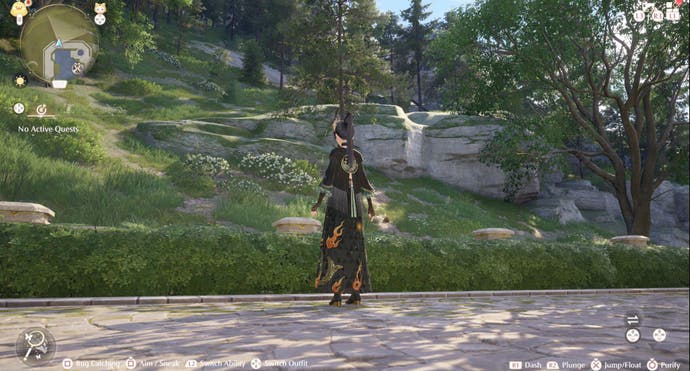
This should bring you to the glowing butterfly who is flying just off the cliff's edge. To reach it you need to wear the Bug Catching Ability Outfit before jumping and swinging your bug net in mid-air. Once caught, the butterfly will reward you with a Whimstar.
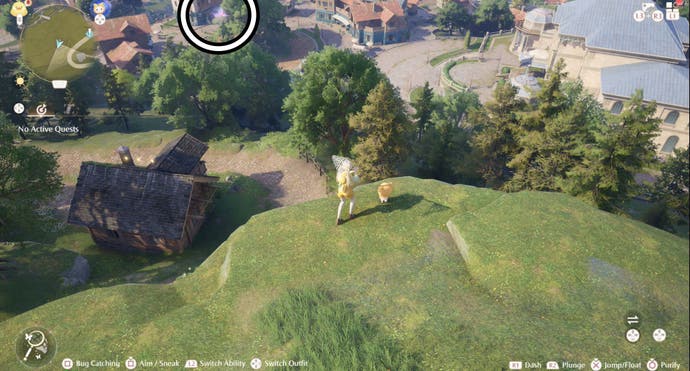
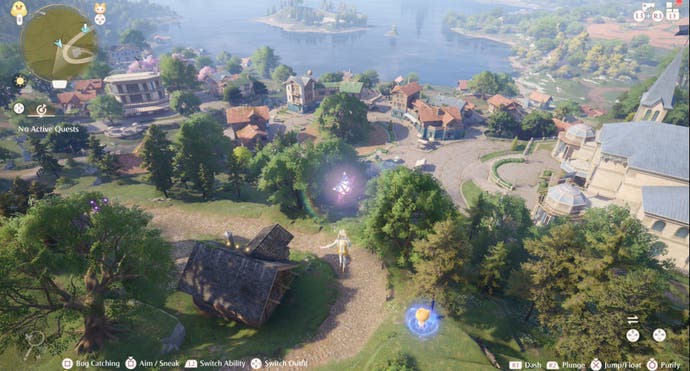
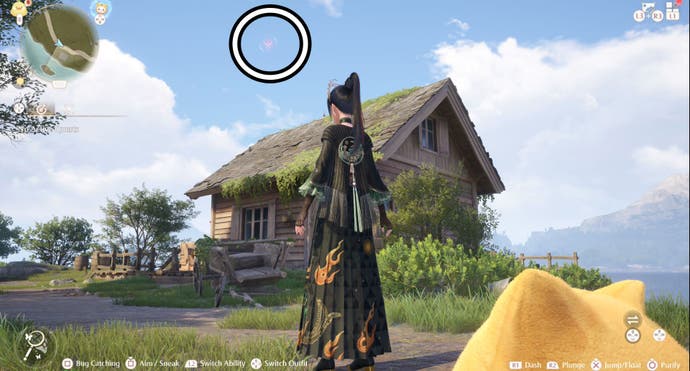
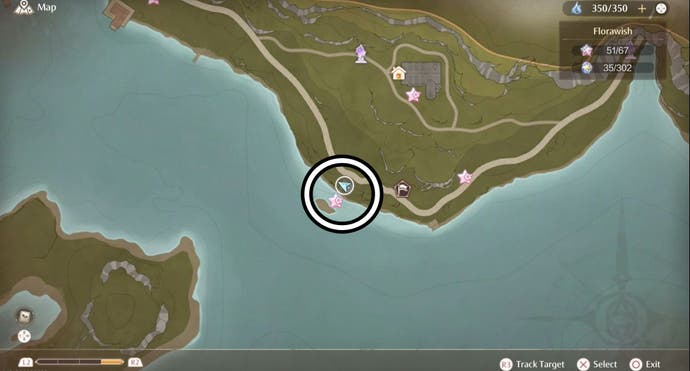
Florawish Whimstar location 50 - Bug Catching, Shack south-west of Sanctum of the Observant
This Whimstar requires the Bug Catching Ability Outfit earned during Chapter 1: Wishes Without Wings - Accident at the Clothing Store.
Once you have that outfit, head west of the Hoop Hooper mini-game which itself is south of the Sanctum of the Observant. You'll want to continue walking until you see a small shack with a glowing butterfly fluttering above its roof. Now all you have to do is catch this butterfly to earn your Whimstar.
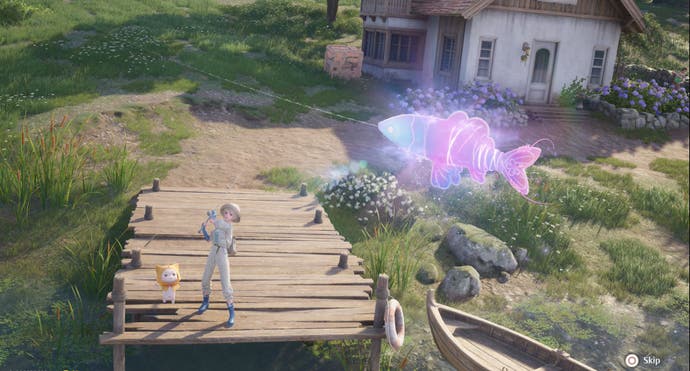
Florawish Whimstar location 51 - Fishing, Dock southeast of Florawish Lane Warp Spire
This Whimstar requires the Fishing Ability Outfit earned during Chapter 1: Wishes Without Wings - Unexplained Coma Incidents.
Once you've got this Outfit, head to the dock southeast of the Florawish Lane Warp Spire. It can also be found by taking the southern path from the Wishing Tree and continuing southeast until you reach a small dock.
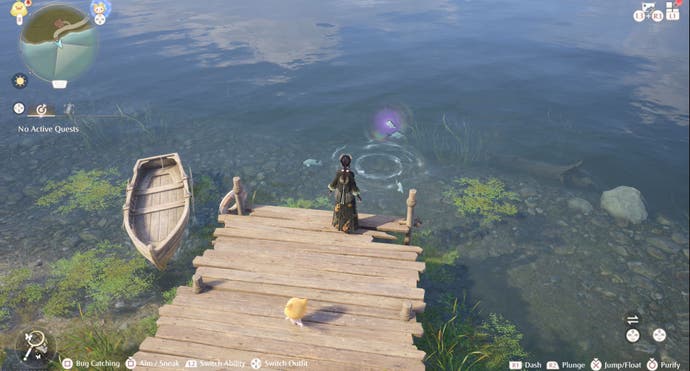
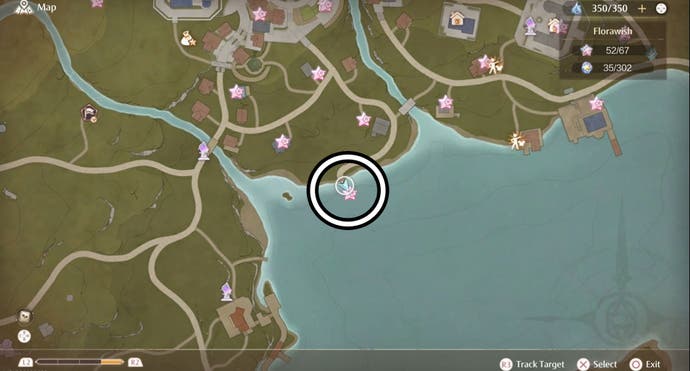
You'll see a glowing fish swimming in the water surrounding this dock and, once caught, it will give you a Whimstar.
Florawish Whimstar location 52 - Fishing, In river southwest of Stylists Guild
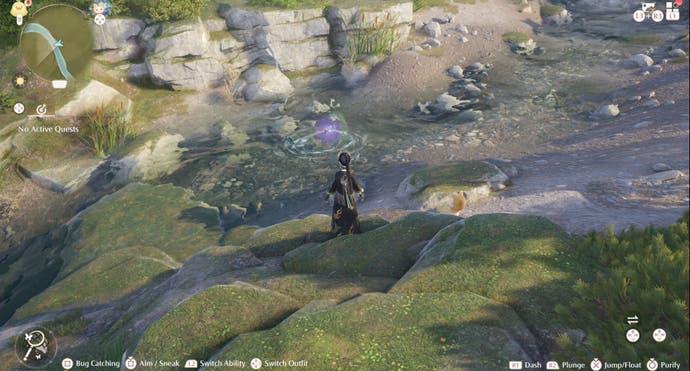
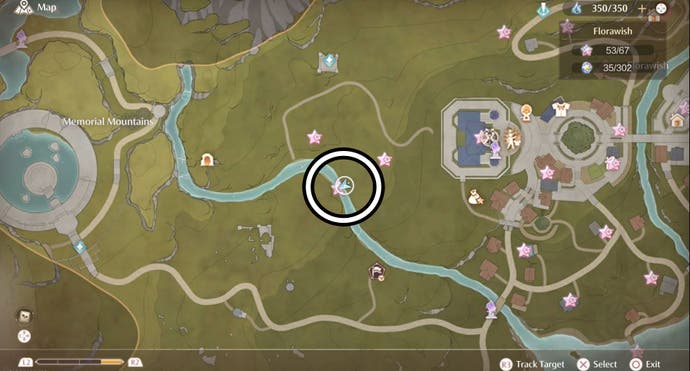
This Whimstar requires the Fishing Ability Outfit unlocked during Chapter 1: Wishes Without Wings - Unexplained Coma.
Like the above Whimstar, you need to catch a glowing fish to earn this Whimstar. The quickest way to find its location is to follow the river upwards from the Dodge and Dash mingame, until you spot the glowing fish swimming amongst a group of fish in the water.
Florawish Whimstar location 53 - Stray Hatty purchase 1
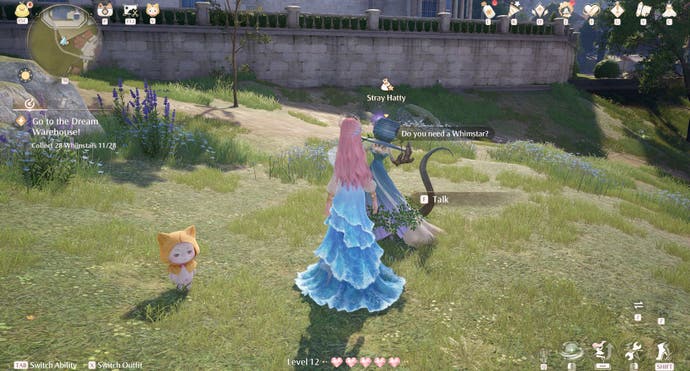
This Whimstar can be purchased from Stray Hatty, found south of the Stylist's Guild, for 10,000 Bling.
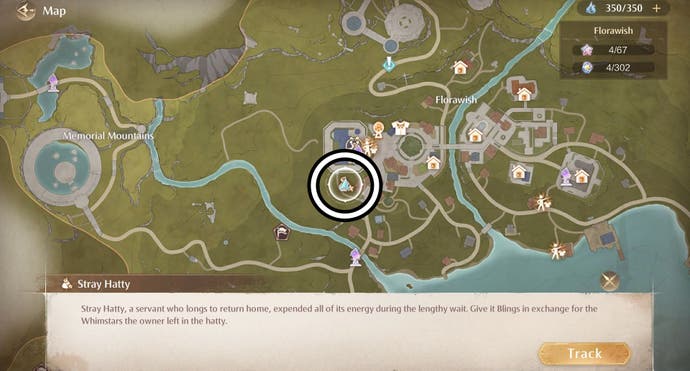
Florawish Whimstar location 54 - Stray Hatty purchase 2
This Whimstar can be purchased from Stray Hatty, found south of the Stylist's Guild, for 100,000 Bling.
Florawish Whimstar location 55 - Stray Hatty purchase 3
This Whimstar can be purchased from Stray Hatty, found south of the Stylist's Guild, for 200,000 Bling.
Florawish Whimstar location 56 - Stray Hatty purchase 4
This Whimstar can be purchased from Stray Hatty, found south of the Stylist's Guild, for 300,000 Bling.
Florawish Whimstar location 57 - Stray Hatty purchase 5
This Whimstar can be purchased from Stray Hatty, found south of the Stylist's Guild, for 500,000 Bling.
Florawish Whimstar location 58 - Stray Hatty purchase 6
This Whimstar can be purchased from Stray Hatty, found south of the Stylist's Guild, for 1,000,000 Bling.
Florawish Whimstar location 59 - Stray Hatty purchase 7
This Whimstar can be purchased from Stray Hatty, found south of the Stylist's Guild, for 2,000,000 Bling.
Florawish Whimstar location 60 - Stray Hatty purchase 8
This Whimstar can be purchased from Stray Hatty, found south of the Stylist's Guild, for 3,000,000 Bling.
Good luck finding all of the Florawish Whimstars in Infinity Nikki! Remember to check out our guides on the Well of Fortune Whimstar locations and Dream Warehouse Whimstar locations.


