How to buy Smithing Stones with Bell Bearing locations in Elden Ring
Weapon upgrades ahoy!
Smithing Stones are resources used to upgrade weapons in Elden Ring.
These consumable items are, while not especially rare, are hidden and useful enough that you'll want to know where to find them as soon as possible.
Whilst they can be found throughout The Lands Between, these valuable items can also be purchased from the Twin Maiden Husks in the Roundtable Hold. All you need to make them available are a series of different Smithing Stone Bell Bearings, with each corresponding to a level of Smithing Stone.
There are also two levels of Smithing Stone, the regular and Somber Smithing Stones. So whichever you need, this guide can tell you where to get the relevant Bell Bearing so you can buy as many Smithing Stones with Runes as you like.
On this page:
- How to buy Smithing Stone 1 and 2 with Smithing Stone Bell Bearing 1
- How to buy Smithing Stone 3 and 4 with Smithing Stone Bell Bearing 2
- How to buy Smithing Stone 5 and 6 with Smithing Stone Bell Bearing 3
- How to buy Smithing Stone 7 and 8 with Smithing Stone Bell Bearing 4
- How to buy Sober Smithing Stone 1 and 2 with Soberstone Miner's Bell Bearing 1
- How to buy Sober Smithing Stone 3 and 4 with Soberstone Miner's Bell Bearing 2
- How to buy Sober Smithing Stone 5 and 6 with Soberstone Miner's Bell Bearing 3
- How to buy Sober Smithing Stone 7 and 8 with Soberstone Miner's Bell Bearing 4
- How to buy Sober Smithing Stone 9 with Soberstone Miner's Bell Bearing 5
How to buy Smithing Stone 1 and 2 with Smithing Stone Bell Bearing 1
To make Smithing Stone [1] and [2] available for purchase in the Roundtable Hold, you need to navigate a cave and beat a boss.
The cave, Raya Lucaria Crystal Tunnel, can be found in Liurnia, towards the northeast side of the sunken lake. Before you enter it there should be a red hole on the map, we've marked where that is and also provided an in-game screenshot to show you where the cave entrance is.
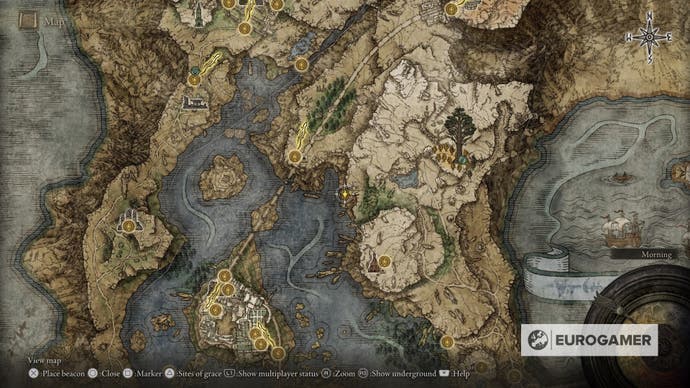
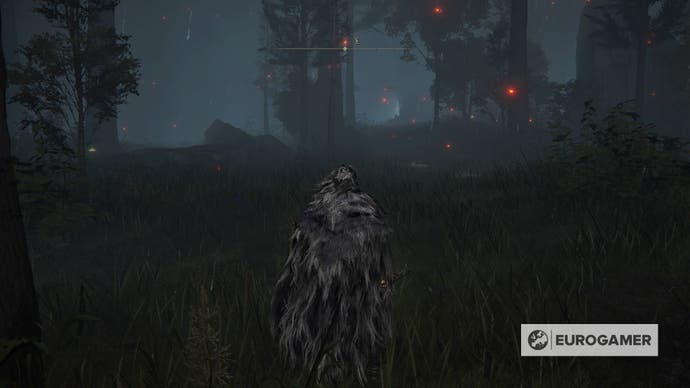
Once inside, you should find the Raya Lucaria Crystal Tunnel Site of Grace, then make your way down the cave itself. Along the way you should also find Smithing Stones in the cave walls, so be sure to acquire them by exploring as you go.

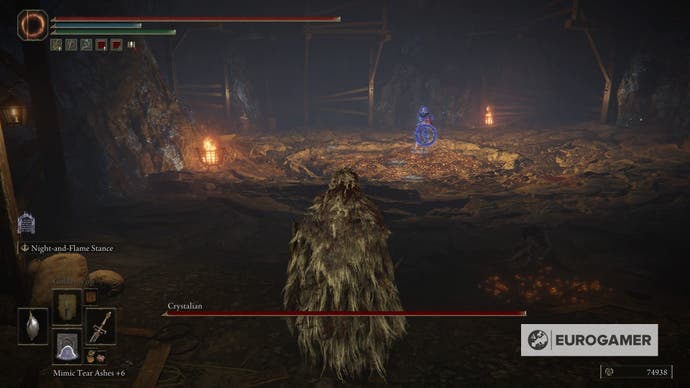
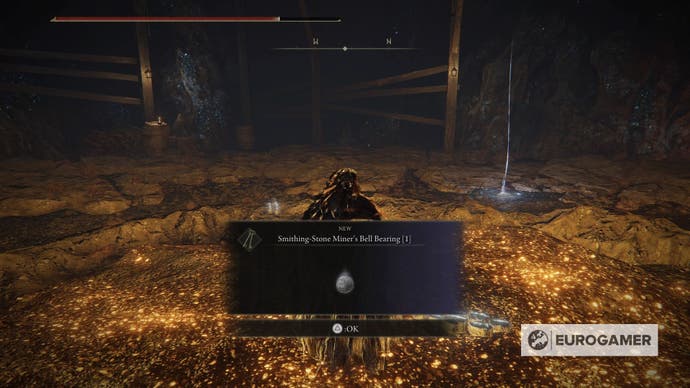
When you get to the very bottom of the cave you'll face a boss called the Crystalian, defeat it and you will then automatically be given the Smithing-Stone Miner's Bell Bearing [1] - take this to the Twin Maiden Husks in the Roundtable Hold and you'll then be able to purchase the Smithing Stones [1] and [2].
How to buy Smithing Stone 3 and 4 with Smithing Stone Bell Bearing 2
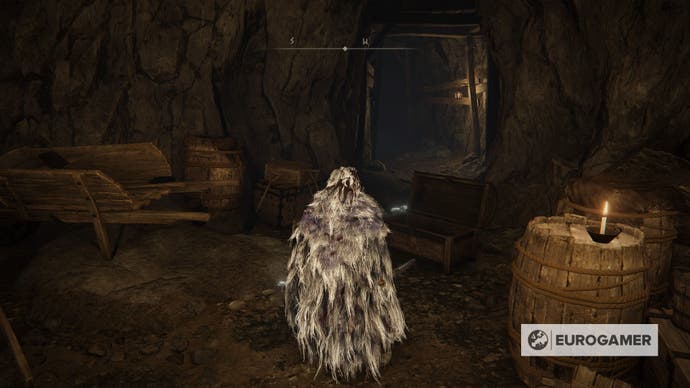
The next Bell Bearing is in the Altus Plateau, and can be found in a chest in the Sealed Tunnel, which we have marked on the map and with an in-game image below.
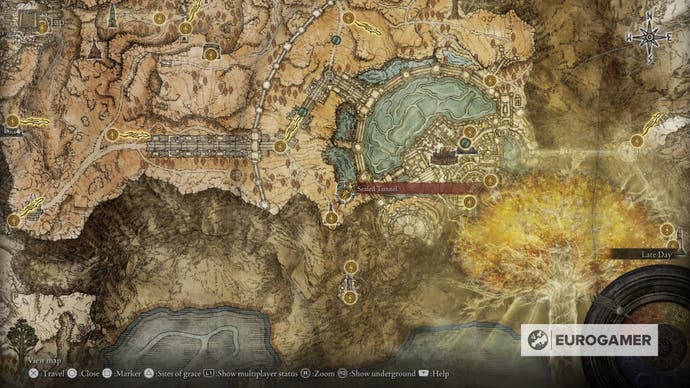
If you've already managed to find the tunnel and its relevant Site of Grace head inside for the chest, if not here's how to reach it from the main path.
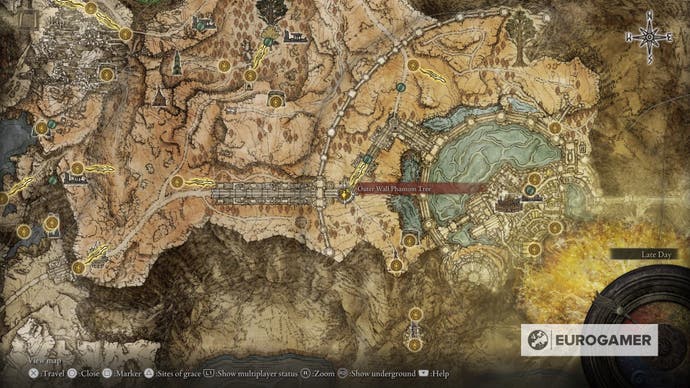
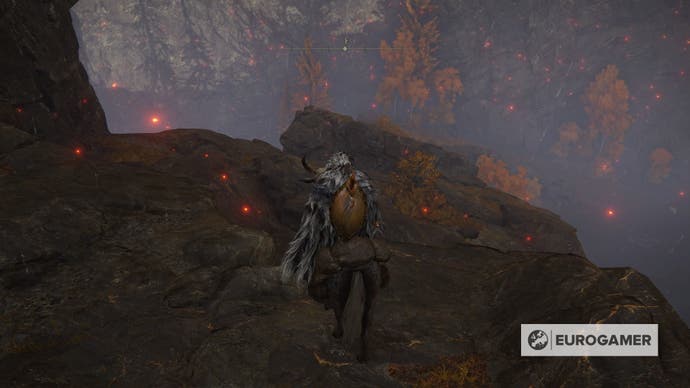
Teleport to the Outer Wall Phantom Tree Site of Grace and head east. When you get to the cliff face you should also see some rocks ramping downwards, use them to get to the water below. From here head directly across the water to find the cave itself.
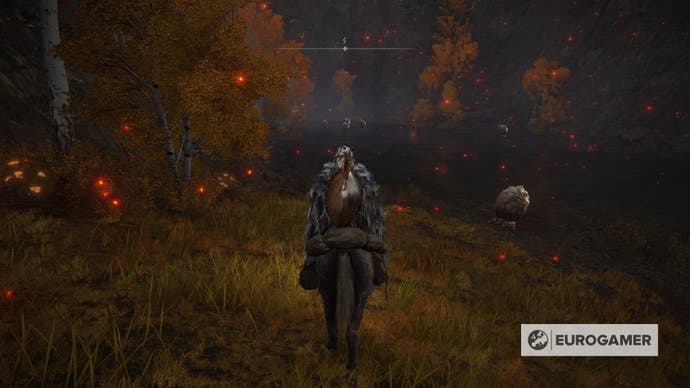
If you go through the first cave area and find a lift, turn around and continue exploring. You should quickly see a chest in front of a wall (which is actually an illusory wall, which is why it isn't in the picture below). Open the chest for Smithing-Stone Miner's Bell Bearing [2].
How to buy Smithing Stone 5 and 6 with Smithing Stone Bell Bearing 3
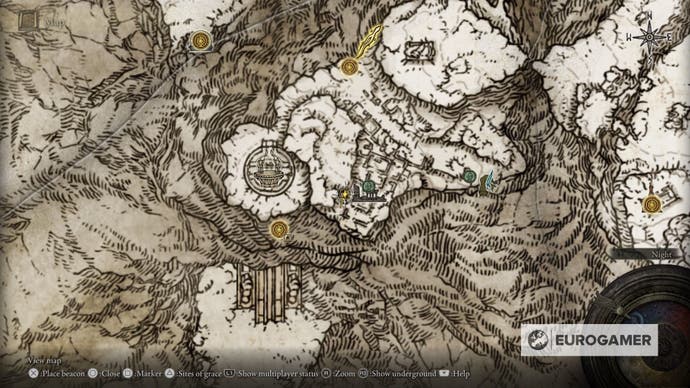
To get these Smithing Stones, make sure you have access to the Mountaintops of the Giants region, which you can access after getting through the Grand Lift of Rold.
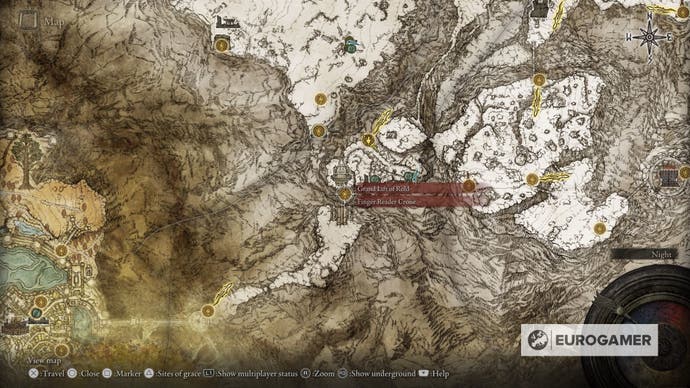
If you already have the Zamor Ruins Site of Grace, this is the closest to the Bell Bearing's location, if not use the Grand Lift Of Rold and follow the path pictured below, the Site of Grace is just on your left.
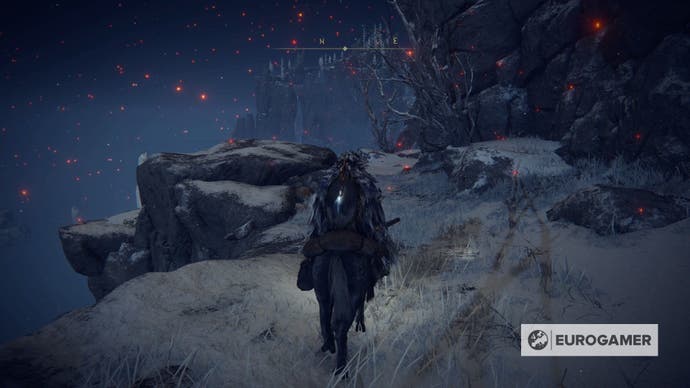
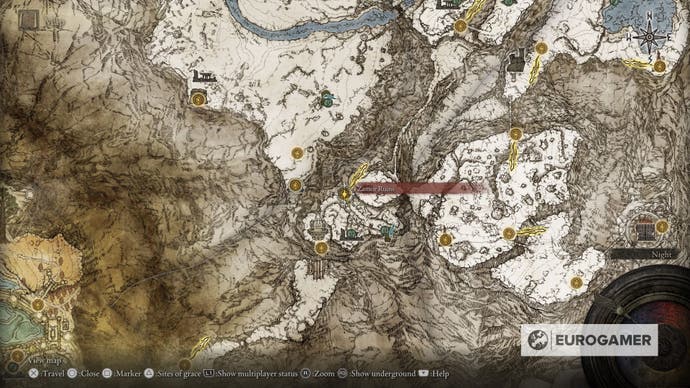
From here head southeast into the ruins themselves, making your way past the enemies (who can be quite easily snuck around if you want to avoid a fight) to the exact point marked on the map below. You should see stairs leading into a catacomb, head into it.
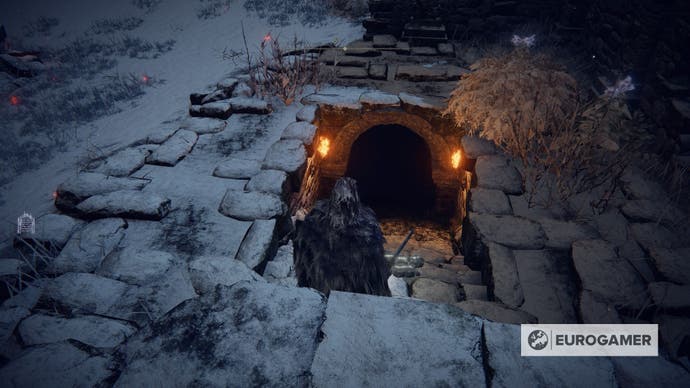
Open the chest behind the door and you'll have found the Smithing-Stone Miner's Bell Bearing [3].
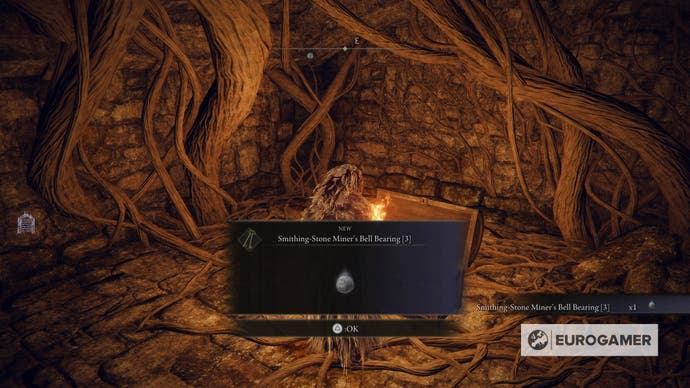
How to buy Smithing Stone 7 and 8 with Smithing Stone Bell Bearing 4
Getting this Bell Bearing is rather simple, as you receive it along the critical path of the main game.
When you arrive in Crumbling Farum Azula, you'll be required to fight the two-in-one boss of Godskin Duo. Again, this is unavoidable, and you get Smithing-Stone Miner's Bell Bearing [4] for beating them.
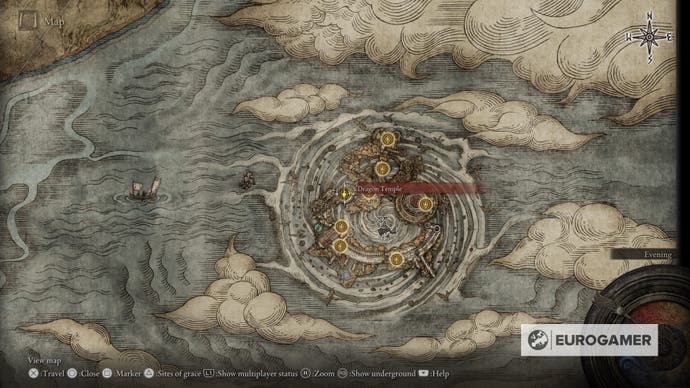
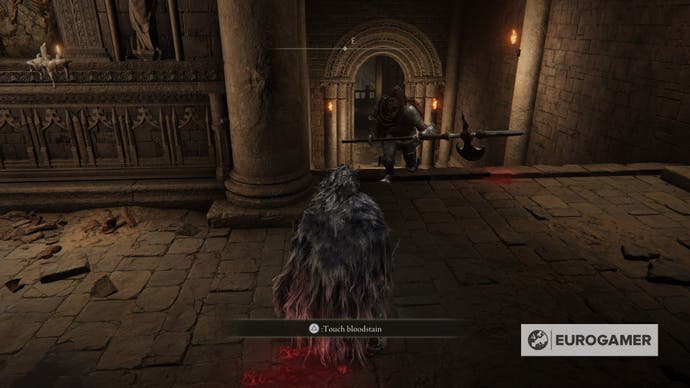
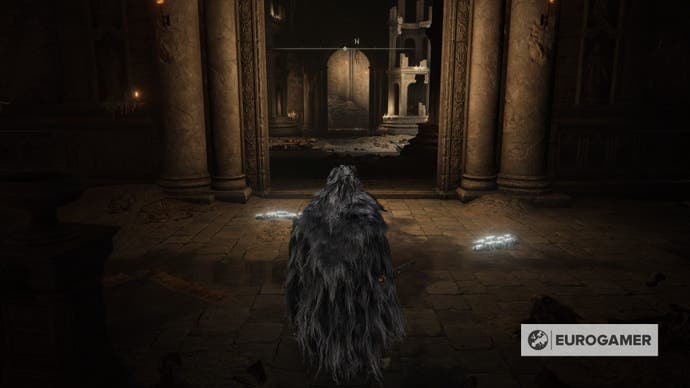
The boss can be found near the Dragon Temple Site of Grace, simply head through the doorway, right down the hall and staircase and into the giant room.
How to buy Sober Smithing Stone 1 and 2 with Soberstone Miner's Bell Bearing 1
The first Bell Bearing for Somber Smithing Stones can be found in the Caelid region of the map. It's located in the Sellia Crystal Tunnel, which also has a Site of Grace as you go in. We've marked the cave's location both on the map and via an in-game image as well.
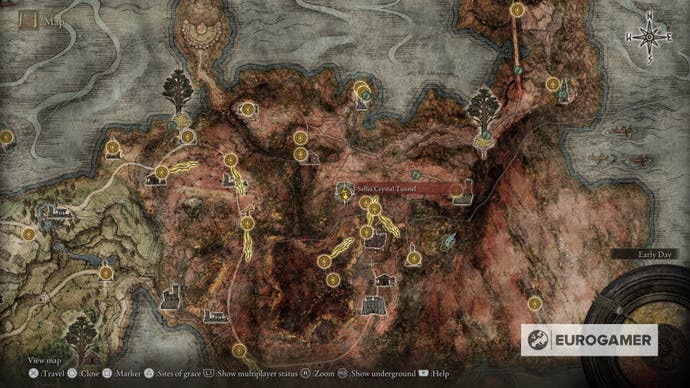
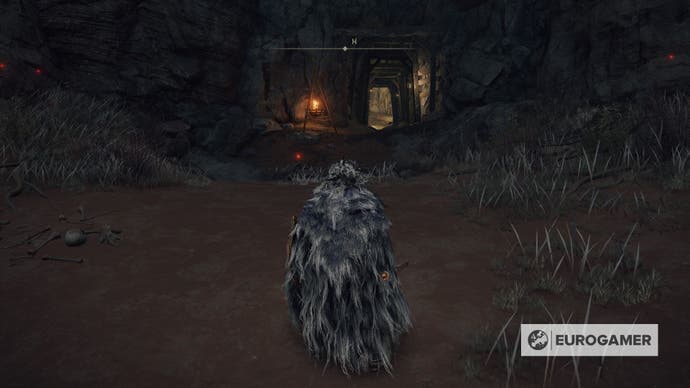
If you prefer, you can reach this location early by from encountering a chest trap in Limgrave not far from your starting location:
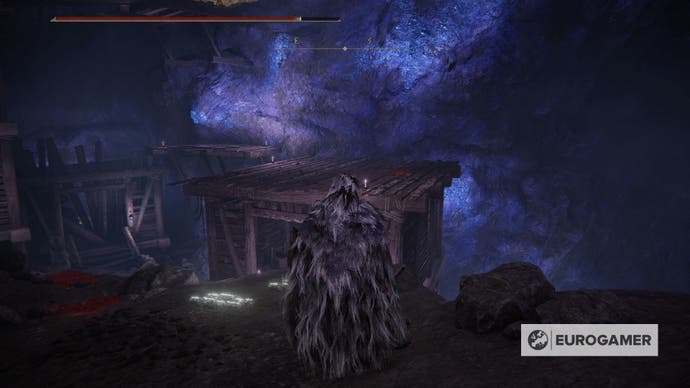
When you arrive, this mini dungeon-like area is mostly straightforward, apart from one section early on. Basically you'll need to do a running jump from a rock to a wooden roof in the first major room, and we've shown where in the image below.
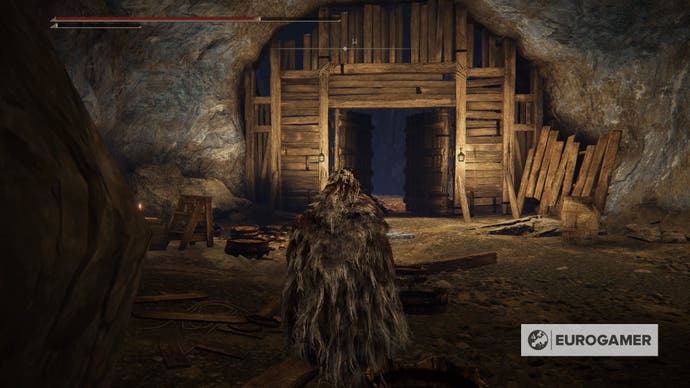
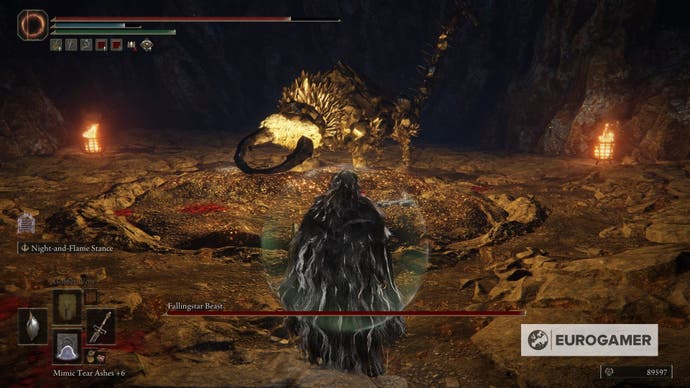
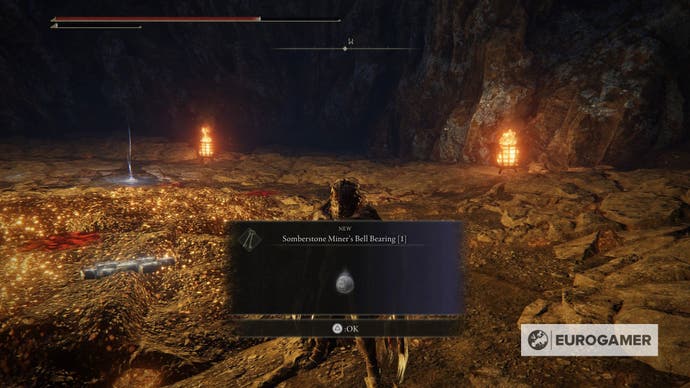
Eventually you'll come to some big wooden doors, and through them you'll fight the Fallingstar Beast boss, who will reward you with the Somberstone Miner's Bell Bearing [1].
How to buy Sober Smithing Stone 3 and 4 with Soberstone Miner's Bell Bearing 2
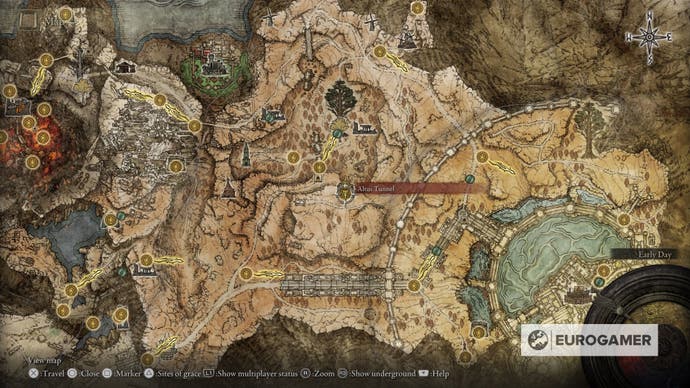
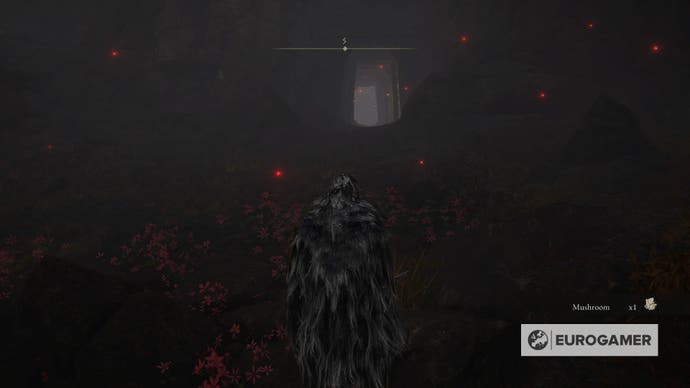
To find Somberstone Miner's Bell Bearing [2] you need to get to the Altus Tunnel Site of Grace in the Altus Plateau. We've marked the location on the map image below, and provided another screenshot so you can get a rough idea of where the entrance itself is for the cave you need to be in.
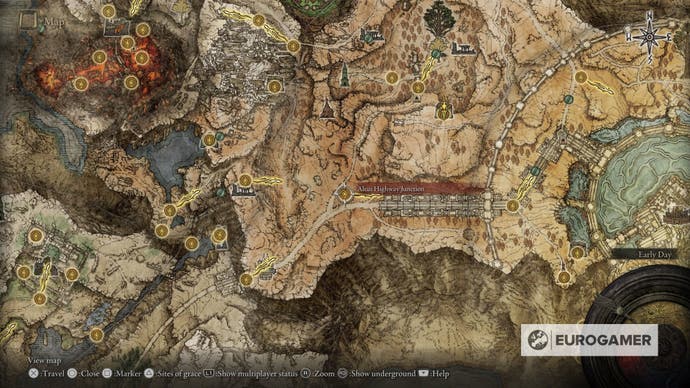
If you haven't found the cave yet, the best way to get there is by going along the left path at the Altus Highway Junction Site of Grace. Follow this path all the way along and you should easily be close to the cave itself.
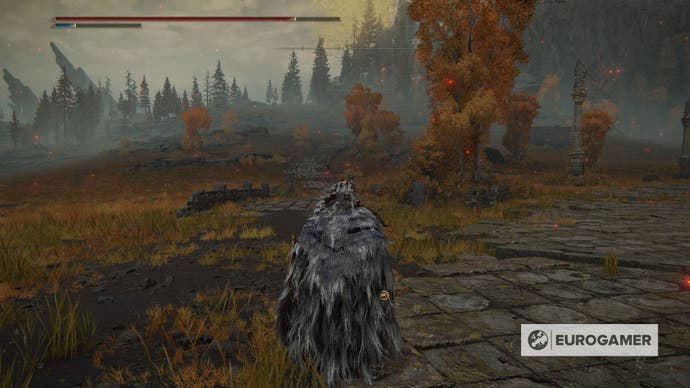
Once inside, make your way through the cave and to the large wooden doors, behind it will be a dual Crystalian boss, defeating them will net you the necessary Bell Bearing for Somber Smithing Stone [3] and [4].
How to buy Sober Smithing Stone 5 and 6 with Soberstone Miner's Bell Bearing 3
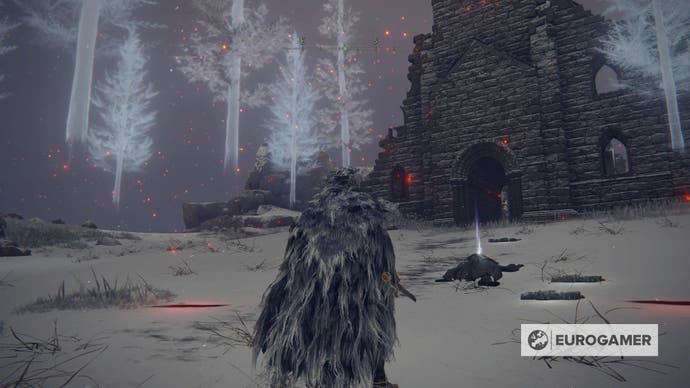
For this Bell Bearing, head to the First Church of Marika Site of Grace in the Mountaintops of the Giants. We've marked it on the map below. The Bell Bearing is round the north side of the church on a corpse, as also shown below.
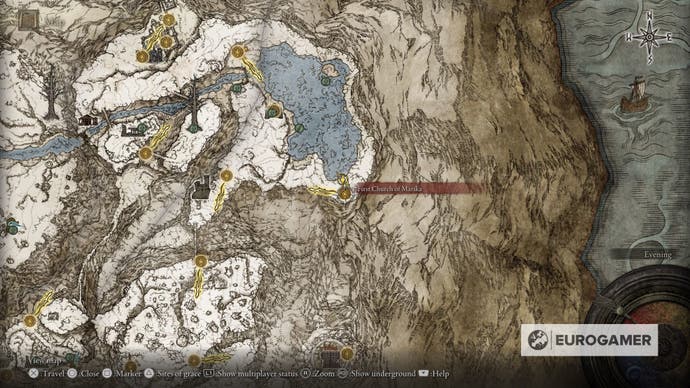
If you haven't reached the church yet, make sure you've found the Freezing Lake Site of Grace to the northwest of it. The relevant Site of Grace is the one pointing the yellow arrow toward the church in the image below.
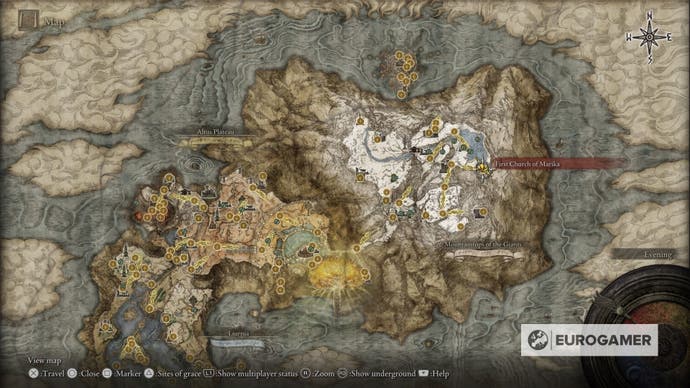
From here go past the dragon boss and hug the right hand side of the frozen lake whilst riding Torrent, in no time you'll come to the church.
The aforementioned corpse will have the Somberstone Miner's Bell Bearing [3] on it.
How to buy Sober Smithing Stone 7 and 8 with Soberstone Miner's Bell Bearing 4
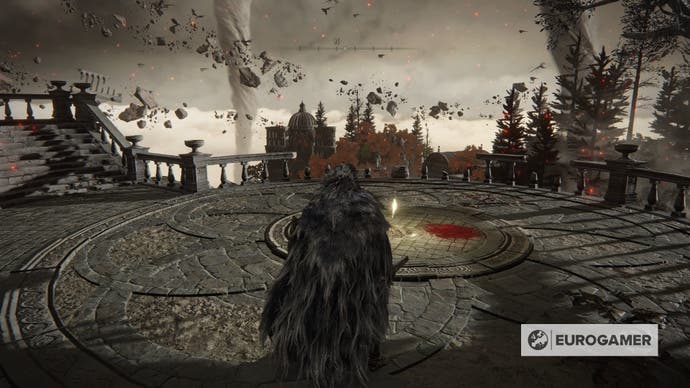
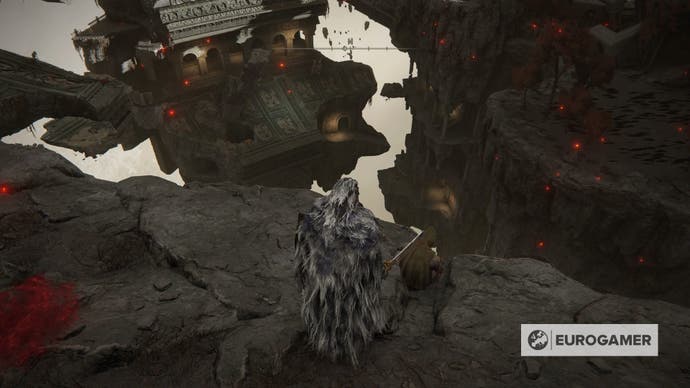
This Bell Bearing may be on the critical path of the game, but can actually be missed if you aren't inquisitive enough. The Bell Bearing itself is near the Tempest-Facing Balcony Site of Grace at the Crumbling Farum Azula.
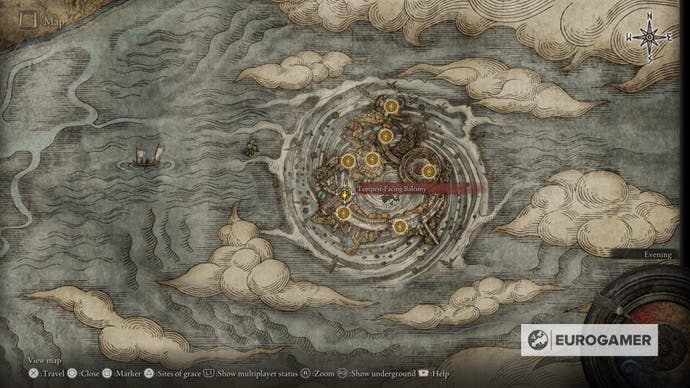
Simply head north from the Site of Grace and onto the rocks, and on the edge there's a small hooded body, the Somberstone Miner's Bell Bearing [4] is lootable from the corpse.
How to buy Sober Smithing Stone 9 with Soberstone Miner's Bell Bearing 5
To get this Bell Bearing, you'll want to travel to the Dragon Temple Rooftop Site of Grace at Crumbling Farum Azula.
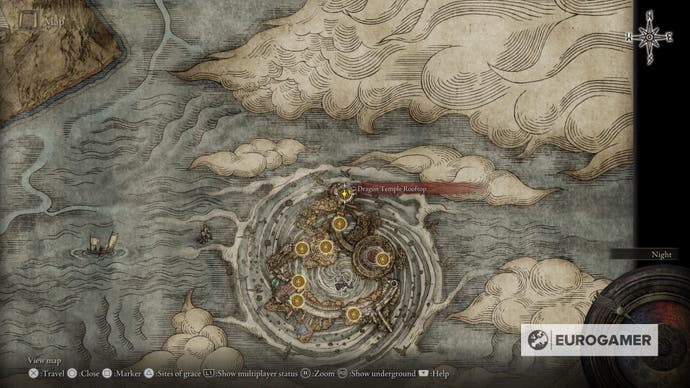
From here head down the red-tiled roofs and turn to the right, you should see the below screenshot with a dragon all the way at the other end. You'll then need to make your way all the way over to the dragon itself.
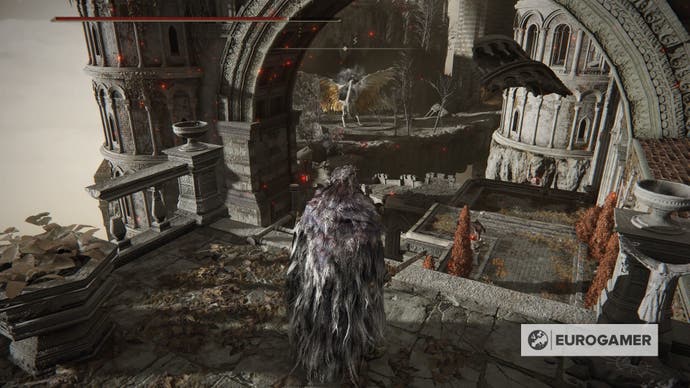
When you get close to the dragon go right and you should move beneath a giant archway. Follow the path round to the right and over a rather precarious looking fallen tower (which you can walk over, but be careful).
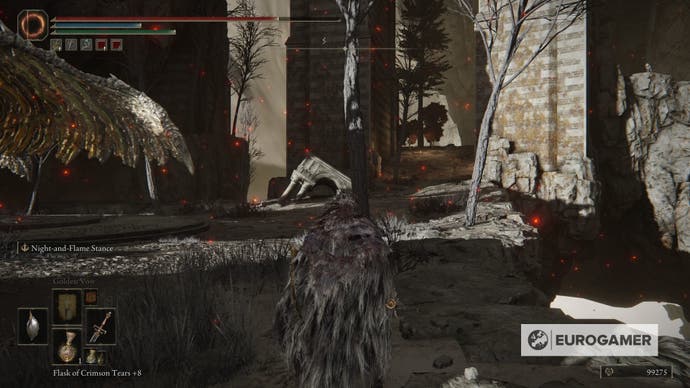
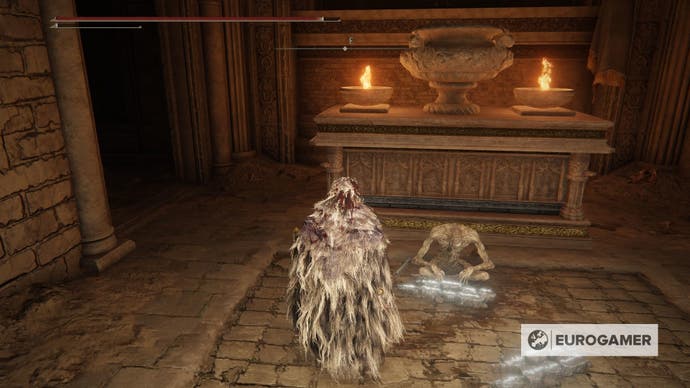
Then you should see a small temple-like structure. In there is an enemy, altar and a corpse. The temple itself is a trap, as two other enemies will come out from the sides once you walk in, so watch yourself.
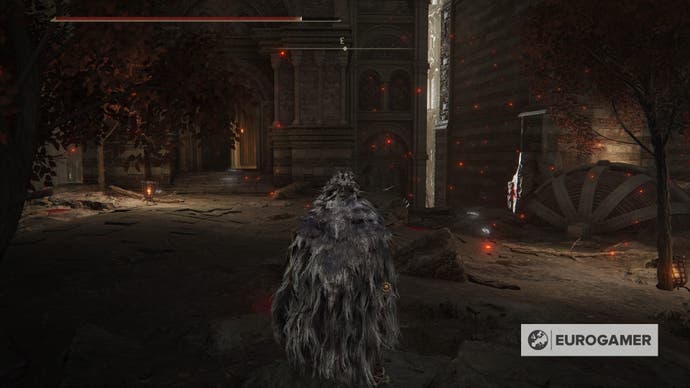
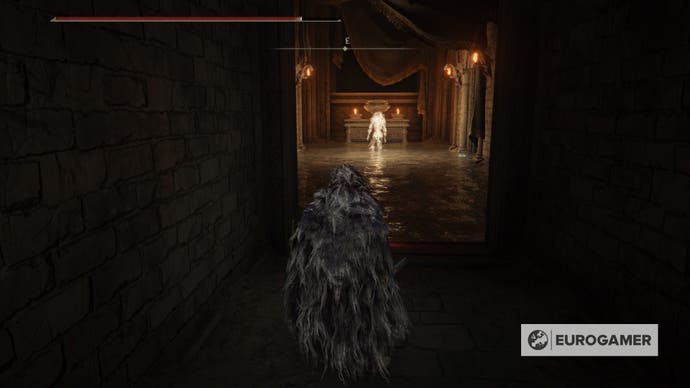
After defeating the enemies, you can loot the corpse for the Somberstone Miner's Bell Bearing [5]. We've also shown where this temple is located on the map below.
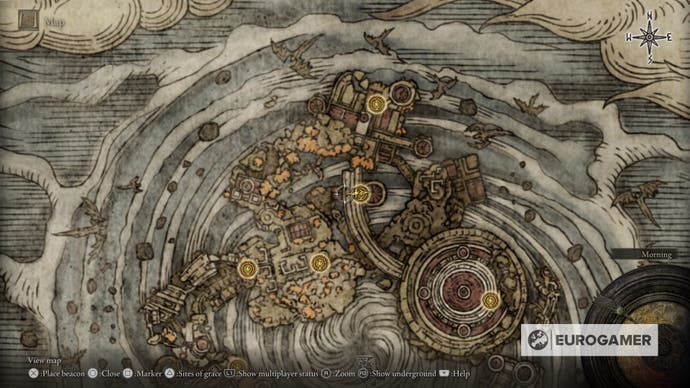
That's the location of every Bell Bearing and their relevant Smithing Stones, hopefully you now have much more powerful weapons to take on Elden Ring's biggest challenges!


_MEGHzTK.png?width=291&height=164&fit=crop&quality=80&format=jpg&auto=webp)
.png?width=291&height=164&fit=crop&quality=80&format=jpg&auto=webp)

-Teaser-Trailer-(Directors-Cut)-_-Short-Film-2025-0-24-screenshot.png?width=291&height=164&fit=crop&quality=80&format=jpg&auto=webp)
