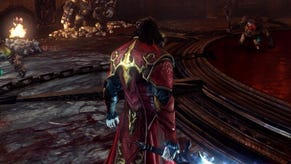
Castlevania: Lords of Shadow 2 - Defeat the Hooded Man walkthrough, kill Abaddon, kill Inner Dracula
Struggling with a boss fight? Use our essential guide to defeat the Hooden Man, Abaddon and Inner Dracula without even breaking a sweat.
There are three massive boss fights to contend with in this chapter of Lords of Shadow 2 - and the trash enemies won't give you an easy ride either. If you've come unstuck in this feisty chapter, take a look through our guide to taking down every last enemy in this section.
Defeat the Hooded Man walkthrough
First of all, kill every single enemy in the garage before activating your Mist Power and going through the gate to the other side. Use one of your Dungeon Keys at the end of this room, and offer your blood in exchange for a 2,000 experience point reward - nice. Get out of the hole and bear right, passing through the gate. If you head over to the furthest left-hand side of the garage, you'll be able to open up another Pain Box and boost your Chaos Gem collection.
Make your way back to the first garage you were in, and then travel towards the gate at the far end of it. Once again, activate your Mist Power to slip through it, then interact with the Memorial that's to your left. No go back and into the opening to your right, in the direction of your objective marker. Get inside the lift, take the ride, and then kill every last enemy when you exit it.
Go upstairs, clambering over the debris where necessary, then head right and go through the gate. There's an opening on the right-hand wall where you can find a Pain Box containing another Chaos Gem. Go back through the opening you just passed through, and carry on making your way along towards the right.
As soon as you reach the end of this section, jump down and kill all the creatures you encounter. Once they're all dead, make your way along the section ahead of you, then veer to the left to get up on the walkway above you. To your right you'll find another Pain Box, so open it up and take the Life Gem inside. Now go through the gate over on the opposite part of this section, and keep heading along the walkway.
When you come to the vent, use your Mist Power, then climb up the ladders to get to the next section above you. Kill the Riot Police you encounter here. You'll notice a metal walkway here with a Pain Box, but just make a mental note of the location for now - you'll be able to come back here when you unlock Dracula's final special power. Just go through the opening near the corner, then activate your Mist Power ability to float your way up towards the ladder. Once you've climbed the ladder, go through the door at the other end of the hallway.
Once you've gone through, leap down and then climb up the ladder that's in front of you. Don't pay any attention to the opening you can see on your left - that simply takes you back to where you were. Instead, go through the opening ahead of you to trigger a new cut-scene.
How to kill the Riot Mech
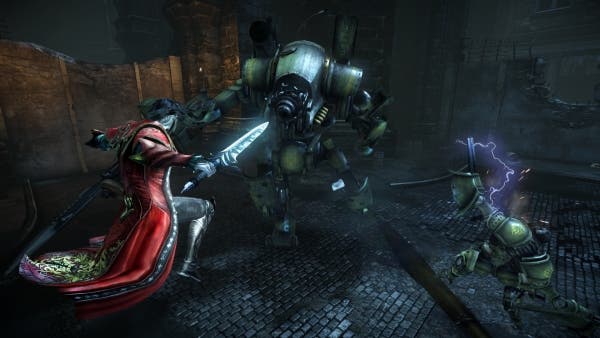
The next fight comes in the form of a handful of Riot Police and a deadly Riot Mech. Take on the Riot Mech first by activating your Chaos Claws, then firing Chaos Bombs until you've destroyed the Mech's outer armour. Eventually it will fire missiles, but they don't fall until around 10 seconds have gone by. Just be ready for them to hit and keep moving, dodging whenever necessary. Once the Mech's dead, polish off the Riot Police using the tactics we explained earlier on in this walkthrough.
Make your way through the opening that's on the far side from where you are, then get over the debris. If you turn around now, you'll see a a smashed-up ladder in front of you. Climb up to get to the section above you, then go through the door and interact with the lever to your right to get the power back on. Head through the door that's right at the end from where you are, then go to the right and inch your way between the sign you come across. There's a Memorial to your right that you can access, before going down the road to trigger a fresh cut-scene.
Kill every last zombie here, then keep heading in the direction of your map's objective marker. Keep heading down the street before slipping into the alley that's just to your right. Kill any enemies you encounter, then use your special Mist Power to get through the gate blocking the way ahead. To your right is another Memorial. Keep going past it, and then take a right to get back out onto the main road once more.
Keep travelling down the road, and go straight over at the intersection to get hold of another Chaos Gem from a Pain Box. Turn back the way you came, and take a right at the intersection you just passed. There's a hatch at the end of the road to your right. Go through it and then keep following the corridor until you come to a lever. Interact with it to turn the power back on.
Keep going through the hatch, go around the corner, and then make your way up and through the next hatch you come across. There are some enemies hanging around on the road nearby. Once you've killed them all, use your Chaos Claws on the ladder above you and to your left. If you're running out of magic power, head right and squeeze through the crack in the wall to enter an area where you can top it up.
Leave via the crack and then head to the right and kill the enemies. If you need to top your health up, walk down the street and pass through the gate on your right to get to the statue. You'll also find another Memorial at the left-hand side of the end of the road.
Now that you've got your hands on all the secrets, make your way back to the ladder and climb up it via the fire escape. As soon as you get inside, jump down so that you're on the ground floor, kill all the enemies nearby, and then access the Memorial in the corner of the room. Get back up on the platform and then jump across to the metal box that's hanging from the ceiling.
Leap over to the next box along, then jump towards the left-hand box, and then onto the platform just ahead of it. Now make your way onto the left-hand box, over to the next platform, and then climb up the ladder on your left to get to the upper platform. Now jump over onto the next hanging box you face, then jump onto the one on your right, and then finally drop down onto the platform below you and to the left.
There's a broken metal girder ahead of you. Leap over it, and then drop down using the ladder to your left. There's a Pain Box containing a Life Gem on the platform just below, but if you're not fussed about collecting it, just head straight up the ladder. Just be aware that if you collect this gem, you'll have to make it through the hanging box section all over again.
Once you've reached the top of the ladder, carry on up the stairs until you get to another ladder, and just keep making your way up until you end up on the roof. Kill all the enemies that attack you, then make your way through the door that's on the right-hand side of this roof area.
There's a lift shaft just to your right - jump down it, then grab a Void Gem from the Pain Box that's in the tiny area to your left. Keep heading down, then use your Mist Power to get through the gate you come to. Jump down again and sneak through the crack in the wall. Use one of your Dungeon Keys here for a handy 2,000 experience point reward.
Make your way back up to the rooftop, and note the broken railing over to the right. There's a Pain Box below that contains a Chaos Gem, but again, if you decide to go for it you're going to have to deal with the fiddly hanging box section all over again.
Go over to the very edge of the metal walkway, then lower the other section of the walkway using one of your Chaos Bombs. This'll trigger a cut-scene. When it's over, kill all of the enemies that appear, then freeze the waterfall ahead with a Void Projection. Climb up the frozen waterfall to get inside the building.
Kill all of the nearby enemies, and make a mental note of the yellow button on the wall that's flashing. This button activates a fan, but you need to get the electricity supply back on before you can push it.
Head to the left and go through the gate using your Mist Power. Now freeze the flames ahead of you by firing Void Projections. Go through the next gate you come across using your Mist Power, then activate the power supply using the left-hand button.
Go back to the flashing yellow button and interact with it to get the fan turning. Don't worry about the enemies here, just use your Mist Power to get to the next level. If you do choose to see off the enemies first, you'll likely have to go back and reactivate the power supply when it runs out.
There's a propane tank up here. Use your Chaos Bomb to start a cut-scene, then leap over the debris and jump down into the room that's beneath you. If you're low on health - and want to get your hands on another Kleidos - keep following the trail of the yellow glow, and go through the crack. Keep going down the corridor until you come to another crack - pass through it to find another power switch.
Once power's activated again, go outside and top up your health. Be ready for a fight against the Riot Police when you leave the garage. Kill them, ignore the waterfall this time around, and instead make your way up the electrical equipment on the other side. Go down the corridor until you come to a Pile of Sacrifice. Interact with it to get the Kleidos.
Climb up the other side of the building, and then go all the way along the roof until you find some rubble you can climb up. Head to the right and then jump down into the hallway below you. Walk down this hallway and then fall down the hole you come to. This is the room you started in.
Now interact with the level nearby to get the power on, walk up the stairs, and make your way into the next room. Jump down to the lowest floor you can, kill all of the enemies, and then go through the open doors. Just be aware that when you pass into the next room, you'll trigger a cut-scene which immediately precedes a boss fight against the mighty Abaddon.
How to kill Abaddon
You'll find this fight a good deal easier if you've got one or two of the Ensnared Demon relics about you, but with full Chaos and Void magic meters it should still be easy enough. If you do find yourself dropping low on either of these resources, just kill the enemies summoned by the Abaddon.
Keep your eyes peeled for the Abaddon's linear projectile assault, not to mention its stomping attack which causes a massive radial shockwave to appear. There are some sticky missiles it fires into the air too, although you shouldn't have too much trouble dodging away from these as they land. If you stick to magical attacks, you can maintain enough range to nullify much of the enemy's damage.
Take note of the green, glowing part of Abaddon and fling your Chaos Bombs at it. Once you've exhausted two to three meters' worth of magic, the boss will fall. Void Projections also work, but they do less damage so it'll take longer. Use your Chaos Bombs wisely and you can pretty much ignore the weaker enemies and focus on killing Abaddon.
How about if you're out of magic completely? Use your whip at maximum range and focus on the same chest area of the Abaddon. You can top your magic up by killing the enemies that spawn, then use that magic to inflict much greater damage against the boss.
Be ready to complete a QTE when the Abaddon gets close to falling. If you mess it up, you'll be sent back to the point just before you delivered the pre-killing blow. Not a big deal, but annoying nevertheless.
Once the Abaddon's dead, make your way through the floor and then jump onto the rubble to get to the corridor above. Now go through the door to the left of the hallway to get back inside the library. There's an item here for your collection, but you can't acquire it until you've unlocked Dracula's final ability.
Ignore it for now and head straight down the hallway, then go left through the next room. There's a Memorial to the left of the room - grab it, then go back and use the power switch that's on your right. Doing so will open up a door on the opposite side of this area.
Go through that door until you're in the wide open space again, and finish the fight against the Riot Police and Mechs. Take the Police down first so you can handle the Mechs individually. Now go down to the far end of the rood to get a Void Gem from a Pain Box. You'll be attacked by another Mech on your way to the Pain Box, so be ready to fight him.
Make your way back down the road again and climb up the right-hand side. Head to the left, then climb up again to get to the platform above you. Jump down into the section below you, then climb your way up onto the next platform. Keep climbing up the wall, and then through the window to get another Chaos Gem from a Pain Box.
Jump all the way back down and then get out onto the road. Look for a marble pillar with a light post nearby. Make your way up the pillar, and then head to the left as you follow a purple trail. As soon as you get to the balcony, jump over the edge and towards the platform that's ahead of you. Swing your way over to the left, then jump across and into the interior of the building.
Go down the hall and then jump down into the bottom section as soon as you come to the stairway. Activate your Mist Power to slide through the gate, and then walk forward. As soon as the next cut-scene ends, it's time to face off against The Hooded Man.
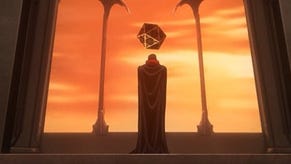
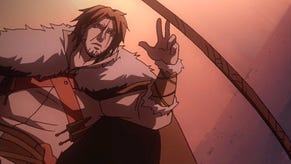
How to kill The Hooded Man (Victor Belmont)
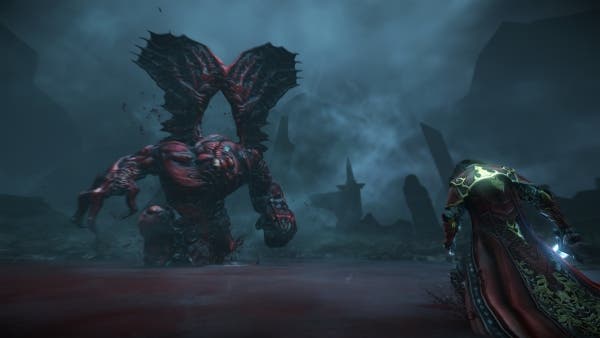
As soon as the fight begins, you'll lose access to any relics you have - as well as your magical powers. We recommend making use of your upgraded Guillotine ability here, as it allows you to stay up in the air while attacking him, before assaulting him with a massive amount of damage when you hit the ground. This, combined with some deft dodging of your opponent's attacks, simplifies this fight considerably.
After you've thrown a decent amount of damage Victor's way, the floor beneath you will collapse. Once you're on the lower floor, you can make use of your magical powers once again. Stay close to your opponent and counter-attack each attack he makes at you. If you're not quite so nimble, use your Sustained Whip attack to make things a little easier.
Be alert if your opponent counters any of your own attacks. Jump and dodge out of the way as soon as this happens to avoid the vicious assault that's coming. When he jumps in the air, get ready to follow him, otherwise you'll be hit by the fiery shockwave he blasts out as he lands.
Beyond these general attacks, you need to be mindful of the silver projectile that he occasionally fires - he telegraphs this attack by announcing it, helpfully. Evade the first shot by jumping, but get ready to drop down to avoid the second shot that'll come at your elevated position soon after.
At a certain point, the Hooded Man will drop a rock on the floor which causes him to expand massively. From now on, stay at range from him and focus on the stones that appear all around this area - just keep your camera focused on the boss so you can avoid his attacks. Once you've smashed up all the stones, you'll have to successfully complete a QTE to end the fight.
Once the cut-scene's finished playing, make your way up the stairs and follow the corner around to the right. Drop down to activate the power for the access panel that's ahead of you. Dart through the door and then jump your way to the nearby ladder. Climb it, move to the middle of the walkway, then float along to the next platform beneath you using your Mist Power.
There's a pillar to your right which you need to climb, before making your way over to where Victor awaits. Activate the lift ahead of you, then kill all of the enemies that spawn when the cut-scene's finished. Kill the Horned Demon first, and let the Lieutenant and Victor handle the smaller monsters. The Horned Demon fights a bit like the Abaddon did, but you'll want to stick to using your Shadow Whip at range, rather than your magic. Jump in the air to avoid the worst of the ground-based attacks.
When all the enemies are dead you'll be treated to another cut-scene. Then it's time for a fun fight with Inner Dracula.
How to kill Inner Dracula
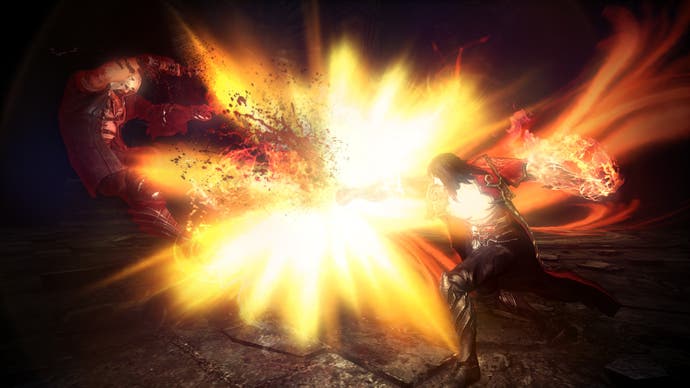
Quality dodging is the key to winning this fight. He'll come at you with a series of vertical and horizontal swipes which you need to avoid. Head left or right for the majority of his attacks, but be ready to dodge backwards from the horizontal swings.
Make sure you jump in the air when his unblockable attack comes, as the shockwave he delivers to the ground can't be avoided unless you're airborne. You'll also need to deal with a similar shockwave when Inner Dracula leaps into the air. When he lands back down on the ground, he'll smash it hard.
Once you've dealt a certain amount of damage you'll need to complete a QTE, one which grants Dracula the ability to fly. As you can imagine, this makes dodging the shockwave damage much easier, but for the most part the tactics remain the same. Just keep dishing out damage to move this fight onto the next phase.
When the next phase comes, Dracula will lose his shell. Make sure you dodge his projectiles, as he now has the ability to suck the life from you with them. Keep moving and use your Chaos Bombs against Inner Dracula's head. Eventually he'll switch back to his original form, complete with a topped up health meter. Boooo.
You'll have to fight the proper Inner Dracula form several times before he dies, but watch out for the new abilities he gains throughout the fight. Remain too close to him and he'll inflict a spike attack at anything near him. If he puts a fist into the ground, you must dodge the blood trail that follows you around. Use your Shadow Whip from the air to keep damaging him when this happens.
In general, stick to ranged attacks - and stay in the air wherever possible - and you shouldn't have too much difficulty finishing him off. You'll only be able to properly kill off Inner Dracula once the health bar of his other form has been fully depleted though.
You can find the rest of our Lords of Shadow 2 puzzle guides from the first page of this walkthrough.


