Honkai Star Rail beginner guide with tips and tricks
Explainers and guides for new and returning players.
Our Honkai Star Rail beginner's guide is for anybody looking to join the Astral Express crew and start your Trailblazing journey across the stars, but doesn't know where to start, or needs explainers on one of the gacha game's many features.
Whether you're a new or returning player, we've covered all of the essential Honkai: Star Rail information below, including tips and tricks, and explainers to refer back to if you want more detailed information on gameplay features and systems.
When you're more familiar with its ever-expanding universe, then we also recommend regularly checking our ongoing character tier list, banner schedule, and codes pages.
On this page:
- What is Honkai Star Rail?
- What to do first in Star Rail
- What to do frdaily in Star Rail
- Honkai Star Rail's regular update schedule
- How to get characters
- How to level up characters
- Relics and Planar Ornaments explained
- Stellar Jade explained
- Battle Pass explained
- Trailblaze Rank and Equilibrium Level explained
- Trailblaze and Companion Missions explained
- Events and Conventional Memoir explained
- Trailblaze Power and Fuel explained
- Forgotten Hall and Memory of Chaos explained
- Simulated Universe explained
- Tips, tricks, and things we wish we knew before starting
- List of all our Star Rail guides
Essential information:
Explainers:
Tips and other guides:
What is Honkai Star Rail?
Honkai: Star Rail is the newest free-to-play live service game from Genshin Impact and Honkai Impact 3rd developer, HoYoverse, that is available on PC, mobile, and PS5. It has a futuristic setting that sees you travel to different planets and settlements in a very convenient space train, the Astral Express.
As for the gameplay, it's entirely different to anything HoYoverse has done before, as Star Rail has a turn-based combat system - but with some modern improvements, such as auto-battle and the ability to fast-forward during combat.
The rest of the gameplay resembles Genshin Impact more than Honkai Impact 3rd, involving travelling to specific locations to battle enemies for gear and resources. However, this has been streamlined when compared to Genshin Impact, as Star Rail lets you transport right to a fight's location, queue up multiple resource farming fights at once, and even has a system for creating gear with the main stats you want.
For more information on what it's like to play, you can check out our Honkai Star Rail review.
What to do first in Honkai Star Rail
If you're just starting out your journey in Star Rail, we suggest playing through as much of the story as you can first (this is called the Trailblaze Mission), until you complete the 'Long Wait for the Blade's Edge' part of the 'In the Withering Wintry Night' Trailblazer Mission, as this is when Daily Training unlocks. This the second major Trailblaze storyline, set on the snowy planet of Jarilo-VI.
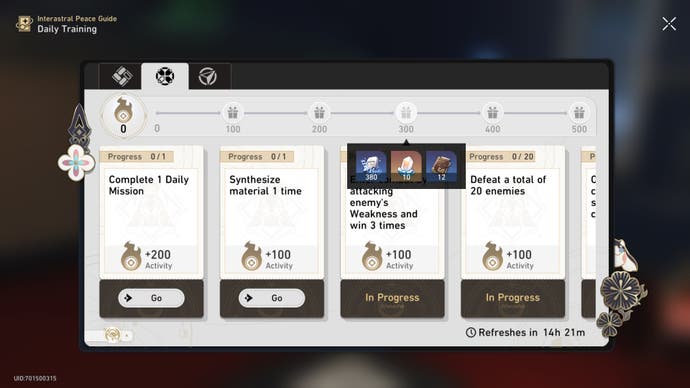
Completing Activities for the Daily Training system is your daily source of Stellar Jade, the primary currency used to buy Star Rail Passes, which are used for rolling for new characters or Light Cones (weapons) through the gacha system. Daily Training is also a source of Trailblaze EXP, which is needed to raise your Trailblaze Level in order to take part in main story missions and limited-time events.
Opening any treasure chests and fighting Warp Trotters you find along the way is also recommended, as both of these optional activities give you Stellar Jade.
What to do daily in Honkai Star Rail
We've got more information on what these activities mean below, but in general here's everything you should do daily in Honkai Star Rail:
- Daily Training
- Assignments
- Spend Trailblaze Power
- Battle Pass challenges
- Logging in to HoYoLAB for free rewards
Apart from HoYoLAB rewards and Trailblaze Power (which replenishes once every six minutes), the rest of these daily activities reset at 4am (server time) every day.
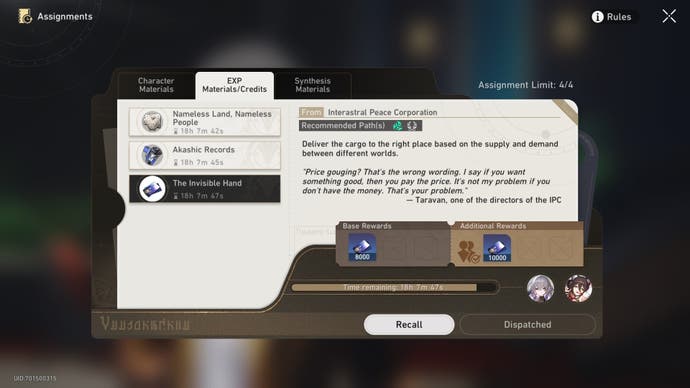
You don't have to do all of these activities in one day, but if you want to make sure you're not missing out on any rewards, you should aim to do most of them. If you want to save time, then we recommend you drop spending Trailblaze Power. You won't be missing out so much now that Reserved Trailblaze Power has been added, as it stores your unused Trailblaze Power, but at a slower rate than the regular variety.
Honkai Star Rail's regular update schedule
Honkai Star Rail is pretty good for consistently sticking to a regular update schedule. Since its release in April 2023, there has been a new named update every six weeks.
This update comes with a number like 1.3 or 1.4, resetting the battle pass, adding new quests, and occasionally new features - like Reserved Trailblaze Power and phone wallpapers.
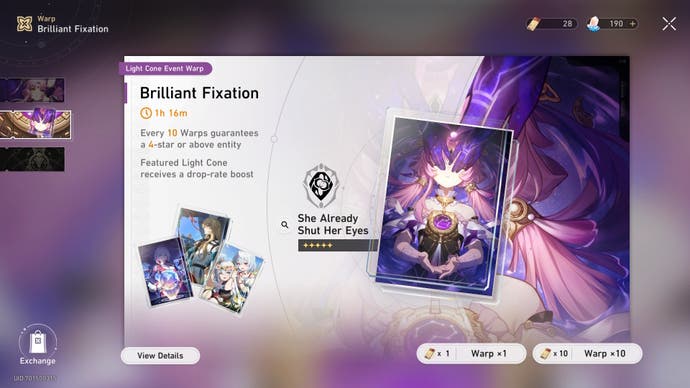
Usually, every three weeks there is a Banner change that replaces the featured character and Light Cone Banners. These featured Banners mean you have a higher chance of getting the 5-Star and 4-Star characters and weapons featured on them. The 5-Star weapon and character on these revolving Banners can only be obtained by spending your in-game currency on their specific limited-time Banner, as the regular variety has a set pool that only adds new 4-Star characters and weapons.
These event Banners will eventually come back around though, so don't worry too much if you don't get the 5-Star you wanted.
With each update, there are limited-time events. How many, and how long they last for, varies, but all of them end before the new version update. Some events are replayable through the Conventional Memoir tab of the events menu, but they don't dish out at many important rewards, like Stellar Jade and free characters.
So, make sure you complete all that you can before each event's end date, and spend any event currency in the special shops that pop up during some of the more unique events.
You can jump ahead to our tips and tricks section now, or continue reading for more detailed explainers below.
How to get characters in Honkai Star Rail
You get Dan Heng, March 7th, Herta, Asta, and Natasha for free by completing main quests and taking part in the Simulated Universe, but the main source of getting characters in Honkai Star Rail is by using Star Passes to Warp on Banners as part of a gacha system. While you can spend real money to get Stellar Jade to buy regular and Special Passes, there are plenty of ways to get free Stellar Jade by just playing the game.
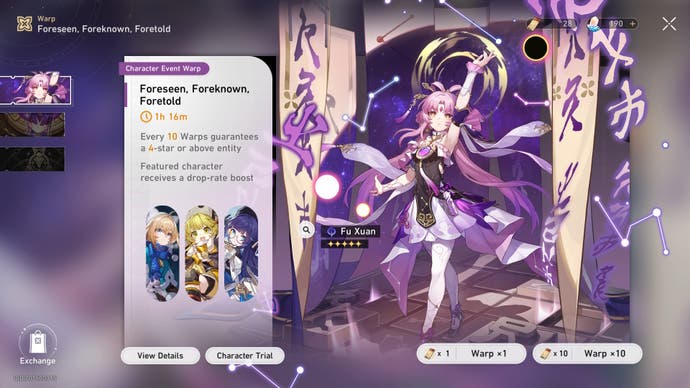
To unlock Banners and the ability to Warp on them in Honkai Star Rail, you need to complete the 'A Moment of Peace' part of the 'Today Is Yesterday's Tomorrow' Trailblaze Mission Prologue on Herta Space Station.
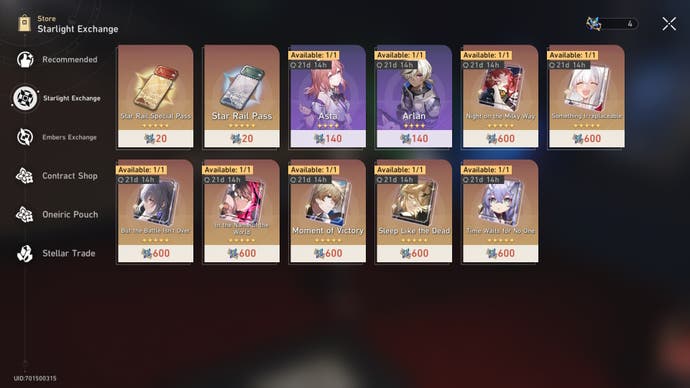
You can also occasionally get a 4-Star character for free as part of limited-time events, and you can save up to buy 4-Star characters from the in-game shop by using your Undying Starlight currency - but this currency is only obtainable by Warping on Banners anyway.
Banners may seem complicated and overwhelming at first, but if you want to know more, we've got full explainers on how getting new characters works in our dedicated Banner, and Star Passes, pages.
In short though, our three main tips for Banners in Star Rail are:
- Spend your regular Star Passes on the Beginner's Banner first.
- Always convert your Stellar Jade to Special Star Passes in the shop, not the regular Passes.
- Prepare to lose the dreaded 50/50 and save up enough Stellar Jade for two guaranteed 5-Star pulls to get characters you really want.
The 50/50 means you only have a 50% chance to get the featured 5-Star character on a limited-time Banner. As it takes 90 Special Star Passes to guarantee a 5-Star pull on a character Banner, this means you need to save 180 Special Star Passes just in case you lose the 50/50.
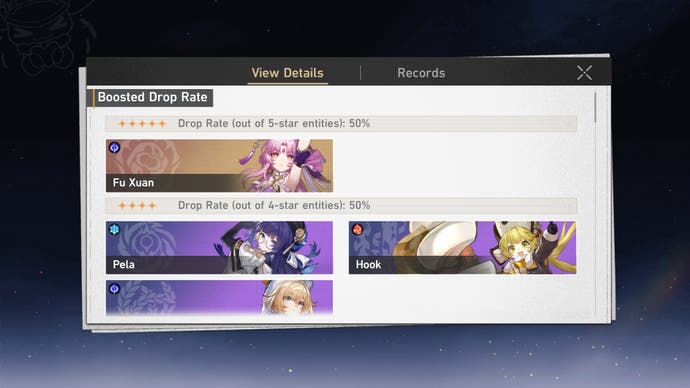
The only good news to this needlessly complicated system is that you are 100% guaranteed to get the featured 5-Star the second time you pull a 5-Star character or Light Cone on the same Banner.
You're very unlucky if it takes 180 pulls to get the character you want, but it's best to be prepared for if your luck does take a turn for the worse if you're Warping for a character you really want to add to your collection.
How to level up characters in Honkai Star Rail
There are technically two ways to level up your characters in Honkai Star Rail, but you should only really use one of them. While you can raise a character's EXP by defeating enemies, it's a ridiculously low amount compared to the best method.
The best way to level up characters in Honkai Star Rail is to use Character EXP materials called Travel Encounters, Adventure Log, and Traveler's Guide.
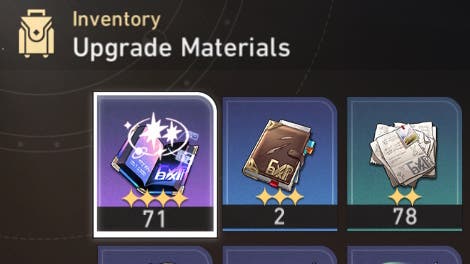
Here's how much EXP you get from using one of each:
- Travel Encounters - 1,000 EXP
- Adventure Log - 5,000 EXP
- Traveler's Guide - 20,000 EXP
These EXP materials are usually rewarded in limited-time events, but you can also get them from playing the game, most notably by farming the Bud of Memories Golden Calyx. You can also get them by completing activities like quests and opening treasure chests.
Be on the lookout for Garden of Plenty event periods, as you earn double Golden and Crimson Calyx drops while they're running.
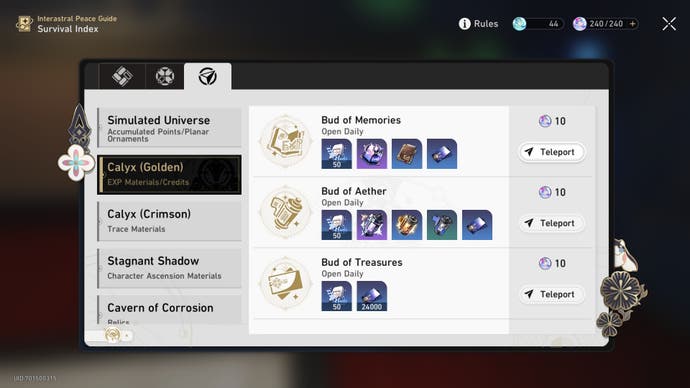
To use character EXP materials, you need to go to the character menu, choose the character you want to improve, then select what materials you want to use, or auto-fill, and hit 'Level Up'. It costs 1 Credit for every 10 EXP gained.
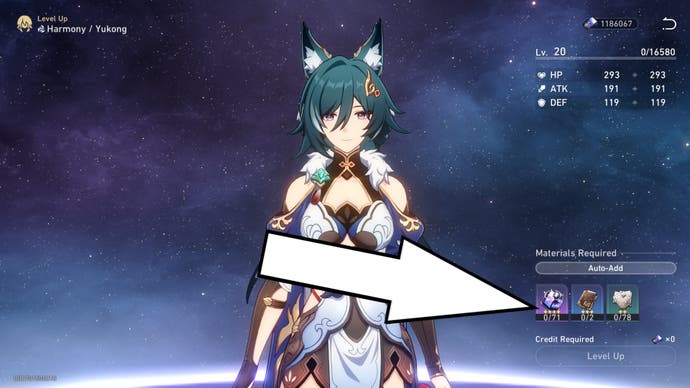
Every 10 levels after Level 20, however, you need to Ascend a character before you can level them up any further. Every character needs different types of Ascension materials, which range from items dropped from defeating regular enemies in the wild, obtained from Assignments, and special materials found in Stagnant Shadows.
Level 80 is the maximum for every character in Star Rail, but not everyone needs to be maxed out to be effective in your team. Save those resources unless you really need them!
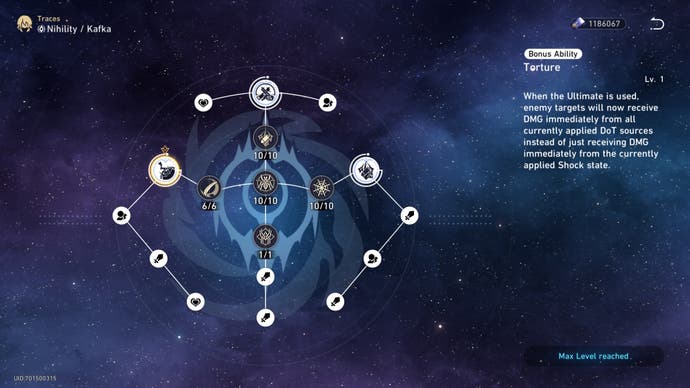
Finally, to make your characters the best they can be, you need to improve their Traces. These upgrade Basic, Skill, and Ultimate abilities, as well as unlock special bonus abilities and stat upgrades. They take materials dropped by enemies, bosses, Tracks of Destiny, and Credits to upgrade. However, you don't need to upgrade every Trace to its maximum, especially Basic Attacks. If that character rarely uses a certain attack or attribute, there's really no point in wasting valuable resources on it.
Relics and Planar Ornaments in Honkai Star Rail explained
Relics are equipable items you give characters to raise their stats, but they also have bonus effects if you equip them as 2-piece and 4-piece sets. You're not locked out of equipping certain Relics if they aren't meant for a certain type of character, which can make the system a little overwhelming for beginners.
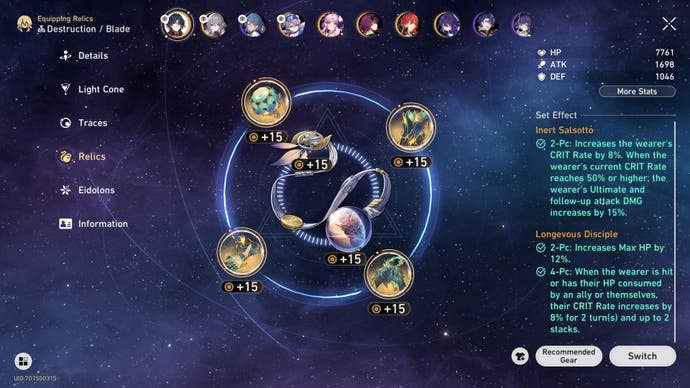
At the beginning, you should focus on trying to equip 2-piece or 4-piece Relic sets on your characters and not worry too much about the main and sub stats. You'll only have lower rarity sets near the start, but that's perfectly fine for the level of enemies you'll be up against at this point.
If you do have a lot of repeats, that's the point where you should pay attention to the main and sub stat numbers. These stats raise your raw attack, health, critical hit, healing, Energy Recharge, speed, Effect Hit Rate, and Break Effect capabilities. Each character should ideally prioritise stats that are relevant to the build you're running on them.
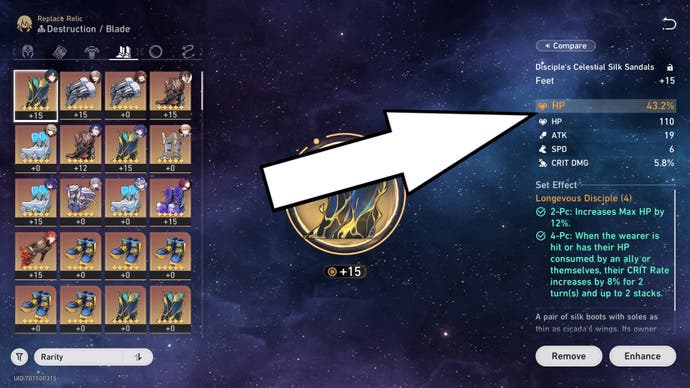
For example, getting the Outgoing Healing Boost main stat on a piece of the Passerby of Wandering Cloud Relic set would be ideal if you're looking to boost the healing stats for an Abundance character in your party.
Planar Ornaments are exactly the same as Relics, except they are farmed in the Simulated Universe, and they only have 2-piece bonuses, as you can only equip two on a character.
With all that said, you can almost ignore Relics and Planar Ornaments at the beginning of the game. When you play more, and the enemy encounters become tougher, that's when you should aim to get better equipment by farming the Cavern of Corrosion and the Simulated Universe for your characters.
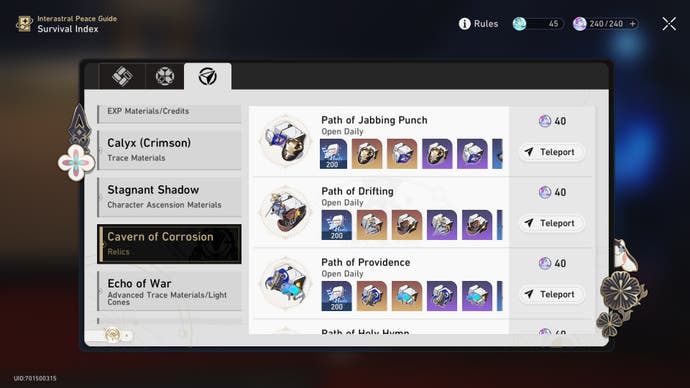
You can also get more Relics by searching chests, buying them from each area's main shop, completing quests, raising Trailblaze Level, and completing tasks from the Operations Briefing menu. The best way to get good Relics in Honkai Star Rail, however, is to farm the Cavern of Corrosions.
During Realm of the Strange event periods, you get double drops for farming Relics at Cavern of Corrosions, and during Planar Fissure event event periods, you get double drops for farming Planar Ornaments. So make sure to take advantage of these special periods when you can!
Lastly, if you want to make a custom Relic, you can use a Self-Modeling Resin. These are rare, so don't use them all the time, but if you're sick of farming, they are incredibly useful. The only downside is that you can only choose your main stat, not the substats.
Stellar Jade in Honkai Star Rail explained
Stellar Jade is the rarest and most sought after currency in Honkai Star Rail, as it's what you need to exchange for Warps (Star Rail Passes) to get characters as part of the gacha Banner system. You can also use them to buy Fuel, but we recommend only using Stellar Jade for buying Star Passes if you want a mostly free-to-play experience.
The good news is that almost every activity in Honkai Star Rail rewards Stellar Jade, and there are login events that reward Stellar Jade or Passes every patch. However, it does take a while to save up enough Stellar Jade to guarantee a character. Limited-time events, Conventional Memoir Events, Daily Training, and redeeming codes are some of the best ways to consistently get Stellar Jade.
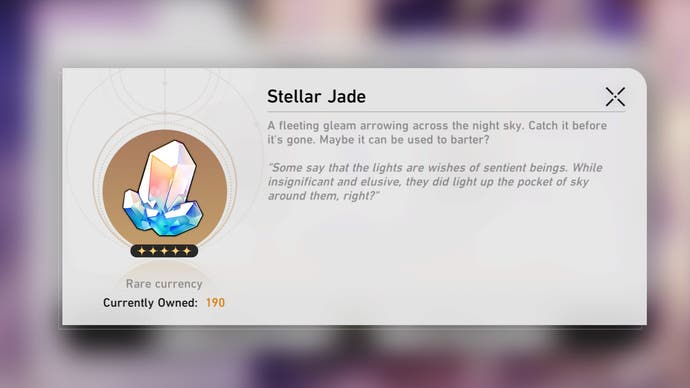
Some other unique ways to get Stellar Jade include defeating Warp Trotters, texting back characters, talking to characters on the Astral Express, and purchasing items from World Shops with its special currency.
Check out our dedicated Stellar Jade page for a more detailed explanation on how to get Stellar Jade in Honkai Star Rail.
Battle Pass in Honkai Star Rail explained
The Battle Pass (Nameless Honor) is an entirely optional feature that rewards you for completing daily, weekly, and event tasks. It's unlocked after completing 'Long Wait for the Blade's Edge', the seventh part of the Chapter 1 Trailblaze Mission 'In the Withering Wintry Night'.
There is a free track (Nameless Gift), a premium track (Nameless Glory), and a premium boost package (Nameless Medal). The Nameless Medal upgrade is just like the Nameless Glory premium track unlock, but you also get an instant boost of 10 Battle Pass levels, exclusive profile pictures, and slightly more Stellar Jade and Fuel.
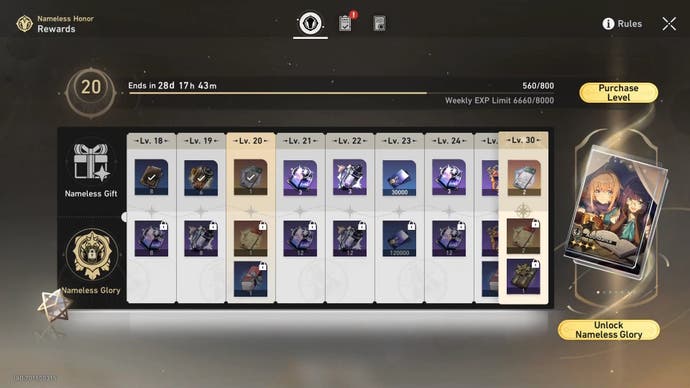
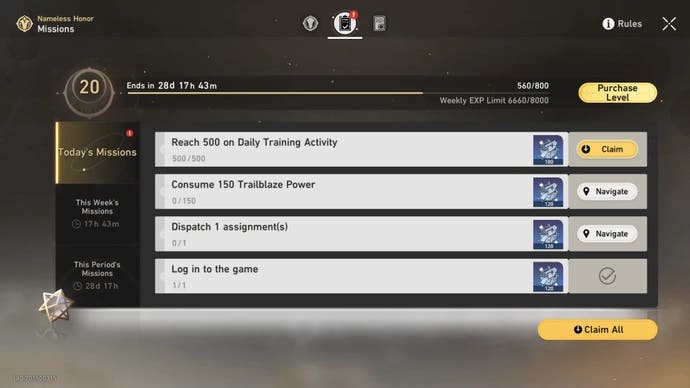
You can get a wide range of items and materials from the each level of the free and premium Battle Passes, including Star Rail Passes, Character and Light Cone EXP materials, Credits, Stellar Jade, Self-Modeling Resin, character and Light Cone Ascension materials, and a choice between five 4-Star Light Cones on the premium tier.
There are 50 levels on both the free and premium tracks, but you only need to reach Level 30 on the premium track to pick your Light Cone.
With all that said, the Battle Pass in Honkai: Star Rail is not an essential part of the game. It's basically just a nice optional bonus to anybody who plays regularly, and every reward (except the premium Light Cones and profile pictures) can also be earned by playing the game.
Just make sure to claim all your free rewards before each Battle Pass period ends! This usually happens a couple of days before the next patch.
Trailblaze Level and Equilibrium Level in Honkai Star Rail explained
We have a more detailed explanation in our dedicated Trailblaze Level page, but in summary, Trailblaze Rank is your entry level to start missions and events, and Equilibrium Level determines how difficult the enemies are. A higher Equilibrium Level also unlocks higher levels of Calyxes, Stagnant Shadows, and Echoes of War, and winning these battles at higher levels gives you better rewards.
Trailblaze Level currently stops at Level 70, but most events only need you to be between Level 20 and 30 for higher-level content, if indeed they have a Trailblaze Level requirement at all. You will, however, often be locked out of Trailblaze Missions until you reach the required Trailblaze Level.
You can visit Pom Pom for rewards on the Astral Express every time you gain a Trailblaze Level, but you can't claim Trailblaze rewards after levelling up unless you're at the right Equilibrium Level.
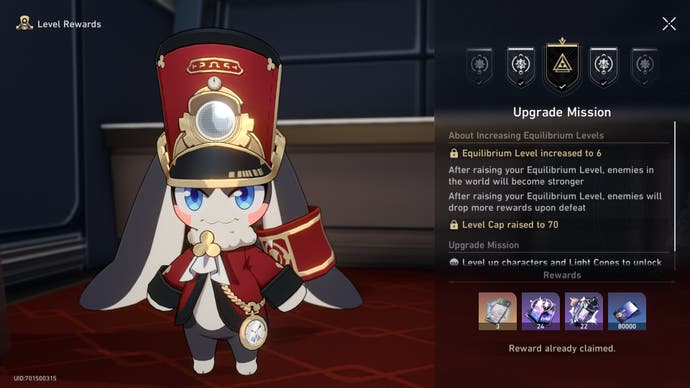
When you get to a high enough Trailblaze Rank, you have to complete an Equilibrium Trial to test and see if you're ready to increase your Equilibrium Level. It's not recommended to do this until you're sure you want to take on higher-level enemies. It will eventually become unavoidable, though, as you can't climb Trailblaze Levels until you complete the next Equilibrium Trial.
As long as you bring along a half decent team who are built correctly, Equilibrium Trials won't be too much of a challenge for you. They even get easier at later levels, as you have had more time to build your teams properly.
Trailblaze and Companion Missions in Honkai Star Rail explained
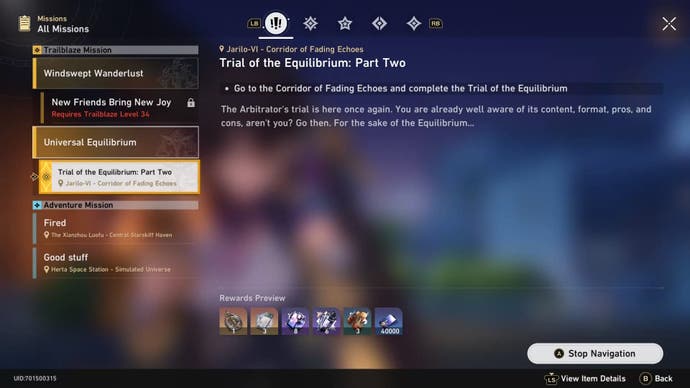
Trailblaze Missions are your main storyline quests, and Companion Missions are character-specific quests.
Trailblaze Missions progress the Astral Express crew's starward journey to find and contain Stellarons. They're broken down into Chapters, with the Prologue taking place on Herta Space Station, and Continuance Missions taking place in between main Chapters, returning you to past locations.

Companion Missions let you dive deeper into a character's past, present, or future, giving you a deeper understanding of their backstory and character. Unlocking Companion Missions requires a mix of progressing with the Trailblaze Mission story and reaching the right Trailblaze Level.
Some characters only have one Companion Mission, while others have two or more. Once you complete the required part of a Companion's Mission chain, they occasionally show up on the Astral Express, and you can talk to them for some bonus Stellar Jade.
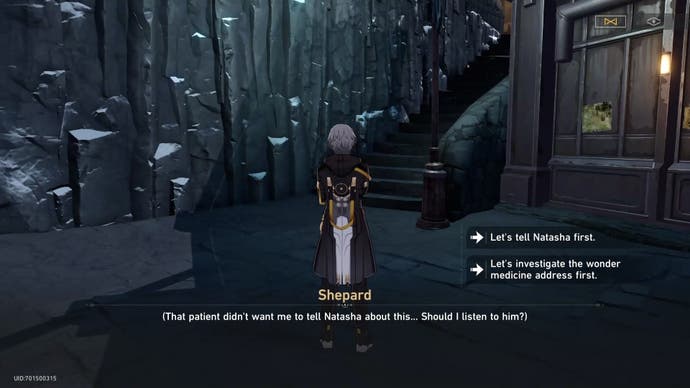
Companion Missions also contain story choices occasionally, and it's important to note that once you've made a decision, it's permanent. You can't go back and make different choices once the game has saved your decision. This hasn't changed anything drastic for us yet, but it very well might in the future, so choose wisely!
Events and Conventional Memoir in Honkai Star Rail explained
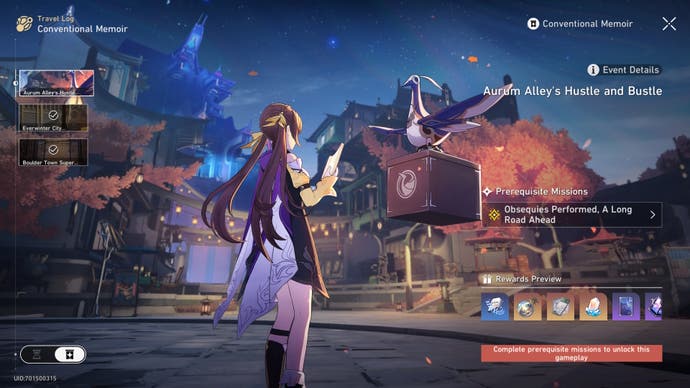
Events refer to either time-limited quests regularly added to Honkai Star Rail, or permanent reruns of old time-limited quests that have reduced rewards. These rerun events are stored in the Conventional Memoir section of the main events menu.
Events always have Trailblaze Mission completion requirements, and some also have Trailblaze Level requirements. For example, if an event takes place on the Xianzhou Luofu, you are required to have at least reached this area as part of the story. However, with Conventional Memoir, you won't miss out on any key story or character moments if they occur during an event, as you can just play through it later.
However, if you meet the requirements, we recommend participating in every event that you can when they initially run. Events are a great source of Stellar Jade, character materials, Credits, and sometimes even offer free 4-Star characters and Light Cones.
Trailblaze Power and Fuel in Honkai Star Rail explained
Wondering what those two orb currencies above your map are? These pinkish and greenish orbs are Trailblaze Power and Reserved Trailblaze Power, respectively, and they are the currency you use in exchange for claiming rewards from Calyxes, Stagnant Shadows, Cavern of Corrosions, and Echoes of War. These challenges are where you get Light Cone and character materials, Relics, and Credits. You also have the option of using Trailblaze Power in the Simulated Universe to get reward that include Planar Ornaments.
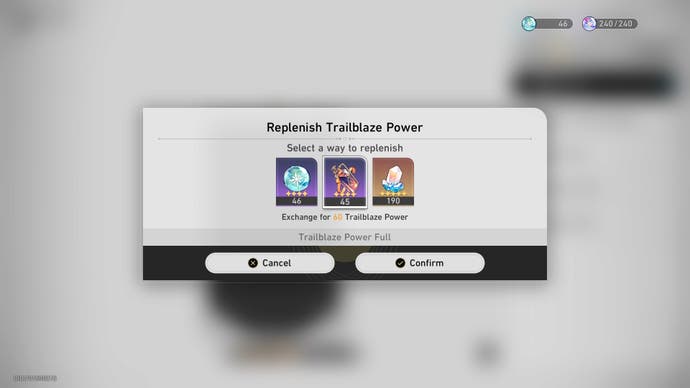
Regular Trailblaze Power replenishes every day at a rate of one every six minutes, capping out at 240. Fuel is a consumable item that can be used to instantly replenish 60 Trailblaze Power, which can go past the 240 cap. We recommend saving Fuel for when you really need to quickly level up characters, but it's up to you!
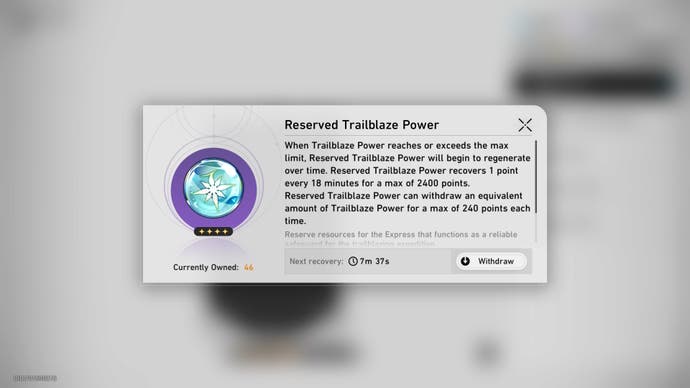
Reserved Trailblazer Power lets you store unused Trailblaze Power up to the maximum of 2,400. When you reach the cap of 240 regular pinkish Trailblaze Power, it then spills over into these greenish orbs of Reserved Trailblaze Power at a reduced rate of one Reserved Trailblazer Power every 18 minutes.
So, it's worth spending your ordinary Trailblaze Power as often as you can if you regularly play Star Rail, but you won't be missing out on too much farming time if you decide to take a break, as it takes a whole month for your Reserved Trailblaze Power to reach its max cap!
Forgotten Hall and Memory of Chaos in Honkai Star Rail explained
If you don't care about optional combat challenges, then you can completely ignore the Forgotten Hall and Memory of Chaos, unless you want some extra Stellar Jade, unique Light Cones, an interesting combat challenge, or the occasional free 4-Star character. None of these rewards are essential, however, so if you don't like Star Rail's combat, it's more than okay to ignore the Forgotten Hall.
The Forgotten Hall is unlocked after completing the Adventure Mission side quest 'Fleeting Lights', which is obtained by reaching Trailblaze Level 21. Once you complete this mission, the Forgotten Hall is accessed from the cracked standing mirror in the main car of the Astral Express.
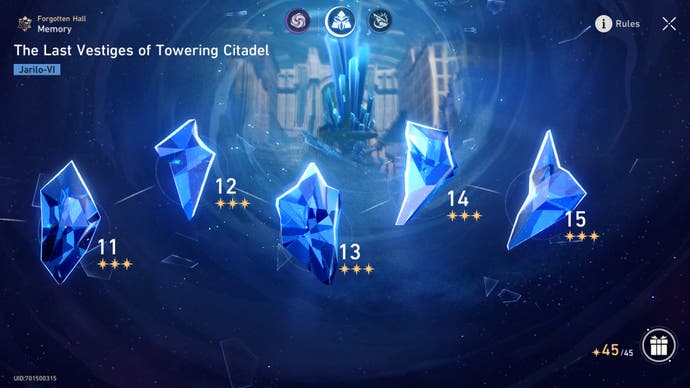
Every Forgotten Hall challenge is the same: defeat all enemies in a stage without any characters dying within a set number of turns. You get zero, one, two, or three stars, depending on how well you do in each stage. Zero stars are earned by completing the battle before the maximum number of turns with at least one downed party member. This means you don't need any stars to progress to the next stage! Simply surviving will do. However, the more stars you have, the more rewards you get.
There are two types of Forgotten Hall paths: Memory and Memory of Chaos. Memories are the blue coloured paths, and are permanent, fixed combat challenges that you can only earn rewards from once. Additional Memories have been added as part of new patches, so there should be more to come.
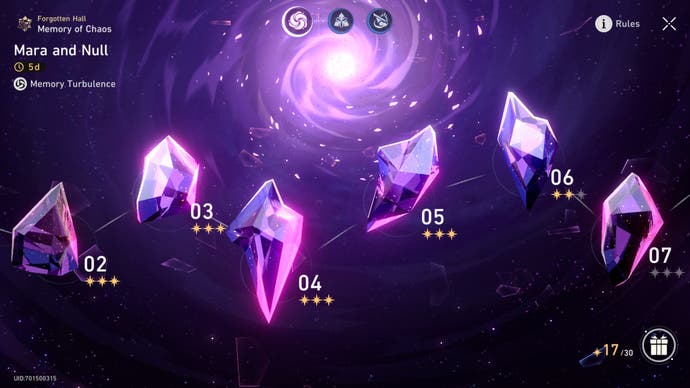
Memory of Chaos is the pink coloured path, and its challenges are refreshed every few weeks with new enemies and combat modifiers. These modifiers usually benefit the featured Banner character currently in rotation the most, but you don't need them to earn three stars in every stage.
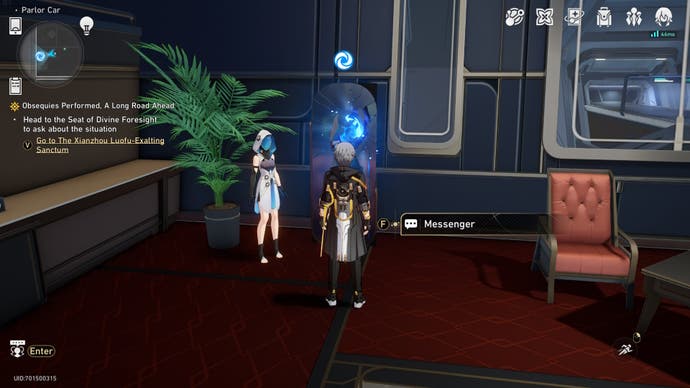
Lastly, you can speak with the Messenger beside the Forgotten Hall mirror to spend Lucent Afterglow currency in exchange for unique 4-Star weapons. Lucent Afterglow is one of the rewards you get for completing stages in the Forgotten Hall.
Simulated Universe in Honkai Star Rail explained
The Simulated Universe is another optional activity that you can consider occasionally ignoring, but it is the only way to get Planar Ornaments, has its own story to experience, and tends to feature in events a lot. The good news is that it's not as hard as the Forgotten Hall, as you can clear its 'Worlds' on lower difficulties to get Planar Ornaments, and obtain buffs during the gameplay that greatly increase your combat capabilities.
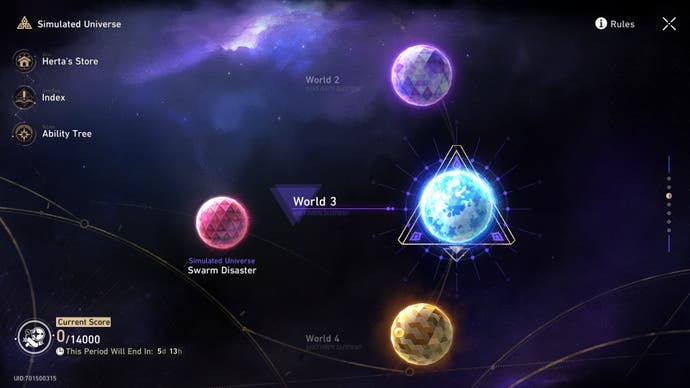
These buffs come in two forms: Blessings and Curios. Blessings are obtained by killing enemies or taking part in 'Events' in the Simulated Universe, and you get Curios by defeating Elite enemies, and taking part in the same Simulated Universe Events. These events sometimes give you the option of picking between Curios, Blessings, and Cosmic Fragments, with Cosmic Fragments being the currency you use to upgrade your Blessings.
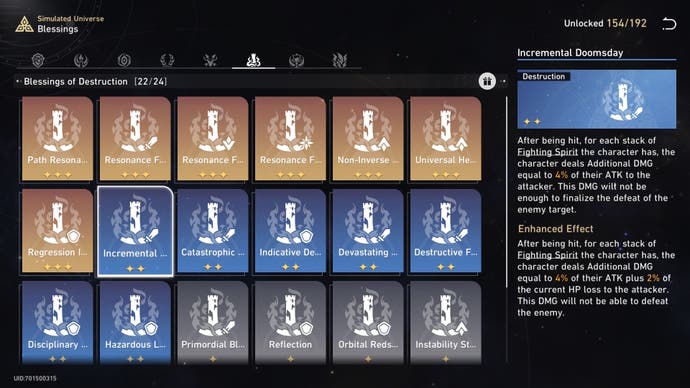
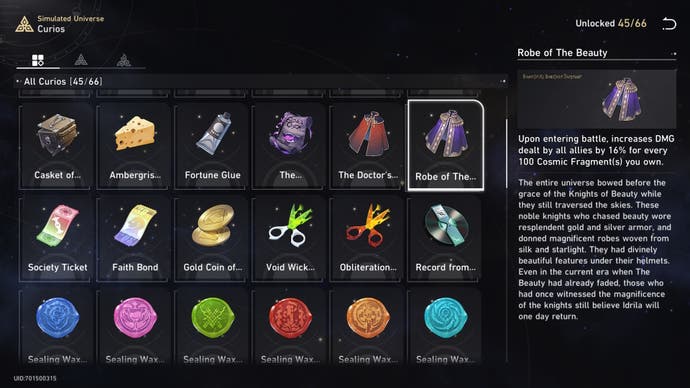
In short, the Simulated Universe is a roguelike combat mode, as your Blessings, Curios, and Cosmic Fragments don't carry over to each new run. You do have a permanent Ability Tree, however, that you can invest points into to improve your combat prowess.
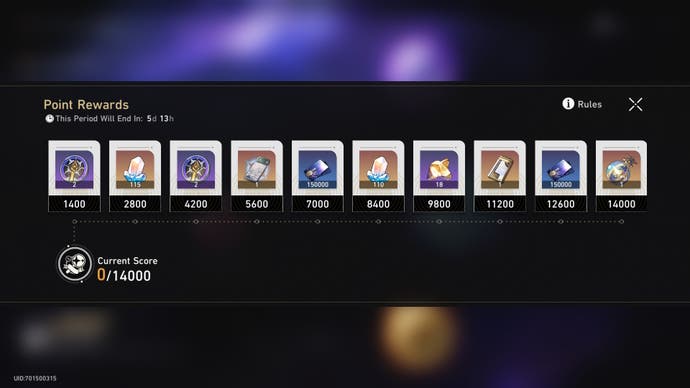
The main appeal of the Simulated Universe is to farm Planar Ornaments, but there are also weekly rewards you get for playing through enough Worlds and earning points. The higher your Equilibrium Level, the better your rewards. These weekly Simulated Universe rewards can include:
- Regular Star Rail Passes
- Stellar Jade
- Credits
- Lost Gold Fragments
- Tracks of Destiny
- Immersifiers
- Herta Bonds
Immersifiers can be exchanged for Planar Ornaments while playing the Simulated Universe, and Herta Bonds can be spent in the Simulated Universe's shop, called Herta's Store, in exchange for regular Star Rail Passes and unique 5-Star Light Cones and their Superimpossions.
Honkai Star Rail tips and tricks
There are some things good to know that aren’t as essential as the explainers we have above, but will make your time aboard the Astral Express a lot easier, especially at the beginning of the game.
Here's some tips and tricks for Honkai Star Rail that we wish we knew before starting:
- Use HoYoLab site or app - You can log in daily or complete special online activities for free rewards like Stellar Jade, Credits, and character and Light Cone materials.
- Check an item in your Inventory to see how to get it - Most items have little rectangular text boxes below them that explain how to get it, and clicking this text box can instantly take you to the map location you need to go, or the conversion menu used for exchanging materials. You can also track and teleport to overworld enemies using this system.
- Don't spend Stellar Jade on regular Star Rail Passes - It's Special Star Passes you need to Warp for the event characters, and the regular variety for permanent Banners. While the permanent character and Light Cone Banner does have good characters on it, they're also included on event Banners, meaning you will get them eventually just by Warping on the event character Banners with Special Star Passes.
- 5-Star characters aren't automatically better than 4-Stars - A 5-Star Harmony character like Bronya is indeed an amazing team member to buff your team, but Tingyun is arguably just as good, and she's a 4-Star. It's all about picking the right team for each individual situation, so if Bronya is hogging Skill Points required for your DPS, you might want to switch over to Tingyun so can also boost your team's DPS, while saving some Skill Points in your rotation.
- Don't ignore events - Events regularly dish out great rewards for little work, and you can even get 4-Star characters, Light Cones, and Self-Modeling Resin from Events. The best event rewards are always obtained when they first debut, however, but you can still earn some rewards from the Conventional Memoir.
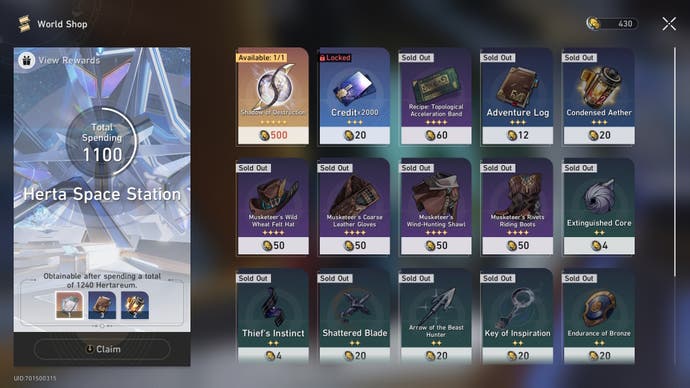
- Spend your currencies at World Shops regularly - You might not need those Credits right now, but you actually get rewarded for spending an area's unique currency at World Shops! The currency you use for these shops (like Hertareum, Shields, and, Strales) aren't used for anything else, so there's no reason not to spend them all. When you can't buy anything else, you'll get the option to just buy Credits instead.
- Attack Warp Trotters first - These cosmic pig-like creatures reward Stellar Jade when killed for the first time, but they escape after a certain number of turns, so target them first during battles. Warp Trotters are usually weak to Quantum, Imaginary, and Physical Damage.
- Don't put party members with high Taunt beside weak allies - A lot of enemies actually have AOE attacks, and characters with high Taunt (like Gepard) draw these attacks the most, so you'll want to ideally slot them first or last in your party lineups beside a character who can take a hit, or who benefits from taking damage, like Blade.
- Interact with everything - That sparkling plant you see in the distance? It can talk. That trash can? Leads to a secret quest. One time we even smashed a normal looking pot and were rewarded with a conversation that ended in feeding the pot trash bags. Star Rail's a strange game, and you can unearth random rewards and uniquely weird scenarios simply by exploring, so go and rummage through those trash cans!
- Don't use your Ultimate right away - Fire away during the regular battles, but during Elite and Boss fights, you'll want to carefully consider when to use your Ultimate. Yes, you'll be losing out on gaining Energy for another Ultimate in the meantime, but it's better to hold off on Natasha's Ultimate healing effects until after the boss does their big attack, unless your characters really need the healing beforehand to withstand the big attack. There's also no point in unleashing Seele's Ultimate on a boss with 1% health left - save that for the next boss phase!
- You don't need to unlock all of a character's Traces - If you're not using a character's normal attack, there's no point in wasting resources to level its Trace up fully. The same applies to Skill and Ultimate Traces, and even the bonus nodes. If your character's a healer who doesn't scale off Crit, then there's no need to unlock that Crit Rate Trace unless it's before a Trace you do need to unlock.
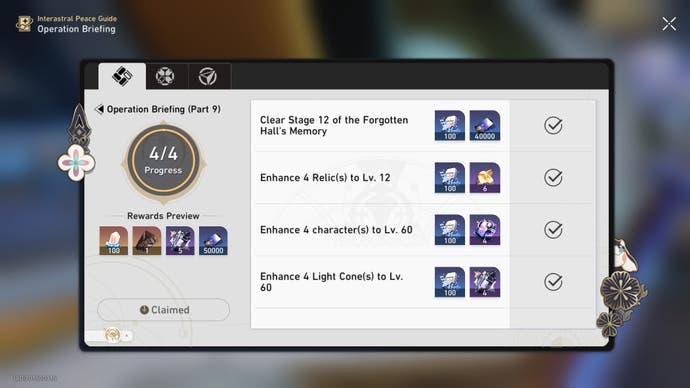
- If you don't know what to do next, check your Operation Briefing - This is a great set of challenges you can check to see what your current goal (besides completing quests) should be. If it's suggesting you should level up a Light Cone to Level 80, perhaps it's time for you to seriously consider what the best Light Cone for your main characters are, and invest in those. You'll also get some bonus rewards for completing each challenge and page of challenges.
- Don't farm Relics too early - 5-Star Relics with perfect stats and substats for each character is the goal in Honkai: Star Rail, albeit a mostly unachievable one. You'll probably never get a perfect 5-Star Relic, but you should at least try to get a good main stat and two good substats. So, using that Trailblaze Power to farm 4-Star Relics will be a waste of time in the future when you unlock 5-Star Relic farming. Don't completely abstain from getting better Relics before you can farm 5-Stars, but don't go all in on it either.
- Nihility characters don't benefit from increased Crit Rate and Crit Damage - These stats are wasted on characters like Kafka and Sampo who do most of their damage over time. Boosting their raw attack stat, specific damage type, and sometimes Effect Hit Rate, will benefit your DPS a lot more.
- Natasha is your best friend - Until you get another healer, Natasha is a go-to party member for any team in Star Rail, as she's the only free Abundance character you get by playing through the story. As you can't heal with items, Abundance characters are essential to surviving in Star Rail. Preservation characters like March 7th can also help keep your team alive, but for longer battles, you need a healer.
Honkai Star Rail guides list: All our Honkai Star Rail guides listed
When you're ready to tackle other features and systems in Honkai Star Rail, you can refer back to this list for detailed information on many different aspects of the game:
Banner and event schedules:
Tier list:
Banners and Warping:
Character builds and materials:

Free rewards:
Explainers:
- How to get the Fire Trailblazer
- Stagnant Shadows explained, how to unlock Stagnant Shadows
- How to get Stellar Jade
- How to increase Trailblaze Level and Trailblaze level rewards
- How to retreat
Main quests:
- How to use Findie to search for mine cart part locations
- Certification Level answers for rap tournament champion and microcrystalline unit questions
Side quests:
- Ministry of Education quiz answers
- Fool's Box puzzle solutions for 'Vessel of Mediocrity'
- 'Night on the Great Mine' puzzle solutions for mine cart tests
- Sensitive Beings' puzzle solutions for Unearthly Marvel paths
Misc guides:
Have fun exploring Star Rail's universe!
