How to beat Scream in Spider-Man 2
Tips, tricks and strategy for defeating Scream.
Defeating Scream in Marvel's Spider-Man 2 takes a bit of perseverance and a lot of dodging. You'll really need to stay on your toes and watch your enemy as Scream is a very fast opponent. Like Venom, Scream is a strong sentient Symbiote that can easily take you down in a few hits.
If you're struggling with this fight then don't worry, we're here to show you how to beat Scream in Spider-Man 2. We've also listed some handy tips and tricks that are worth knowing before diving into battle.
On this page:
Tips for fighting Scream in Spider-Man 2
- Use Your Gadgets - Your gadgets will help you in this fight. We found that Concussion Burst was particularly effective against Scream, but you can also use any of the Gadgets to give yourself a breather to heal while they damage the enemy.
- Pull The Fight Into The Air - They won't stay in the air for very long (unlike fighting Hunters), but hold Square to take Scream into the air. While airborne, Peter has the advantage and you can get a few heavy hits in.
- Don't Be Afraid To Dodge - It can be tempting to try to parry as much as possible, but don't be afraid to dodge if it means you'll stay alive a bit longer.
- Web Up Scream - We highly recommend using your Web-Shooters to tangle up Scream in your webs. Repeatedly shoot them at the Symbiote until they're briefly immobilised. Though they won't stay this way for long, you will get a small window where you can unleash a flurry of different attacks without them fighting back.
- Use The Environment - There are a few pieces of debris laying around each area, don't forget to use L1 and R1 to grab some and swing it around to hit Scream. This is especially useful if you're feeling backed into a corner and need a few seconds to find a way out.
- Use Your Abilities - Though you no longer have your Symbiote Suit (sad times) your Spider-Man abilities are still pretty strong, especially if you've been investing your skill points in upgrades. It can be easy to get stuck into constantly using one attack on an enemy, but the fight with Scream will be easier if you use everything at your disposal.
- Come Back Later - Now, if you're really finding it hard to get anywhere with Scream, then we recommend leaving this mission for now to spend more time exploring the city or doing side missions to increase your skills or upgrade your gadgets and suit tech.
- Change The Difficulty - Remember, as much as you're here to be a hero, you're also here to have fun. If you're finding that the fight is too hard on the setting you're on (or perhaps it's not hard enough), then you can always change the difficulty level in Gameplay Settings.
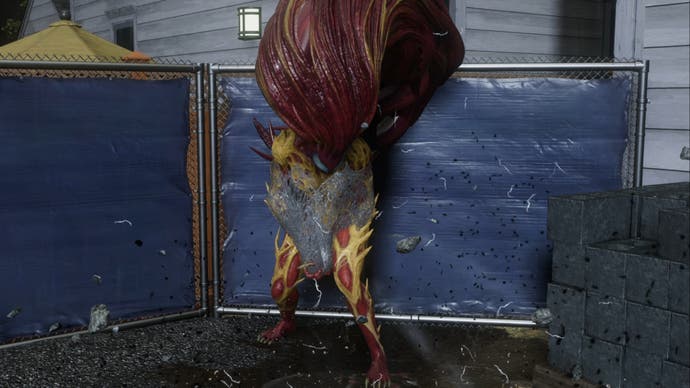

How to beat Scream in Spider-Man 2
The fight with Scream in Spider-Man 2 happens in four different phases, each one more heart-wrenching than the last. We've gone through each phase step by step and we recommend reading it this way as Scream reuses a lot of their attacks in each bit.
If you're stuck on a specific part, use the links below to skip ahead to the one for you.
Phase One
The first part of your fight with Scream is the most important one. This section will get you used to most of the attacks that the Symbiote uses across each phase.
We've listed all of the attacks that Scream uses below, including if you should dodge or parry them:
- Claw Swipes - They will lift their arms very slightly and quickly lunge at you while they swipe their claws. You can easily parry this by watching your Spidey-Sense. Remember to press L1 when the sense turns red to parry the incoming attack. If you feel backed into a corner, you can dodge this attack too.
- 'Hair' Burst - Lines like your Spidey-Sense will appear around Scream as a warning before they use this attack. They will charge up briefly while standing still and then their 'hair' will explode around them in several long spikes. We recommend dodging this attack.
- 'Hair' Whip - Lines like your Spidey-Sense will appear around Scream as a warning for this attack. They will flip their head around and whip their 'hair' out at you. We chose to dodge most of these to wait for an opening to attack them, but it is possible to parry this attack if you time it right.
- Projectile Spikes - Scream will form spikes and throw them at you. Usually, they throw two or three in succession. The warning for this attack is them holding their hand up while it starts to glow. Also, we found that Scream uses this attack more when they're far away from Peter.
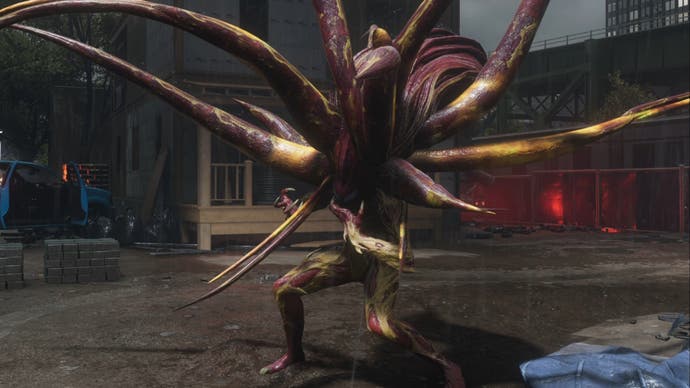
Scream really likes to move around the battle area down this street. For this phase, they will mainly stay on ground level which works to your advantage.
There are several cars parked along the street you're battling on. If you pulse with R3 you should be prompted to hold down L1 and R1 to trigger the alarms on these cars. Do this when Scream is near a vehicle and the sound will hurt them in the same way it did with Venom earlier in the story. While the sound is hurting Scream, use L2 and R2 to zip over to them and use Web Strike to inflict a decent amount of damage.
All you have to do now is to repeatedly use melee attacks, parries and your gadgets to get Scream's health bar down to zero. Once you've done this, it's time to move on to phase two.

Phase Two
Scream will reuse all of the attacks from the first phase in this section as well as a brand new trick:
- 'Hair' Reach - They will tilt their head towards you and then their 'hair' will reach out to you quickly to try to grab you. We found it best to dodge this attack and use the small window after Scream finishes attacking to strike.
In this section, Scream will now use more of the battlefield and hop onto the rooftops of several houses. They will continuously be on the move too, so you really need to stay on your toes and vigilantly watch for any incoming attacks.
We found that Scream will mainly use the rooftops to fire their projectile spike attack at you. While they're doing this attack, you can use L2 and R2 to zip up to them then Web Strike them. Doing this does put you in a bit of danger with the spikes, but it can be worth it to damage the Symbiote.

As before, you need to use everything you've learned about their incoming attacks and your own melee attacks (as well as gadgets) to bring Scream's health bar down to zero again.
Once you've done this, the fight will move to a much tighter space.
Phase Three
You're now stuck in the middle of several houses that are under construction. This does make the fight a bit harder as it gives more roof space for Scream to use and there are a few tight corners as well as open sections of houses that you can get trapped in.
Alongside reusing the same attacks as the previous two stages (though they are faster now), Scream has revealed another new attack:
- Flip and Whip - They will do a fast front flip then whip their extended 'hair' down to try to flatten you with it. You can parry this, just watch your Spidey-Sense and press L1 when it turns red. If you feel stuck in a corner (which is easily done in this area), then dodge to make sure it doesn't hit you.
We touched on it earlier but Scream will utilise the multiple rooftops in this area for projectile attacks. This does give you several chances to heal by hiding underneath a piece of awning or in an open house, but make sure the Symbiote doesn't trap you.
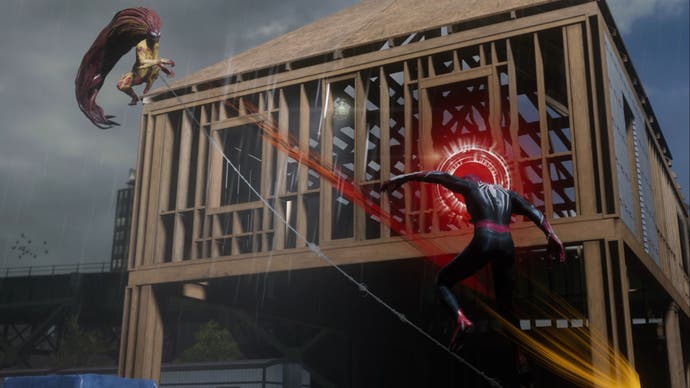
Also, like on the street earlier in the fight, there are a few chances for you to create high frequency noises to hurt Scream. If you can wait for it, we do recommend only using one of the chances around here (we used the car) and leaving the other opportunities for the next phase.
Again, use everything you've learned in your previous clashes with Scream to bring their health down to zero. Once you've done this, you only have one phase left to go - you've got this!
Phase Four
Don't worry, Scream has no new moves for this phase! This means that you can focus on using all of your knowledge of their previous attacks to bring them down.
A word of warning - though they are using all of the same attacks as before, they are much faster and much more dangerous than before. The Claw Swipes and 'Hair' based attacks in particular are far more brutal, so we recommend dodging them if you feel you can't get the parry timings right.
In this phase, we also recommend using the rest of the high-frequency sound opportunities dotted around. If you've not already used them, there's a car and a couple of stacks of metal piping that you can pull with L1 and R1 to hurt Scream.

Remember, you can immobilise Scream briefly by tangling them up in your webs! Doing this gives you a small window where you can safely attack them without worrying about incoming attacks, though they do break themselves free much faster than before.
Gather all of your experience and knowledge to bring Scream's health bar down to zero for one last time. Once you do this, you've finally won!
If you want a break after beating this boss and are after a few trophies, check out our guides for the Big Apple Ballers Stadium, Hang Ten Trophy and Soar Trophy. Also, if it's collectibles you're after, check out our Photo Ops and Marko's Memories locations too.
