How to complete the Citadelle Des Morts Main Quest Easter Egg in Black Ops 6 Zombies
Unlock and upgrade the four swords and topple The Guardian with our handy guide.
The Citadelle Des Morts Easter Egg in Call of Duty Black Ops 6 Zombies is an optional mission that players can tackle alongside the typical horde mode gameplay.
As is tradition for Call of Duty Zombies, the developers have built a lengthy side quest into the latest map, Citadelle Des Morts, with special rewards for completing it. Specifically, you’ll get 5000 XP, a Calling Card and Weaver’s 'Jackknife' Operator Skin for jumping through the many hoops of this optional odyssey.
The Citadelle Des Morts easter egg is a formidable expedition where you have to find and upgrade four swords and incantations and solve a series of symbolic puzzles. It’s a tough easter egg to complete by Call of Duty Zombies standards, especially if you’re planning to tackle it on your own. But the bragging rights for doing so are more than worth it, and the illuminating final cutscene is the cherry on top for all the lore nerds out there. So, without further ado, here’s how to start and complete the Citadelle Des Morts Main Quest Easter Egg.
On this page:
- Citadelle Des Morts Easter Egg Loadout
- How to start the Citadelle Des Morts Easter Egg
- How to find the Page Fragments
- How to find the page fragment Point of Power sequence
- How to unlock and upgrade the swords
- How to upgrade the Stag Sword
- How to upgrade the Lion Sword
- How to upgrade the Dragon Sword
- How to upgrade the Raven Sword
- How to find the Ritual Items
- How to get the Paladin’s Brooch
- How to get the Raven’s Talon
- How to get the Pegasus Horseshoe
- How to get Ra’s Ankh
- How to unlock the incantations
- How to complete the Point of Power trap sequence
- How to acquire the Mystic Orb
- How to complete the Elemental Challenges
- How to activate The Guardian boss fight
- How to beat The Guardian boss fight
Citadelle Des Morts Easter Egg Loadout in Black Ops 6 Zombies
Before we get into it, a quick word on loadouts. While the ASG-89 is still viable, I suggest bringing an assault rifle instead of a shotgun, because there’s a few moments in the quest where you need an accurate weapon to shoot targets at range. I like the KRIG C due to its ammo capacity and quick headshot capabilities, which will net you more points over time. Also it’s common knowledge that the Akimbo GS45 pistols are pretty broken when pack-a-punched in Call of Duty Zombies, due to the explosive rounds they gain, which are perfect for clearing waves of zombies.
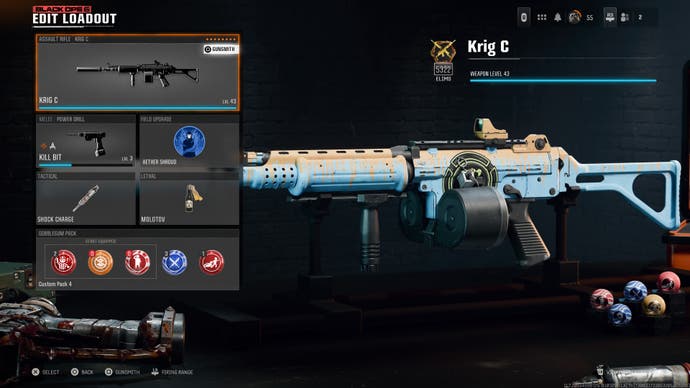
In Citadelle Des Morts, there’s a GS45 Wall Buy straight ahead when you spawn, so you can easily grab it as a secondary weapon. With that in mind, I’d suggest improving the weapon level of the GS45 to 31, equipping the Akimbo stock and any other attachments, then saving a 'Zombie Build' of the weapon in the Gunsmith. This means that when you purchase the GS45 Wall Buy in Citadelle Des Morts, you’ll get your gunsmith configuration instead of the base model of the weapon.
Beyond the above, you should also bring a Shock Charge in your Tactical slot, and a Molotov in your Lethal slot, to speed up some later objectives.
How to start the Citadelle Des Morts Easter Egg in Black Ops 6 Zombies
To begin the Citadelle Des Morts Easter Egg, you need to activate the pack-a-punch machine, and the game will guide you towards this goal. Unlock the marked doors, rotate the lion cannon and use it to blow up the castle’s main entrance, then unlock the remaining marked doors to reach the Oubliette Room where a padlocked container resides.
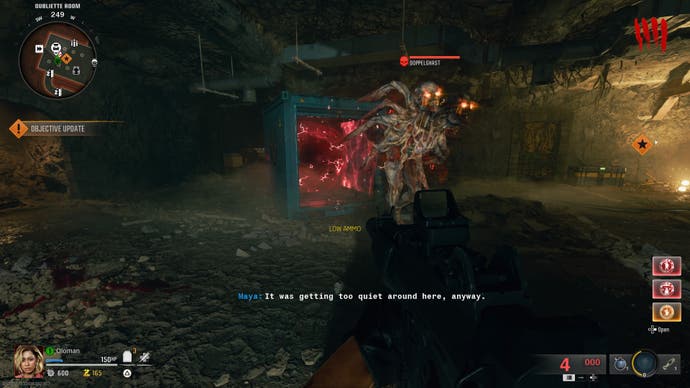
Shoot the three padlocks to unleash a Doppelghast, then kill it and pick up the Blood Aetherium Crystal it drops. Now you want to interact with the red portal inside the once-locked container to summon the pack-a-punch machine.
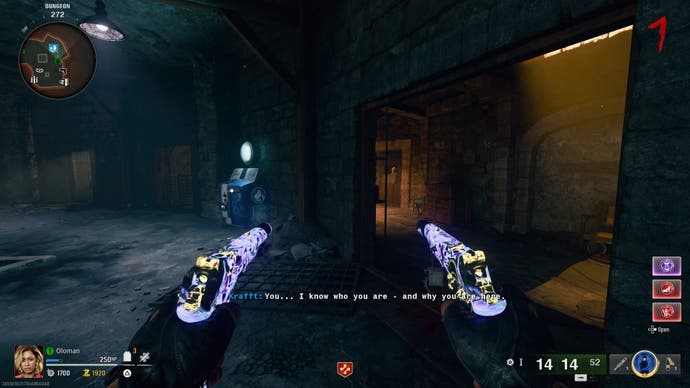
With that done, head out of the Oubliette Room and into the Dungeon where, behind the Quick Revive machine, you’ll find an alcove with a wooden door. Interact with the flap on the wooden door and it will open, revealing Gabriel Krafft. With that dialogue done, you can crack on with the rest of the easter egg.
How to find the Page Fragments in Citadelle Des Morts
Now you need to visit the Sitting Room of the castle, where the Stamin-Up machine resides. In this room, there are four page fragments to pick up - little squares of parchment adorned with glowing red symbols. The symbols align with the Point of Power traps dotted around the map and, depending on which fragments you receive, you have to activate the traps in a specific sequence to progress the easter egg. As it turns out, the order of the fragments is based on their placement in the room, from the left side to the right side. So you can save yourself a step here by picking the fragments up in that particular order.
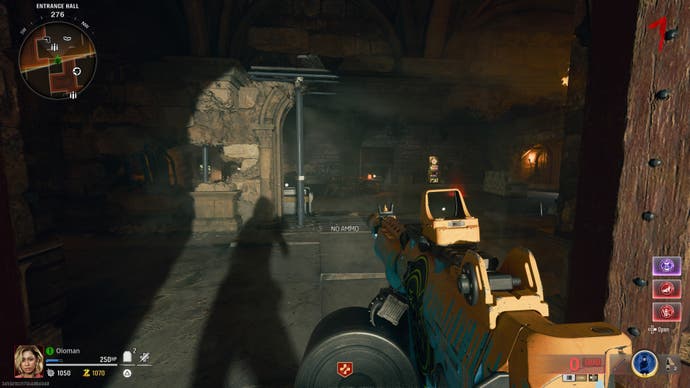
There are four potential symbols on the page fragments, which we’ll call:
- Eye
- Circled eye
- Four prongs
- All prongs
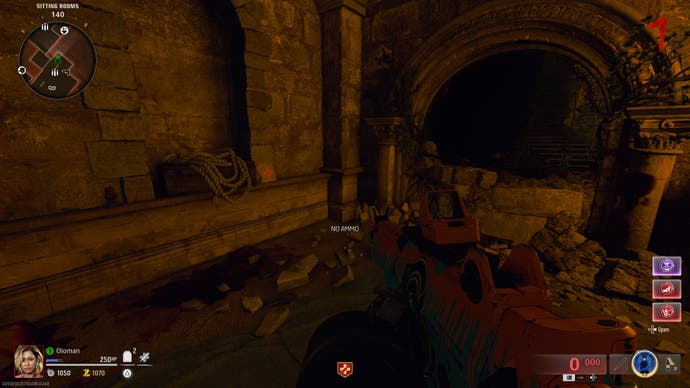
In my example game, I found the 'All prongs' fragment in the leftmost part of the room, in the outer passage. Then I found the 'Eye' fragment on the bunk beds. Then to the right, over on the sofa, I found the 'Four prongs' fragment. Finally, I found the 'Circled eye' fragment in the rightmost passage, on the other side of the wall from the TV.
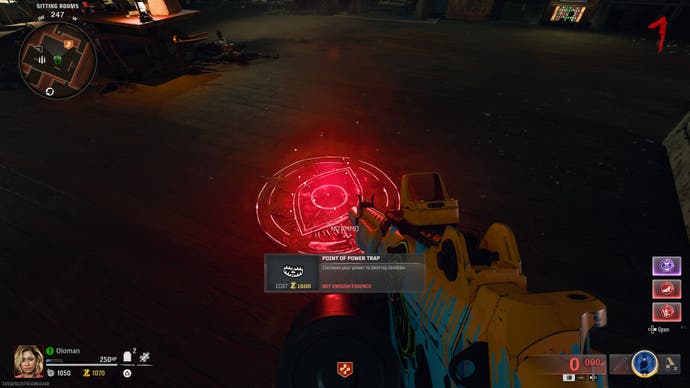
You can check if you’ve got the order right by looking at the trap in the Sitting Room, as this will always be your final trap. In my example game, it’s the Circled eye, which was the fragment I picked up in the rightmost part of the room. So, the order I need to complete the traps is as follows:
- All prongs
- Eye
- Four prongs
- Circled eye
With that information collected, you can now comb the map for the Point of Power traps that correspond to your personal order, then activate and kill enough zombies until they switch off and turn gray. Like the placement and order of the fragment symbols, the position of the traps on the map is also random. However, activating the traps costs 6400 essence in total, so in the interest of efficiency, it’s better to move on to the rest of the easter egg before you do this.
How to find the page fragment Point of Power sequence in Citadelle Des Morts
Without the skip outlined above, the typical way that you would deduce the trap order is by picking up the Sitting Room page fragments and heading to the tavern at the map’s spawn point. Here you can interact with six little potion bottles that feature roman numerals. Interacting with a bottle summons a small symbol, and you need to jot down the symbol that connects to each numbered bottle.
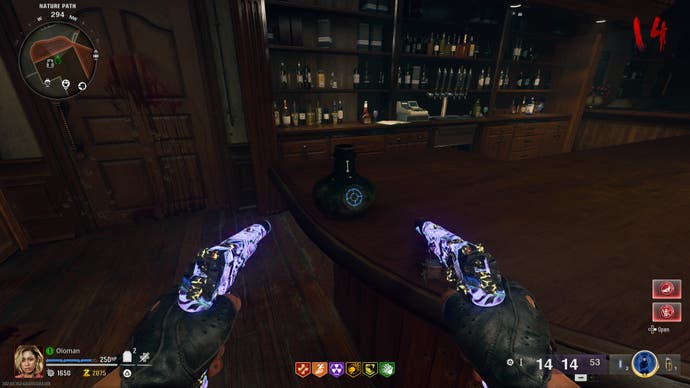
With that done, head back to the castle courtyard and purchase Melee Macchiato from the right rampart. Next, venture down into the Undercroft and punch a vulnerable wall with blue symbols behind it over in the far corner.
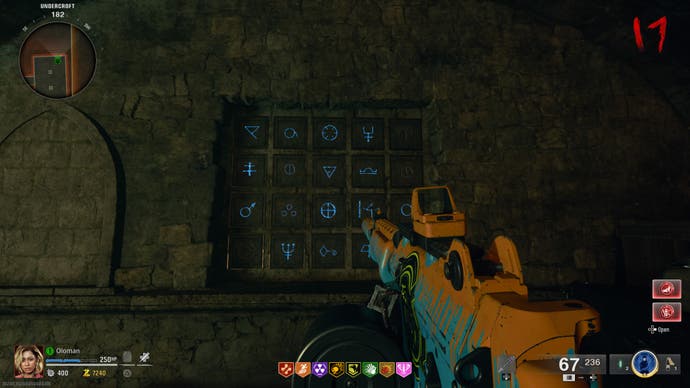
With the symbol wall revealed, you need to shoot the symbols from the tavern bottles, one through six, and a book will appear in an alcove to the left of the wall of symbols. The book will depict four symbols from the fragment pieces you picked up, and you have to read it like a typical book. So in this order: top-left, bottom-left, top-right and bottom-right.
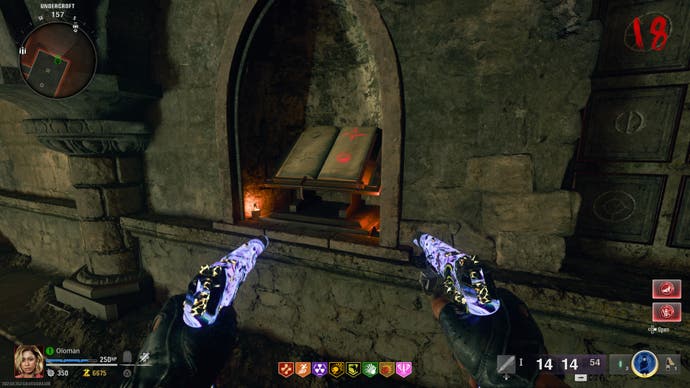
As you complete the traps they will grey out in the book, so it’s a good reference to return to if you’re struggling. Though, as we’ve previously made clear, it’s a costly process and not very efficient to complete the traps first, so we’ll come back to this later.
How to unlock and upgrade the swords in Citadelle Des Morts
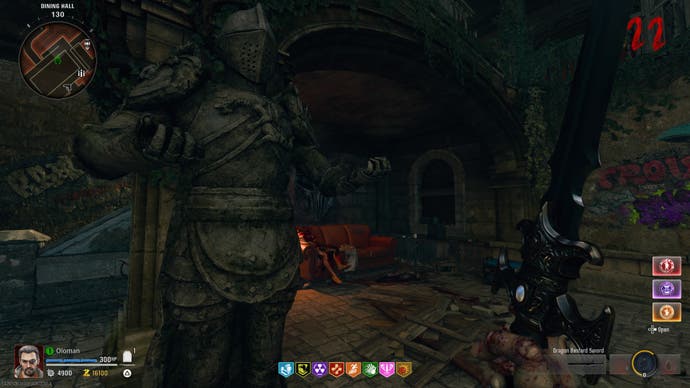
Once you reach Round 10, zombies with knight’s helmets will start spawning and, when they die, they’ll leave behind stamps. If you pick up a stamp and take it to the Dining Hall, you can use it on one of the four knight statues and they will present their sword to you. Keep in mind that you’ll have to go grab another stamp when you want to pick up the next sword.
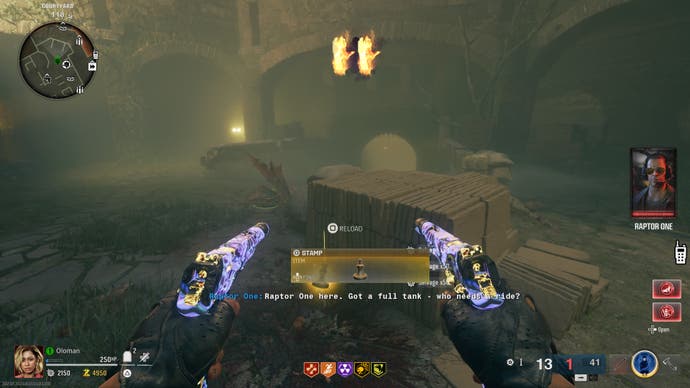
The crux of the Citadelle Des Morts easter egg involves acquiring the four elemental swords and completing a series of challenges to upgrade them. Once the swords are all upgraded, you then have to acquire and activate four ritual items before upgrading them into incantations that correspond to the elemental swords. It’s a massive ordeal, a quest-within-a-quest, and you can approach it in any order.
In the interest of making this easter egg possible for solo players, I’ve put together a structure that will let you tackle the hardest challenges first when you’re at the lowest possible round.
Outside of the Stag Sword and incantation upgrades, you can complete the other swords and collect and activate the ritual items without the need to kill any zombies. Due to this, consider keeping a few straggler zombies alive at the end of a round and completing those sections in chunks to maximise efficiency, while keeping your round as low as possible ahead of the boss fight.
How to upgrade the Stag Sword in Citadelle Des Morts
Offer a stamp to the knight with a stag on their breastplate in the Dining Hall and they’ll give you the Stag Sword. Now we need to find three lightning rods. First off, head to the Deadshot Daiquiri perk spot and you’ll find a lightning rod sitting amongst some rubbish to the left of the machine. Interact with it to pick it up. They look a bit like a spiked mace, if that helps.
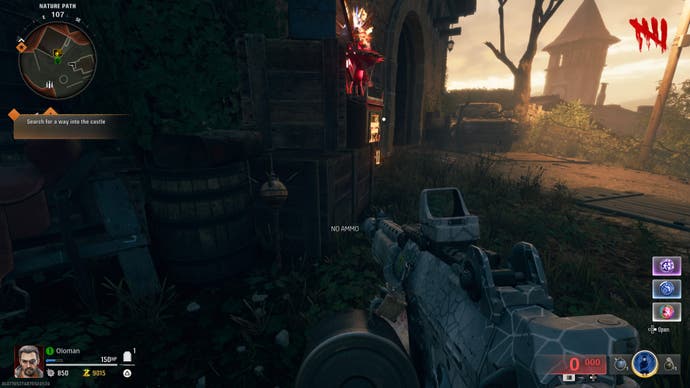
Now you want to head back up to the courtyard and down the other side to the area with Speed Cola. If you’re looking into the area from the courtyard entrance, head to the leftmost part of the area and on the wall, near the little alley, is a fuse box. Lob that Shock Charge I told you to bring directly at the fuse box’s centre and another Lightning Rod will fall from the sky.
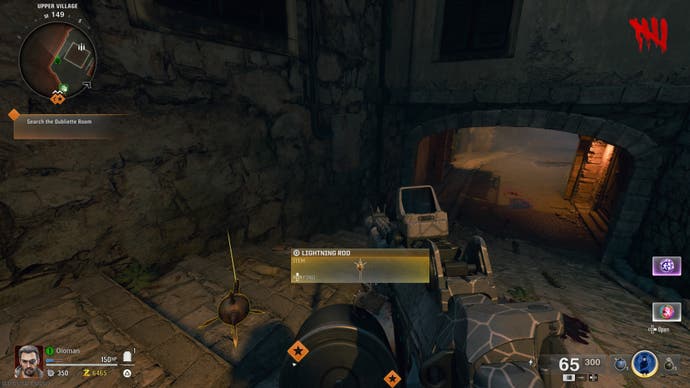
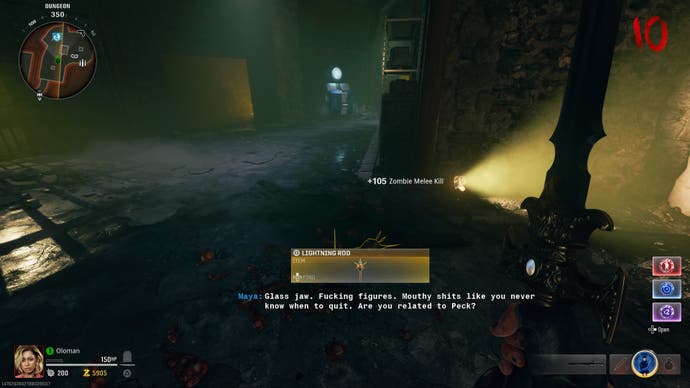
Finally, head inside the castle, and down to the Dungeon where you spoke to Krafft. Wait for an Armored Zombie to appear, kill it with the sword, and they’ll drop the final lightning rod.
With all the lightning rods collected, head up to the Hillside Rampart, which is the exposed castle wall on the side with Elemental Pop. There’s a little stone vase with three slots there and you can interact with it to summon a storm. Brandish the Stag Sword and whack zombies until it becomes charged with lightning, then deposit that energy into the vase by slashing at it three separate times.
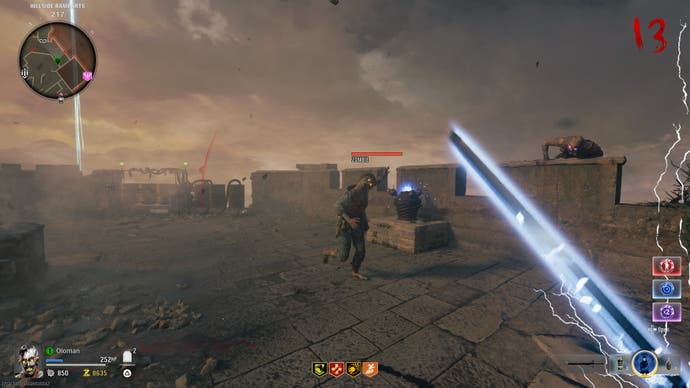
Once the vase has three charges, interact with it to deposit the sword, and it will transform into its upgraded version after a short delay. Now you can take it back to the Dining Hall and store it with the knight to open up your melee slot and move on to your next sword.
How to upgrade the Lion Sword in Citadelle Des Morts
Grab another stamp and interact with the knight that boasts a lion on its breastplate to grab the Lion Sword. Four special parasites emitting a golden glow should spawn when you do this. Kite them down to the area with Speed Cola, and head to the alleyway to the right of the fuse box.
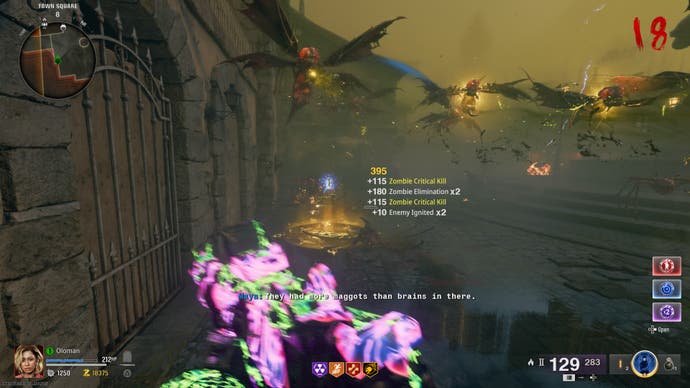
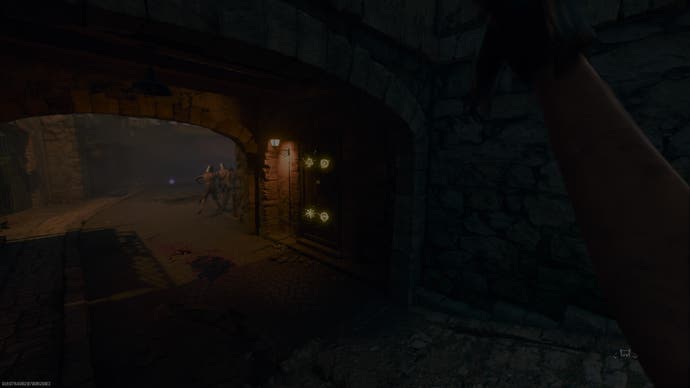
You’ll find a door with a lion door knocker. Kill a glowing parasite with your sword to imbue it with golden energy, then whack the door to summon the first of four symbols. Repeat the process until all four symbols are lit, then interact with the door.
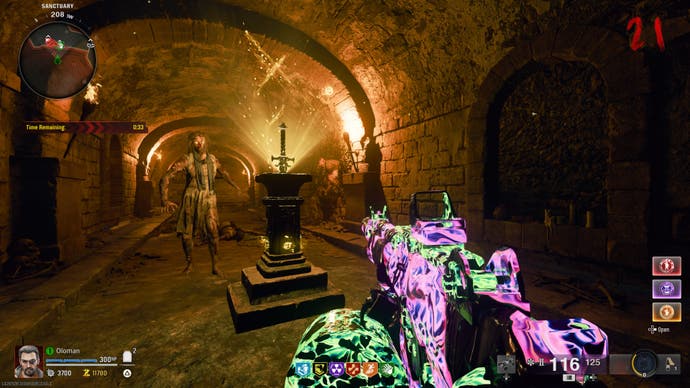
Once inside, let’s prepare for a second. We’re about to partake in a timed target challenge, so equip your assault rifle. When you plug the sword into the stand in front of you, you’ll start a timer; four symbols will then fly out and stick to the walls around you. You need to shoot the symbols in the descending order shown on the base of the stand and quickly. Once that’s done, the Lion Sword will transform into its upgraded version.
How to upgrade the Dragon Sword in Citadelle Des Morts
Once again, grab a stamp and interact with the dragon-chested knight in the Dining Hall to get the Dragon Sword. Head out to the castle’s foyer and ascend the stairs to find a dragon statue. Interact with the dragon to deposit the sword and a map will be illuminated above, pointing to three flame cauldrons placed around the map.
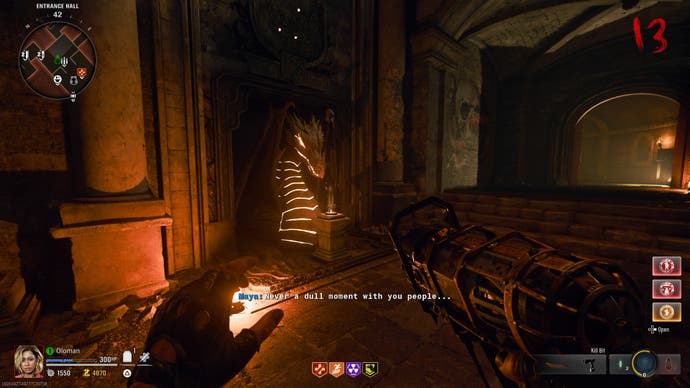
You need to find and interact with the cauldrons to receive the dragon flame (which will damage your health over time) before running back to the statue and interacting with it to transfer the energy. Purple-eyed zombies will spawn along the way back from each cauldron, which you can melee to restore your health.
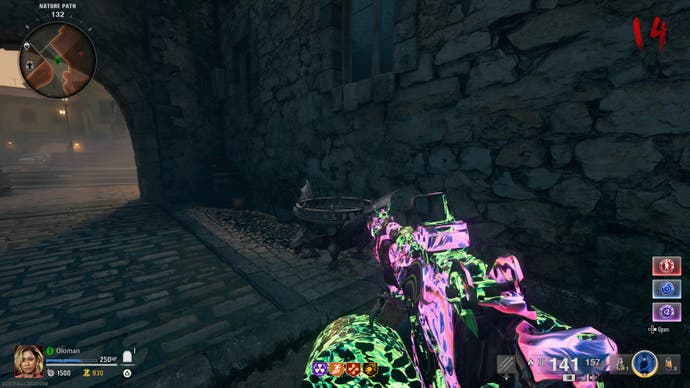
The first cauldron is on the way up to the cannon on the left hand side of the courtyard. Then you want to head down past Deadshot Daiquiri, and find the second cauldron next to the entrance archway that leads to the spawn point. Finally, you need to run all the way back to the spawn point for the third cauldron, which is on the left next to the Rampage Inducer. Once you’ve completed each run, the Dragon Sword will transform into its upgraded version.
How to upgrade the Raven Sword in Citadelle Des Morts
Pick up yet another stamp, interact with the knight that has a raven on its shoulder, and grab the Raven Sword. Now you need to head into the Alchemical Lab and look for an Antiquity. This will be a bone, skull or fossil on a little wooden stand, and they’re hidden around the room, in bookshelves and on study tables.
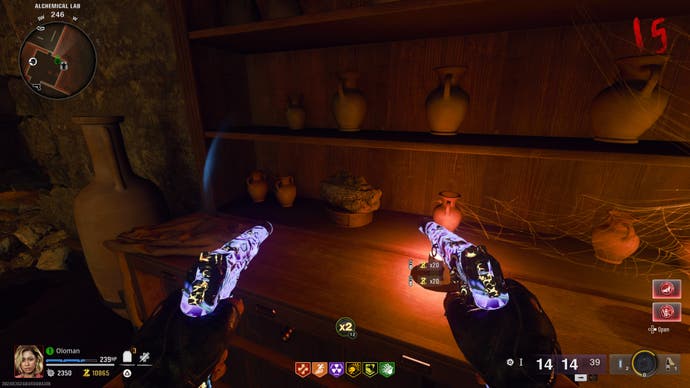
Antiquity in tow, head to the basement of the tavern at the spawn point, and across from the fast travel portal you’ll see a table with rings of green and blue symbols. You need to slot the antiquity into the tablet, then rotate the outer and inner rings to solve the puzzle.
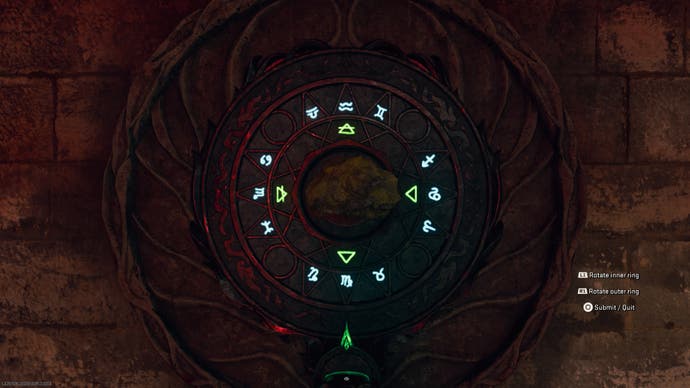
The outer ring corresponds to the zodiac sign of the antiquity, and the inner ring corresponds to its alchemical sign, earth, fire, water or air. If you’re into horoscopes, now is your moment to shine. The solution needs to be entered at the southmost point of the puzzle.
So, if your antiquity is a Scorpion in a fossil, you’d scroll to the Scorpio sign for the outer ring, then, for the inner ring, you’d scroll to the alchemical symbol for water, which is an upside down triangle. Because scorpios are water signs! If you’d rather not figure it out, check out this handy website that automates the process from TroubleChute.
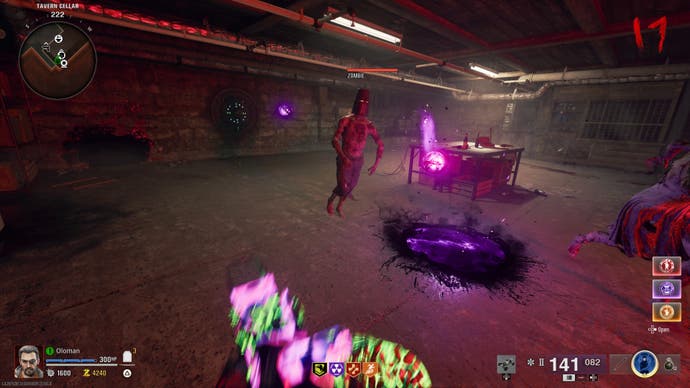
Exit the interface to input your solution, and a purple void will open up in the room behind you if it is correct. Homing orbs will shoot out of the device you were just tinkering in with, and you have to lead them to the void. Once you deposit three orbs into the void, the void will move upstairs, and you’ll have to repeat the process. When that’s done, it’ll move once more, next to the pool table on the mezzanine. Keep filling the voids with orbs and once you’ve satisfied the third void, a mote of light will lead you back down to the zodiac puzzle machine, and create a rift on the floor. Interact with the rift to dip the Raven Sword into the aether, and it will return in its upgraded form.
How to find the Ritual Items in Citadelle Des Morts
Swords are done, so it’s time for incantations. To complete this step, you need to find four Ritual Items which correspond to the elements wielded by each sword - fire, electric, light and dark. In some cases, you’ll also need to charge the item by performing a task after collecting it. I’d recommend completing all of these in one go, at the end of a round where you can keep a straggler.
How to get the Paladin’s Brooch in Citadelle Des Morts
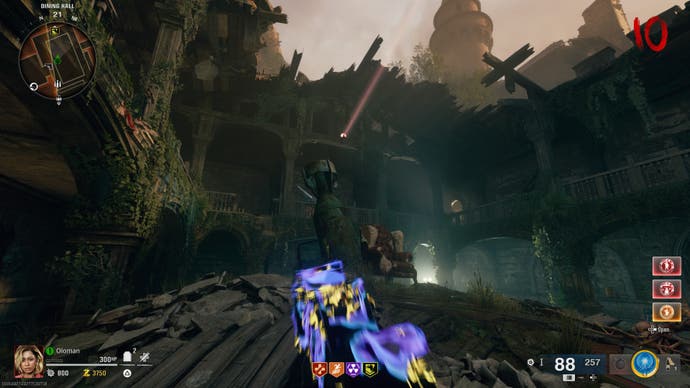
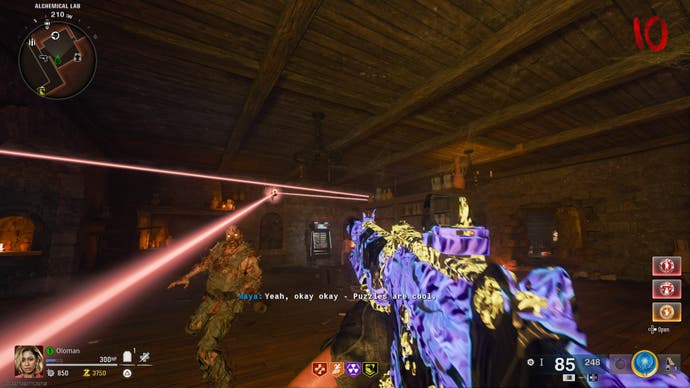
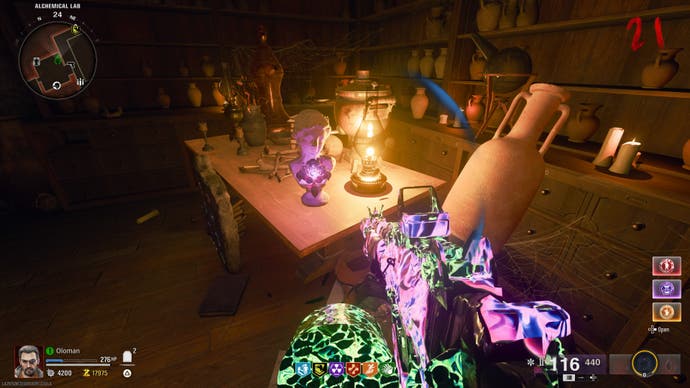
In the Dining Hall where all the sword knights reside, aim above the Vulture Aid perk machine and shoot a curious red crystal. A light beam will be generated, linking to another crystal. What you want to do here is stand in the sightline of the faded beam, and shoot at the crystal which generates it. This will arc the beam and connect it to another crystal, and you’ll repeat this process as it leads you into the Alchemical Lab. Sometimes you have to shoot a crystal a few times to get it to align with another crystal. Eventually, the crystal will beam onto a bust, and generate the Paladin’s Brooch.
How to get the Raven’s Talon in Citadelle Des Morts
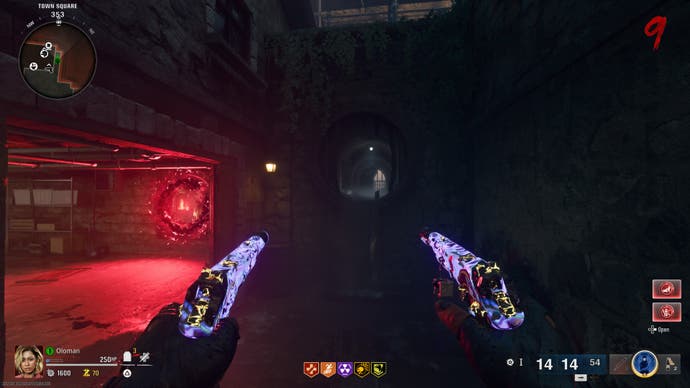
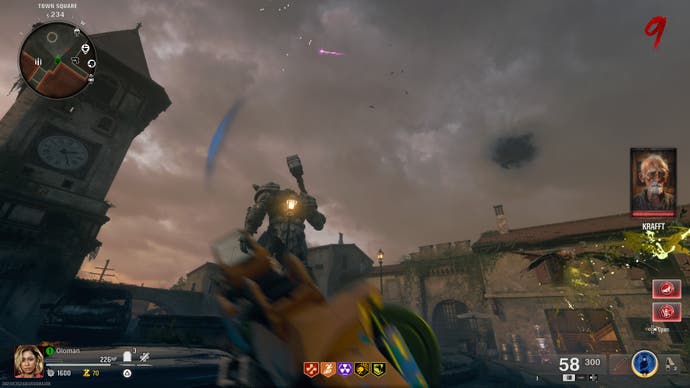
Head to the pack-a-punch room, and use the slide on the back wall that takes you to the spawn area. During the slide you need to shoot a raven prop that appears on the right hand side. Once you hit it, a raven will fly out of the slide and into the sky. Quickly shoot it with your assault rifle, and it’ll drop the Raven’s Talon. You can also fire into the cave slide from the spawn area side with an explosive weapon to avoid paying for the ride…
How to get the Pegasus Horseshoe in Citadelle Des Morts
Head to Deadshot Daiquiri and inside the barn to the right of the machine. Above the exit that faces towards the castle will be a horseshoe. Shoot it down and pick it up. Then you want to head to the Lion Cannon which you used to blow open the castle’s gates. Climb into the mouth of the cannon and shoot yourself to the spawn area.
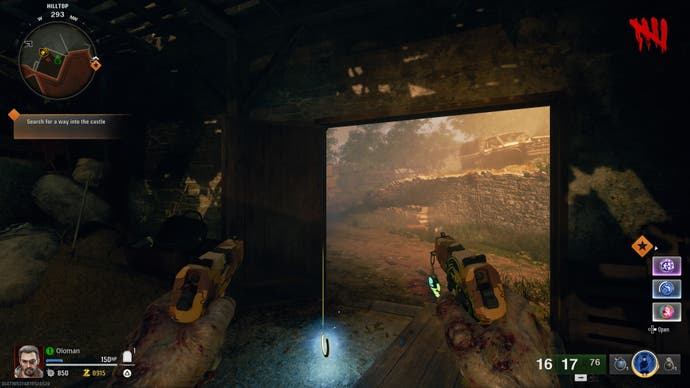
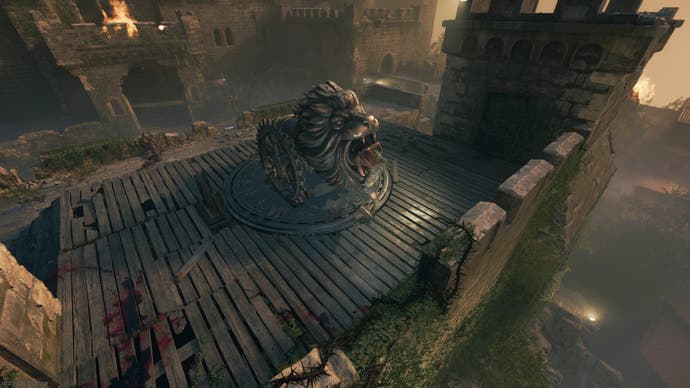
When you land on solid ground, look to the sky for a little storm cloud. Head to the mini storm’s location and pick up the upgraded horseshoe on the ground.
How to get Ra’s Ankh in Citadelle Des Morts
The final ritual item is a pain to unlock, because you need three molotovs, or some other kind of fire-generating weapon. Hopefully you brought one with you, and perhaps you may have got a lucky drop in the meantime. If not, you can always spend 700 salvage to craft two molotovs at one of the crafting tables dotted around the map.
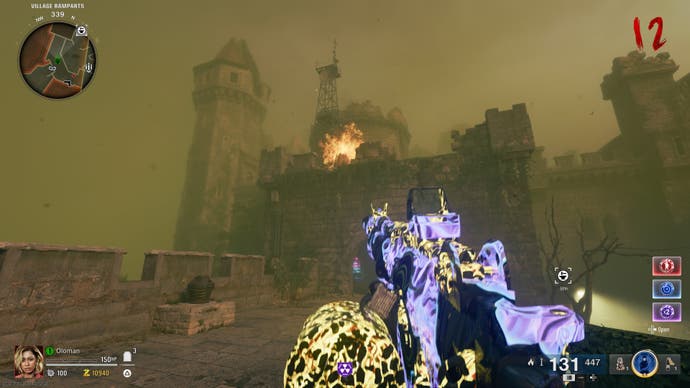
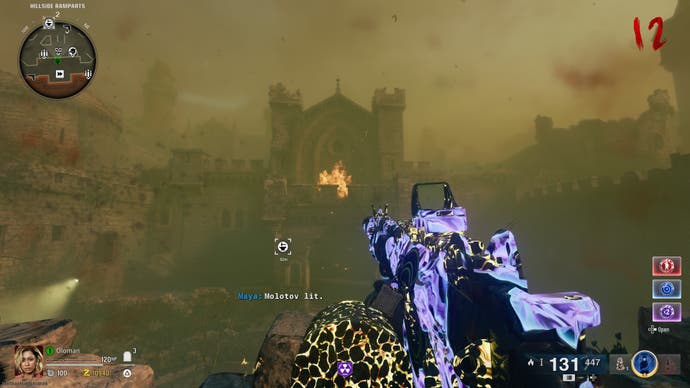
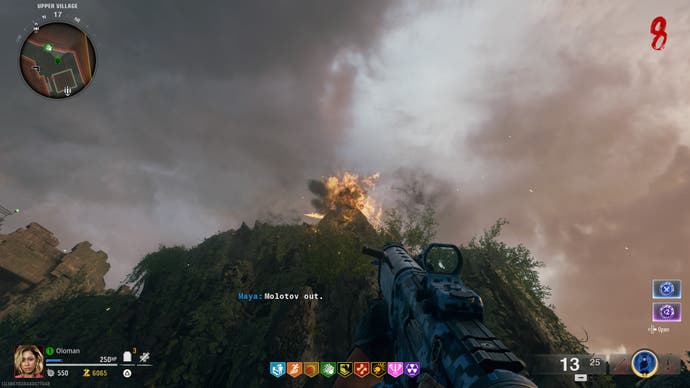
Once you’ve got three, head outside to the castle courtyard and to the rampart just past Elemental Pop where you completed the Stag Sword vase trial. Turn around and look up towards the castle and you’ll see a bonfire above the perk machine room. Launch your molotov at the bonfire to set it alight.
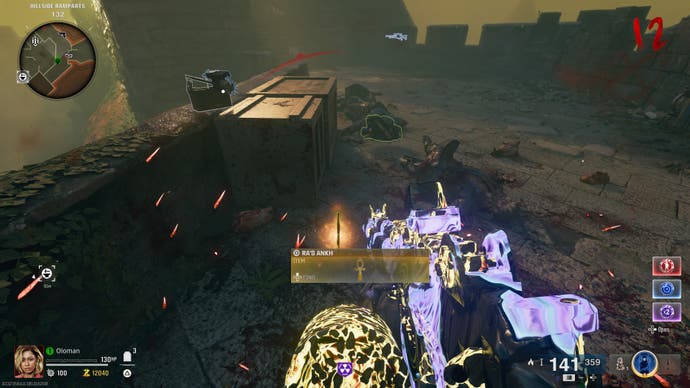
Next, head to the Lion Cannon, and turn around and face the castle. Throw a long range molotov to light the bonfire above the entrance. Finally, head down to Speed Cola, then turn around to face the machine and the castle. Above Speed Cola is the final bonfire. Take care with this last bonfire, as when you set it off, a Doppelghast will spawn. Kill the Doppelghast and they’ll drop Ra’s Ankh, completing your set of Ritual Items.
How to unlock the incantations in Citadelle Des Morts
With the ritual items acquired, you now need to find four golden insignia that have spawned around the map. They will only appear when you get close, and you must interact with them to begin a horde challenge where you have to kill zombies to transpose the ritual item you collected into an incantation. It’s worth doing all of these in one go, as it doesn’t require many zombies to satisfy the criteria, so you can squeeze a few into a single round.
Once you’ve completed an incantation challenge for one of the elements, you can then bring the associated upgraded sword and slash to crack open the box and reveal the incantation. Incantations replace your tactical slot and are powerful elemental abilities you can cast to get rid of zombies.
Here's where to find the incantation challenges:
- The Dark Incantation challenge is in the Undercroft along the right wall and you can open the box with the Raven Sword.
- The Light Incantation challenge is to your left after entering the Dining Hall and you can open the box with the Lion Sword.
- The Fire Incantation is in the courtyard of the castle on the way to Speed Cola, and you can open the box with the Dragon Sword.
- The Electric Incantation is back at spawn near the entrance to the hilltop, and you can open the box with the Stag Sword.
Complete all of the challenges, then leave a straggler and swap through the upgraded swords to crack the boxes. With that out of the way, we can close in on the boss fight.
How to complete the Point of Power trap sequence in Citadelle Des Morts
Remember the page fragment symbol sequence you uncovered earlier? It’s time to put it to use. Start traipsing around the map looking for the first Point of Power trap in your sequence. If you’re struggling to distinguish the traps, one tip I’ve found is that the traps that are part of your order will not feature a red circle on the outermost ring - they will only illuminate the symbol itself. Once you’ve ticked off the first three, remember that the fourth and final trap in your sequence will always be the Sitting Room trap.
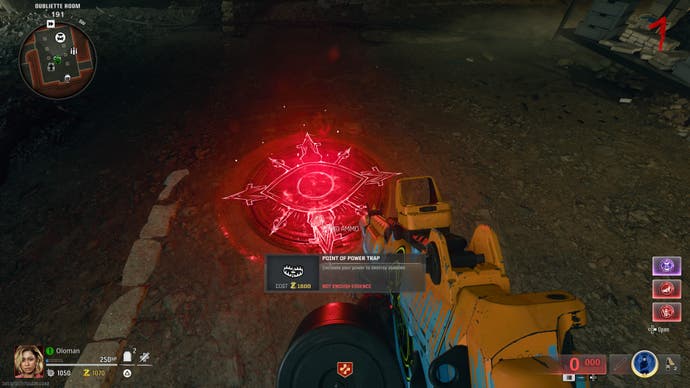
Once you complete the trap sequence, a red mote of light will spawn from the final trap in the Sitting Room and lead towards a wall nearby, revealing a quadrant of symbols marked with Roman numerals.
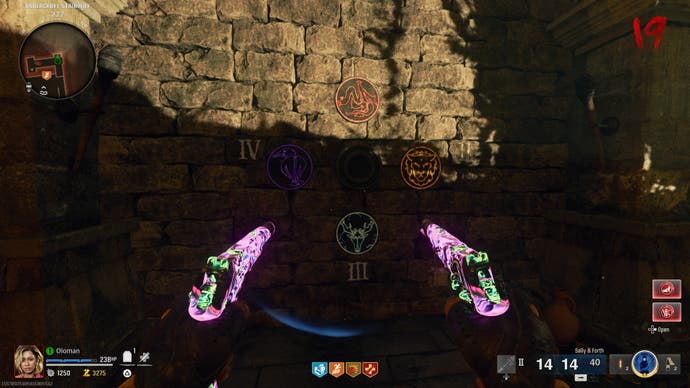
The symbols allude to the swords - Dragon, Lion, Stag and Raven. Jot the order of the sequence down, because it’s needed for the next step.
How to acquire the Mystic Orb in Citadelle Des Morts
To perform the Mystic Orb ritual, you need to pick up one of the four swords, cast the corresponding incantation at the sword’s statue (so the Fire Incantation if you picked up the Dragon sword) and then inspect the sword shortly after. You need to do this four times, in the sequence shown by the Roman numerals on the wall you just uncovered.
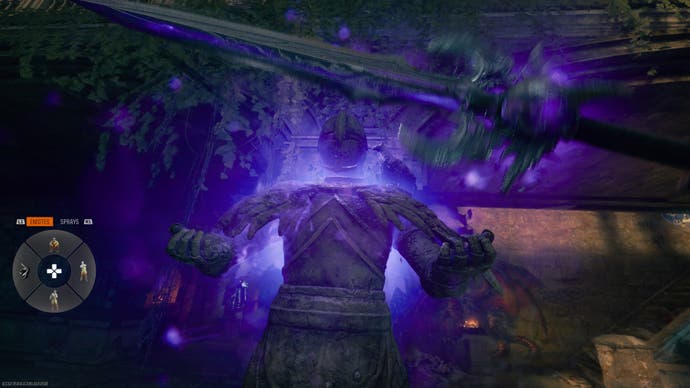
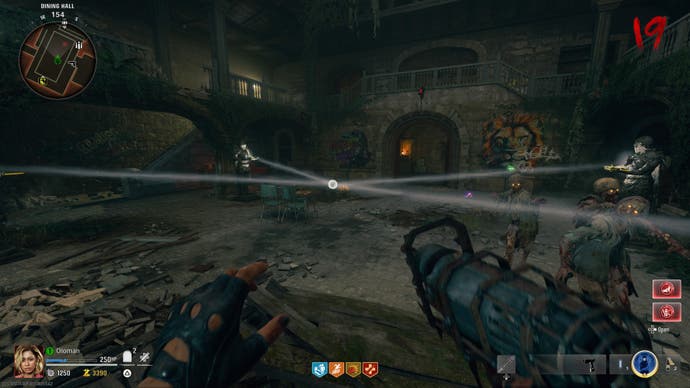
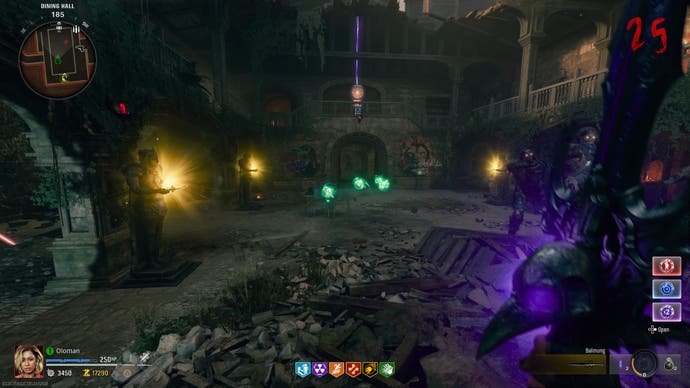
You’ll know you’ve done it right when the statue performs a salute and turns gold. Once all four statues are gold, they’ll come together to reveal the Mystic Orb.
How to complete the Elemental Challenges in Citadelle Des Morts
Now that you’ve got the Mystic Orb, you need to travel to four spots on the map, deposit the orb and complete elemental challenges while defending against an influx of zombies. Once a challenge has finished, always remember to pick up the orb and take it to the next location
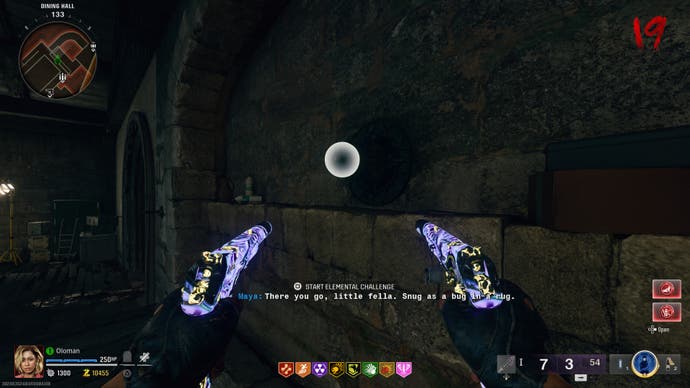
The closest elemental challenge is on the second floor of the Dining Hall (where you completed the rituals) on the opposite side to Vulture Aid. For this challenge, you just need to stand in the green orbs that appear until they dissipate, while defending yourself from zombies. Once that’s done, the orb will be charged, and you can pick it up for the next location.
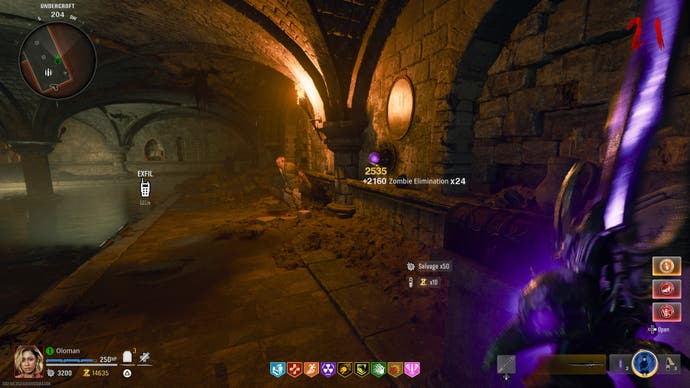
The second elemental challenge is located in the Undercroft, on the wall to the right of the Mystery Box spawn point. This challenge is themed around the Dark Incantation, so to complete it, you need to kill zombies by casting the Dark Incantation or using the Raven sword’s ultimate ability, which you can activate by pulling both triggers. The ammo mod Shadow Rift and the LT53 Kazimir equipment may also assist you here, but you should focus on the sword’s attacks and the incantation to be safe.
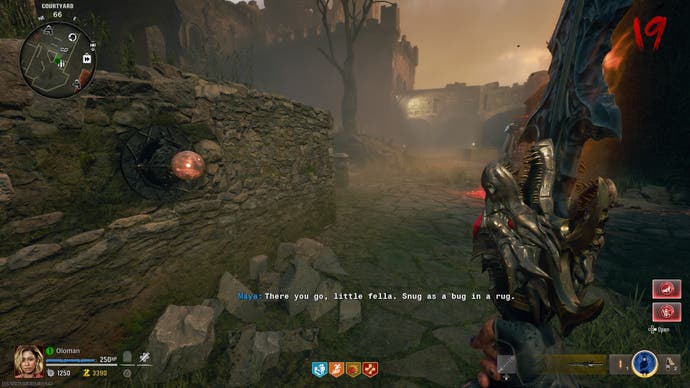
Now run outside of the castle and down the steps into the courtyard. On the wall opposite the ammo box is another orb spot. This challenge is fire-themed, so use the Dragon sword’s special attack, as well as the Fire Incantation. The Napalm Burst ammo mod and molotov cocktails may help with this one, too.
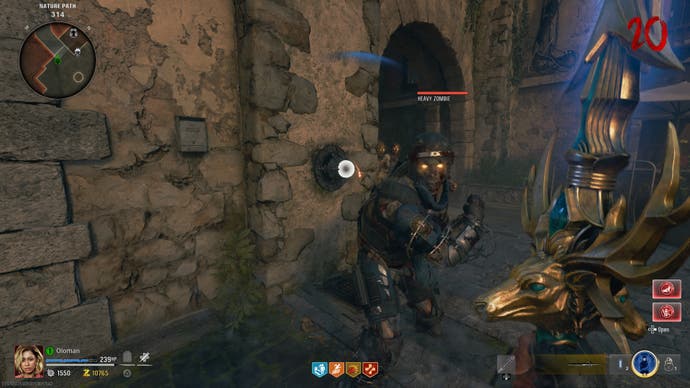
Finally, run all the way to the spawn point. You’ll find the last orb slot on the wall to your left if you’re facing the front of the statue. This challenge is electric-themed, so bring the Stag sword to use its ultimate ability and remember to cast the Electric Incantation. Shock Charges and the Dead Wire ammo mod may help get this one over the line.
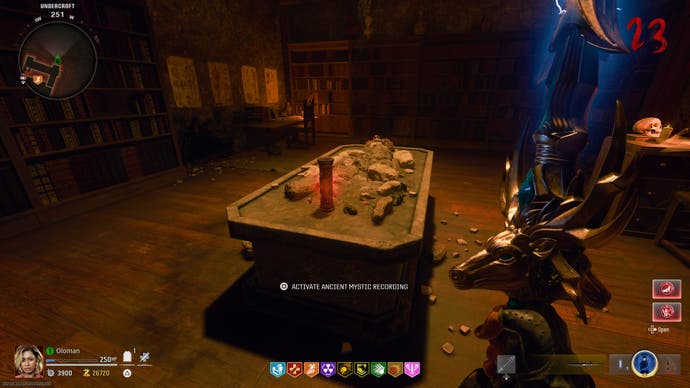
With all the challenges completed, you should see four motes of light swirling around the orb. Take it out of the slot and head back to the passage down to the Undercroft, where the ritual symbols were displayed. There should be a slot in the middle of the symbols where you can deposit the orb, which will bring down the wall and reveal the ghost of The Owl. After a quick chat, pick up the Guardian Key on the table. It’s time to fight the boss.
How to activate The Guardian boss fight in Citadelle Des Morts
With the Guardian Key in tow, head back to the spawn point and face the front of the statue-come-fountain. If you mantle over the fountain’s edge you’ll see there’s a conveniently-shaped slot for the Guardian Key you looted from The Owl’s secret room. Once you interact with the slot, the boss fight will start and you’ll be whisked away, so make sure you’re prepared.
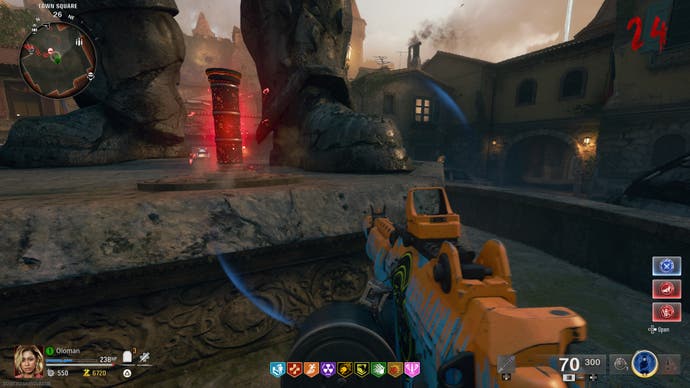
The Guardian is a tremendously difficult boss fight, even for seasoned Call of Duty Zombies players. And if you’re playing solo, it’s doubly hard. You’re going to need all the help you can get, so make sure your guns are pack-a-punched and upgraded to the highest rarity with salvage. You’ll also need to upgrade your armour to the maximum, along with grabbing the perks, equipment and gobblegums you desire.
How to beat The Guardian boss fight in Citadelle Des Morts
The Guardian is a three-phase boss fight against a massive statue coated in armour. You need to break the armour with damage before you can hit its weak spots. Eventually, once you deal enough damage, The Guardian will return to the centre of the arena, replenish its armor and become immune. At which point, they’ll summon a horde of zombies, which you’ll have to dispose of to proceed to the next phase. Thankfully, the boss room will give you access to the incantations you’ve unlocked, as well as an ammo box to resupply if you’re running low.
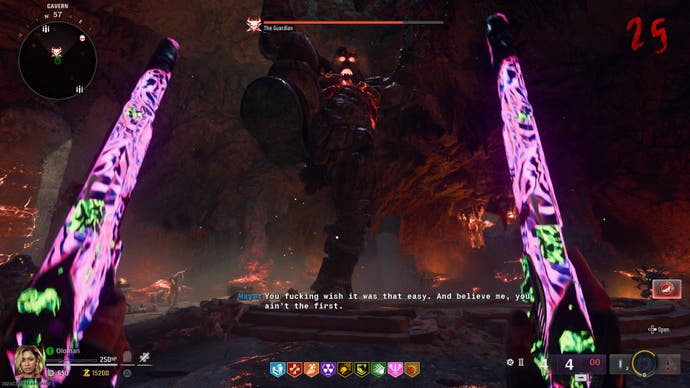
As soon as you land in The Guardian’s den, you’re going to want to keep the boss at arm’s length, as their close-quarters hammer attacks can devastate your health bar, if not down you in one go. Keep moving around the arena, sliding away from the area-of-effect slams and dodging projectiles and homing attacks. Fire shots when you find a spare moment to crack those armour plates and expose the weak spots.
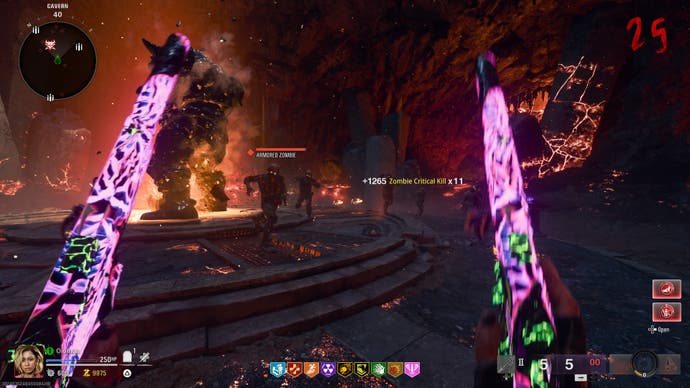
At certain points, entire partitions of the arena will be engulfed in flames and deal tick damage to you if you hover on them. Keep your wits about you as the circle gets smaller, and don’t do anything rash. Just wear The Guardian down slowly and dispose of the horde, grabbing precious armour plates when you can. With a bit of luck and determination, you can fell this great beast, and then grab the amulet it drops to access the ending cutscene.
Best of luck completing the Citadelle Des Morts main quest easter egg!


