How to craft the Jet Gun in Liberty Falls in Black Ops 6 Zombies
All Jet Gun part locations to bring back those TranZit memories.
The Jet Gun is back, making a rather glorious return in Black Ops 6 Zombies, improved and better than ever.
First seen in the Black Ops 2 Zombies’ map 'TranZit', the Jet Gun - officially called the Thrustodyne M23 - is one of the Wonder Weapons that can be acquired in the Black Ops 6 Zombies map, Liberty Falls.
In this guide, we’ll run through how to craft the Jet Gun in Liberty Falls, listing all the Jet Gun part locations including the Water Pressure Gauge, Handbrake, and Electrical Wires, and how to use.
On this page:
How to craft the Jet Gun in Liberty Falls explained
To get your hands on the Black Ops 6 version of the Jet Gun, you'll need to find and collect three parts, and then craft it yourself.
Whilst you can also have the chance of it being a drop from the Mystery Box, this method is guaranteed way to obtain the weapon.
Getting to this stage, however, will require a bit of a lengthy setup, involving the finding of three particular parts that'll all be combined to assemble the famed Wonder Weapon.
The three parts are as follows:
- Water Pressure Gauge
- Handbrake
- Electrical Wires
Finding each of these has their own set of prerequisites whereby you'll need to find another set of specific items that will then allow you to go and collect the actual parts you need.
Once all the parts are collected, you're then able to go to a workbench and craft the Jet Gun fully.

If you're hunting all of the Aetherella figurines, this is the whole process you'll need to run through first, allowing you to then collect each of the figurines from their respective locations.
To get you started on your search, below we've listed each of the aforementioned Jet Gun parts, as well as the prerequisites for collecting them.
As a heads up, you might want to try and do as much as possible on the earlier rounds, not just because of difficulty, but because - for example - the Mangler enemy is tied to the acquisition of one of the three parts.
With that in mind, if you do happen to progress so far as to encounter a Mangler zombie, be sure to try and shoot off its arm ahead of time, as you'll need the cannon it drops. Though if you're unable to, we explain another way in which you can go about getting one of these further into this guide.
Where to find the Water Pressure Gauge in Liberty Falls
To obtain the Water Pressure Gauge, you'll need to do a couple of other tasks first.
As a heads up, whilst they can be done in any order, we think this particular step is one that you should aim to do as soon as possible since it'll only become more difficult and awkward in later rounds - particularly true if playing solo.
The first thing you’ll need to do, is head over to the flower shop located on the east side of the map. You can see the specific location with the below map reference and images.

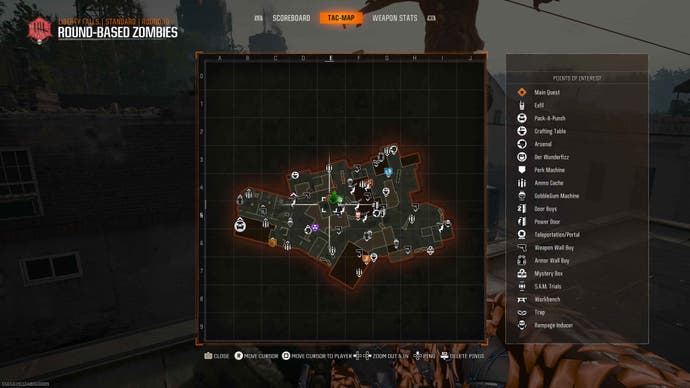
Once there, you’ll want to interact with the valve on the outside of the building to collect it for the next step.

After you’ve done that, make your way over to the Bowling Alley and head inside.
Once there, look over at the wall on the right of the lanes - opposite a possible Mystery Box spawn - where there’ll be a yellow box that you can melee to break open and reveal the Water Pressure Gauge within.


Before it can be picked up however, you’ll need to interact with it for a lengthy period of time whilst stationary and holding your respective interact (AKA reload) button until the respective progress bar maxes out.


During this time, you’ll quickly be swarmed by Zombies, forcing you to take breaks and run them around a bit whilst you keep chipping away at progress. It might be best to wait till the end of a round to make this part a little easier, but enemies will continuously spawn regardless of how far into the round you are, so ultimately it doesn't make the biggest difference.
Should you fail this step - which happens after the bar depletes to zero after no interaction has been made after a short time - it’ll reset the counter and subsequently despawn all active enemies for a brief moment, until they all respawn at their nearest spawn points seconds later.
It should be noted that this step is possible solo, but it can be rather tricky, so you might find acquiring some Cymbal Monkeys or Decoys from the crafting/Salvage tables around the map will help to distract the zombies whilst you complete this step.


Once you’ve interacted with it long enough and the bar is filled, all the Zombies will be eliminated automatically and the Water Pressure Gauge will fall out onto the floor, which you can then pick up.

Next, you're able to move on to locate the second part which is thankfully much more straightforward.
Where to find the Handbrake in Liberty Falls
Similarly to the first part, to acquire the Handbrake, you’ll need to run a couple of other errands first.
Specifically, you're looking for the Toolshed Key that drops from the Groundskeeper zombie, a randomly-spawning enemy that can be found in the graveyard area, next to the church.
This enemy spawned pretty quickly for me, though I had to survive in the area and eliminate a number of zombies before he appeared. The image below gives you a good idea of what he’ll look like.


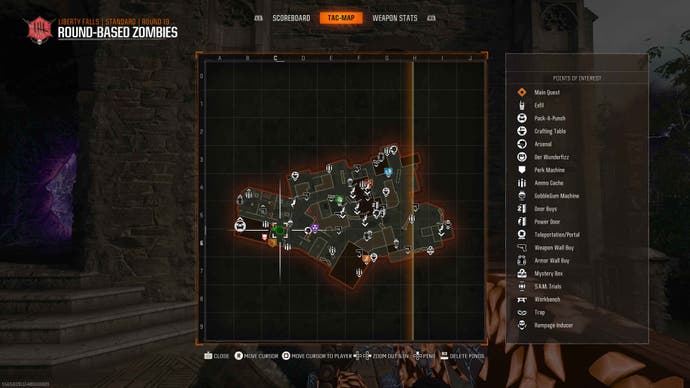
Once he turns up, you’ll want to eliminate him and then pick up the Toolshed Key, then head over to the shed itself which is found behind the Groundskeeper’s building - one of the locations you'll visit for part of the Bowling Alley Easter Egg.
After reaching the shed, interact with the door and inside you’ll find the Handbrake, this being the second of three parts required for the Jet Gun.


The third and final part is a little trickier than this one, but if you've sorted most of these out in the early rounds, it shouldn't be too bad.
Where to find Electical Wires in Liberty Falls
Next up are the Electrical Wires, and just like the other two parts, you’ll need to do a quick bit of setting up for this one.
First off, you’ll need a Mangler’s Cannon which you can acquire by either shooting off and picking up directly from a Mangler themselves - these will spawn every few rounds beginning from about round 10 - or by spending 2500 Salvage at a crafting table to acquire one yourself.


Whichever method you use to get your own cannon, you’ll want to head over to the electrical store opposite Olly’s Comics which has its doors shut. Here's where you want to use the Mangler cannon to blow the doors open.


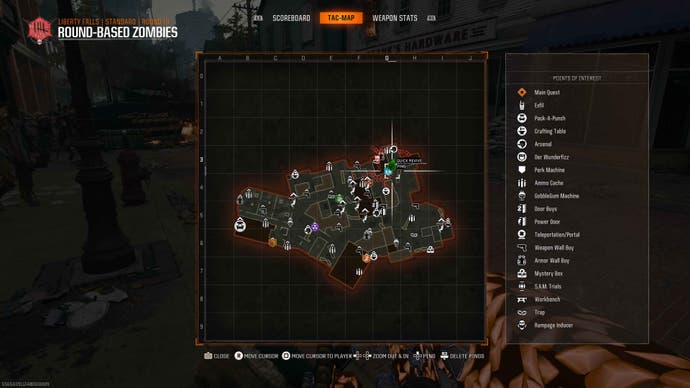
Alternatively, you can actually have a Mangler chase you to the electrical store, and when he charges the cannon, duck out the way and let him blast off the doors of the shop.
Once inside, you’ll see a bundle of wires and other scrap in a pile on the floor that first need interacting with so that the actual Electrical Wires reveal themselves as a lootable item.


Pick them up, and now - so long as you have the Water Pressure Gauge and the Handbrake - you’re ready to build your own Jet Gun!
Where to build the Jet Gun location in Liberty Falls explained
The location to craft the Jet Gun is in a rather simple location, right near where you start the map, inside one of the motel rooms.
You’ll want to go up the stairs near the door to Liberty Lanes, and turn left once you’ve ascended up a floor - but be careful of the zombies that’ll burst out the room at the end.
Coincidentally, this particular room is where you'll have to go to craft the Jet Gun.


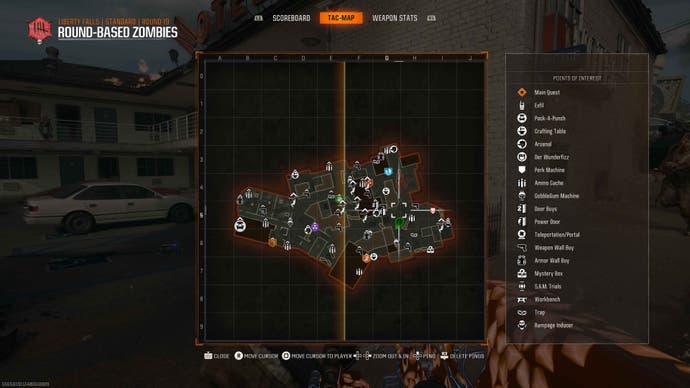
After the zombies are down, enter the motel room and interact with the crafting workbench to begin building the Jet Gun, keeping an eye out for any incoming threats.

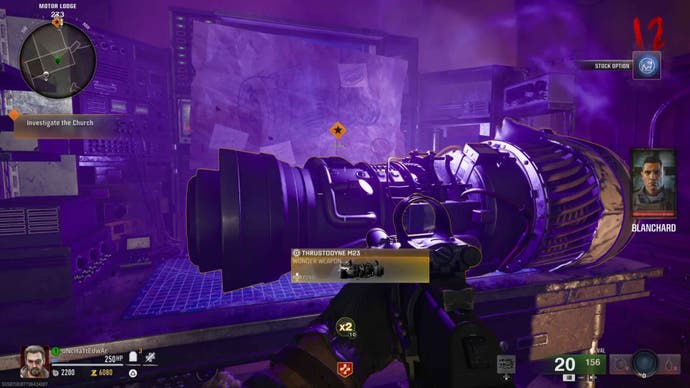
Regardless of which order you acquire the parts in, this is always the same location in which you’ll build the weapon, so it’s a relatively easy point of the map to remember.
What is the Jet Gun and how to use in Black Ops 6?
Since its initial introduction in the Black Ops 2 Zombies map, TranZit, this is the first time the Jet Gun has made a return in the mode.
Famed for its unreliable nature, the Jet Gun in Black Ops 6 Zombies has had a pretty impressive makeover with higher damage, quality of life tweaks, the ability to be Pack-a-Punched, and even its own unique attack.
Perhaps the biggest change of them all is the fact that the weapon will no longer break and scatter its parts anymore, instead remaining as a fully-functional weapon that relies on rechargeable ammo. This means outside of the potential of it overheating when its ammo counter reaches 0, you'll essentially have unlimited ammo.

Beyond that, if you use your ADS button, you’ll be able to make use of a powerful wave attack that’ll wipe out all surrounding zombies at the cost of reducing its ammo to 0 for a period of time.
Following that however, it’ll recharge back to 100, and you can either use it again or instead opt for its primary function on your standard Fire button that'll use less ammo as it pulls in and chews up zombies one by one - a better choice for smaller groups of enemies.
As a few other notes - whilst the weapon can be upgraded via Pack-A-Punch, it doesn’t have the ability to jump up into any higher weapon tiers, and it can also be a random weapon acquired via the Mystery Box.

It is also a vital part of the main quest easter egg, and a weapon you'll need to acquire all of the Aetherella figurines scattered around the map.
All-in-all, it’s a massive glow-up over its original version, and arguably one of the mode’s best weapons. Certainly a handy one to have in case of an emergency!
For more on Black Ops 6 Zombies, be sure to check out our pages covering where to find Pack-A-Punch on both Terminus and Liberty Falls, as well as other Liberty Falls easter eggs such as the Bowling Alley minigame, how to open the vault, and how to become Aetherella and find her figurines.


