Resident Evil Revelations 2 - Ep 1: Upgrade your guns, dodge the blades and find the Rusty Key
The next part of our Revelations 2 walkthrough explains how to upgrade your weapons, get the Rusty Key, and dodge those deadly blades.
It's a flat-out fetch-quest frenzy next, with a curiously-spelled cog to find, more mutants to maim, whirling blades and power to be restored.
With your new power-restoring objective set, head through the open door at the far end of the room, and make a note of the broken ladder to the right just as you pass through. Inside, grab the Tourniquet from the shelf to the left, a Parts Box from the shelf to the right, then examine the workbench in the corner.
Exchanging and Upgrading weapons
Workbenches can be used to either Upgrade or Exchange your weapons. Exchanging a weapon simply means swapping out an active weapon for a stored one, while Upgrading a weapon lets you apply any Parts Box skills you've acquired to your arsenal. Currently, the only parts you have on your person add Damage Lv. 1 to the weapon of your choice, so decide whether you want to upgrade your Shotgun or Handgun, then push on.
Back outside, it's time to use the broken ladder. Approach it and then follow the on-screen prompts in order to give Moira a boost to the upper level. Once she's under your control, guide Moira down the corridor and ignore the blue doors ahead for the time being. Instead, take a left and unlock the closed door to create a clear pathway for Claire to navigate.
In single-player mode, the action automatically switches back to Claire at this point, now in the workbench room. Look for the metal ladder nearby and climb it to reach the platform above. Once you've rejoined Moira, pass through the blue door you spotted a short while earlier, follow the corridor around, and head through the door at the end.
In the next area, ensure you're playing as Claire, prepare your weapon and then follow the corridor around to the right. Almost immediately, a mutant attacks from the doorway to your right. Deal with him swiftly and then investigate the small cabinet on the floor to your left. It contains a hidden Green Herb that can be revealed using Moira's torch.
How to kill the pack of mutants
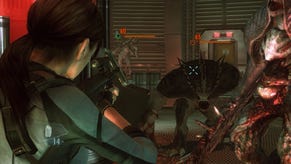
Press onward and enter the final cell to the right. On a desk inside, you'll discover the 'Prisoner's Letter' document, adding a little bit more colour to the game's narrative. Back outside, continue onward down the corridor, follow it left and then pass through the door at the end. As you enter the next room, you're ambushed by two mutants charging in from a doorway to the right. Show them who's boss and then start exploring the area.
Make a note of the staircase leading downward around the corner to the left, grab the Tourniquet from the shelf on the right, and nip through the mutants' doorway to swipe the 'Caution for Experiment Handling' document.
Back outside, move toward the row of sinks along the far wall and glance to your right. There's another corridor in this direction so saunter down it and deal with the mutant that comes crashing through the window a little further on. Finally, use Moira's torch to reveal the hidden Handgun Ammo beneath the debris blocking the route ahead.
Unlock the Exploding Bottle
There's one more room to explore before making your way down the staircase you noted earlier, so pass through the doorway on the right and grab the throwable Exploding Bottle sub-weapon from the shelf, as well as the 'Excerpt from Kafka's "The Trial"' document on the shelf in the middle of the room. There's another exit here too. Ignore it for now, return to the previous area, and make your way down the stairs. Taking this path gives you the upper hand on a few enemies lurking below.
How to kill the hammer mutant
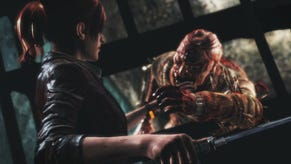
At the bottom of the stairs, follow the corridor around to the right as it opens out onto a larger room. Deal with the two mutants in the distance and then ready yourself for a tougher fight. A gargantuan, hammer-wielding mutant comes crashing in from behind. He's easy enough to deal with - just unleash a few shotgun rounds, concentrating on his exposed fleshy bits. Just be mindful of his hammer attack as it can cause bleeding.
Should you start bleeding, you lose the ability to run, and your health steadily depletes until you're dead. Thankfully, these effects can be mitigated by using a Tourniquet - so try and keep one about your person at all times.
Where to find the Rusty Key
Once all of your opponents have been dealt with, it's time to explore your new surroundings. At the far end of the long room there's a staircase leading back up to the blocked corridor we saw a little earlier on. Of more interest, however, are the two blue doors on either side of the area.
The door on the left leads to the Generator Room but, sadly, it requires a Rusty Key to open. Luckily, the key isn't too far away. simply head through the door on the right (swiping the Exploding Bottle from the shelf once you're on the other side) and then follow the corridor as it bends to the right. You'll find the Rusty Key hanging from a nail on a nearby shelf - grab it then use it to enter the Generator Room back in the previous area.
Inside, you'll encounter another new enemy: giant cockroach bug things! These critters can give you a nasty nip, but they're incredibly weak and can be defeated with a few melee strikes. When the area is clear, drop off the ledge and head to the other side. Here, Claire gives Moira a boost so - if you're playing in single-player - prepare for the old character switcheroo.
Surviving the spinning blades
With Moira now under your control, dash up the ramp and make your way through the opening ahead. The blue door to your immediate right is sadly locked so push onward, turn the corner and examine the row of levers. Once the power is back on, the strange contraption nearby springs to life, its deadly blades whirling around as it slowly glides toward you.
Immediately turn around and start backtracking toward Claire. As you do so, another mutant smashes its way through the previously locked door and begins to approach. As Moira, you're woefully under-equipped for direct combat but you have a handy trick up your sleeve. Shine the torch in your opponent's eyes to stun him temporarily.
You could use the opportunity to make a hasty retreat, or smash him about the head with your crowbar. There's a more satisfying strategy here however: quickly back away toward the whirling-blades behind you then, as the mutant thunders forward, duck aside. If you time it right, he'll be sliced into hundreds of tiny mutant pieces.
When the coast is clear, head through the previously locked door and use your torch to reveal the Topaz (100BP) in the corner. Finally, return to Claire in the trash compactor room and prepare to switch characters once more.
With Claire now under your control, glance at the oncoming crusher and locate the flat edge of the platform rushing toward you. Dash toward it and quickly clamber up out of harm's way. From here, move back out into the main hallway and return to the area where you found the Rusty Key. Be careful though - with the power on, the path is considerably more perilous, thanks to the whirling blades sliding back and forth across the room.
Back in the Rusty Key room, you're ambushed by another hammer-wielding mutant. Once again, focus your attacks on his exposed flesh - avoiding the devastating swing of his hammer - and he should collapse in no time. Finally, make your way to the end of the corridor, push the cart away from the blue door, then head on through.
- Our walkthrough continues with a guide to finding the Gear Kog.
- Looking for the rest of our Resident Evil Revelations 2 strategy guide? Head back to the index page of this article.


