Thief (2014) - A Friend in Need, Great Safe combination, rescuing Basso, collectible items
From rescuing Basso to cracking the combination for the Great Safe, our guide has everything you need to know to complete A Friend in Need.
The next section of Thief is a solid example of everything that makes the series so much fun. There's a little light puzzle solving to be done, plenty of loot to hoover up, and some thoroughly entertaining opportunities to clobber people over the back of the head. Here's how to get through this chapter without making so much as a whisper.
Before you start the mission proper, head on over to the Shady Merchant to stock up on any items you might be missing. Grab the Razor Tool and Wrench Tool in particular while you're here, along with as many Rope Arrows as you can afford. There are lots of short-cuts to take advantage of in this chapter of the game, and you'll need these handy arrows. You might also want to drop by the Queen of Beggars to pick up some Focus points as well.
Find Jacob in Greystone Plaza
Ready to get stuck into the mission? Well, the first bit's very easy, and simply requires you to go and find Jacob in the Greystone Plaza. That's about 10 feet down the road. Unfortunately, that's about as easy as this mission gets.
Go to the Architect's Grand House
Stick to your objective markers and you'll have no trouble getting to your destination, but make sure you grab any loot you see along the way, and for goodness sake don't tumble off the ledges. When you're in the right place, your presence will trigger a cut-scene that shows off a meaty explosion at The Keep.
Slide your way down the slope, and then pick up the poppy nearby. Now use a Rope Arrow on the anchor beam that you can see to your left. Make your way down the rope and then head towards the two benches just up ahead. Have a rummage beneath both of these to find Serendi Stone Circles (4/7) - Lapis Lazuli Circle. If you've been following our guide from the beginning, you should have four of these special collectibles at this point. Have a look through the earlier chapters of our walkthrough if you're missing any of them.
While you're here, make sure you grab the arrows that are inside the box that's resting on the barrel. Now head back up the rope you came down on to continue your journey through A Friend in Need.
Find a Way Inside the House
"If you're determined to make it all the way inside the house without being detected, it's certainly possible to do so but it's also very difficult."
If you're determined to make it all the way inside the house without being detected, it's certainly possible to do so but it's also very difficult. There are five guards to deal with in total, and we simply chose to take three of them out with head-shots, then put a Fire Arrow into the earth by the barrel to the north-east. By leaving this shot until last, you at least ensure you don't create a massive commotion that brings all the cavalry rushing at once.
At this point you need to deal with a pair of dogs that've been caged up. If you really feel the need to silence them, you can use the Choke Arrows to make sure they don't pipe up, but you've already solved the problem of alarming the guards!
Have a good rummage around this environment while you have the freedom to move easily about. Check out all of the outhouses too for any valuable treasure. Once you're ready to infiltrate the house itself, use your Focus ability towards the north-eastern section of this area to spot a ladder you can use.
If you fire a Blunt Arrow towards the gear that's just next to the ladder, you'll gain access to a narrow crawl space that will take you straight to the top floor of the mansion. If you want to take that short-cut, just be aware that you'll miss out on a collectible item by doing so.
If you want to pick up every last piece of loot instead, head towards the west, right along the balcony that had a guard on it (before you shot him, that is). Now leap over to the greenhouse roof, and drop down through it to grab a bag of food and a poppy. You may find you come a cropper on the next section, so take the opportunity to save while you're here.
Turn the valve in front of you all the way over to the right, then interact with the loose brick to open up a secret passage. Go down the ladder, then hack apart the control box here so that you disarm a trap.
Head back up and make your way along the secret passage until you come across a pair of peep-holes. Have a look through them and you'll spy a cook - wait until he's left the room, look through the southern peep-hole, and then press the button you can see on the wall.
Get up to the Architect's Study
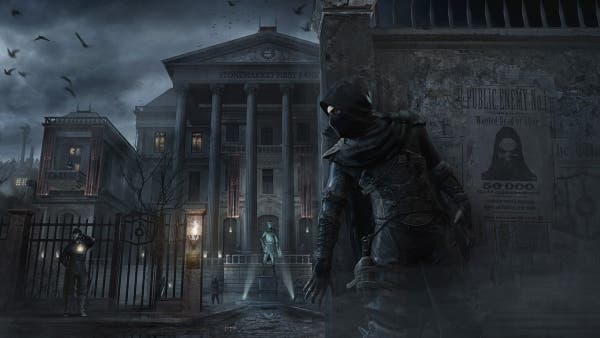
Once you've hacked the control box, shuffle over to the north-west corner of the room and wait here until the cook comes back. When he does, you know what to do - sneak up, get behind him and take him out. Hide the body if you're paranoid about guards coming by.
Sneak your way into the kitchen, but be prepared for an encounter with a guard. When he tries to leave the kitchen, rush up to him as quickly as you can and take him out with your Blackjack. If that's a little too frantic for your tastes, wait until he's shuffled over to the foyer, then take him out with one clean head-shot from a Broadhead Arrow.
Once you've taken care of this guard, you're free to explore this first floor at your leisure, so make sure you grab every last piece of loot you can before moving on. You'll need to do a little light lock-picking in the eastern room, however. When you enter it, press the button that's on the side of the desk to expose a safe. Pick the safe and you'll be able to get your hands on Unique Loot (4/9) - Morendrum Medal. Once you've got it, save your game and make your way upstairs.
There are plenty of guards dotted around this second floor - two of the rooms are occupied, and there's a guard towards the top of the third-floor stairs. As soon as you reach the second floor, make your way into the bathroom that's to your north-east. This will give you easy access to another room which contains the architect's wife and her maid. Knock 'em both out nice and quietly.
"There's an annoying bird in a cage nearby - before you do anything else, make sure you silence it using a Choke Arrow."
Now make your way down the hallway to the north-west, where you'll see another maid chatting away at a guard. There's an annoying bird in a cage nearby - before you do anything else, make sure you silence it using a Choke Arrow. Now sneak your way into the room and climb up the bookshelves. You're in a great position now to take both enemies out from height, although it can be tricky to avoid detection. Reload your game if you're trying for any of this stage's challenges.
Once you've taken both of them out, it's time to exit back into the hall and deal with the guard who's trying to get into the study upstairs. Once you've snuck up and dealt with him, use your Razor Tool to get hold of The Count of Montonessi (8/12) - The Abundance of Emptiness. Don't worry if you're concerned that you've missed out on seven of these already - you can find them by completing Client Jobs and mooching around The City.
Head back to the room that used to contain a conscious maid and the Architect's wife, and then loot everything you find. There's a safe in here that's stuffed with valuables as well, so don't move on until you've cleared it out.
Now make your way into the library where you delivered death from above, and grab a book that's on the shelf - if you're struggling to locate the specific book, just use your Focus ability. Now make your way through the secret corridor, push the button that's on the wall, and ride the lift all the way to the top. Once you exit the lift, you just need to keep moving forward until you come across a button - push it to open up the door ahead.
Search the Study for the Keep Plans
Climb the ladder that's ahead of you until you're on the balcony. Now make your way over to the painting nearby and feel around for the triggers. Once you've found them, a massive model of the Keep will rise up from the floor. To solve the next puzzle, simply rearrange the pieces in front of you, using the Keep that's outside the window for reference. You'll finish up this objective as soon as you've completed the puzzle.
Steal the Plans and Escape
Be ready to make a run for it, but first grab the Great Safe Combination and the Keep Plans from the bookshelf. Once you've nabbed them, run as fast as you can in a northern direction - if you keep this pace up and simply run, jump and climb your way to freedom, you've nothing to worry about.
Get to the Keep
Time to make use of those plans. As soon as the cut-scene finishes, take a left and pay a visit to the Shady Merchant. Make sure you stock up on any arrows that you've used up until this point - always max out your capacity for them when you can afford to do so, as you never know when you'll need more of them.
After stocking up, head towards the east and climb up the rope you find. You'll end up in an attic continue a crawl space - make your way through it to continue your journey towards the Keep.
Get Inside the Keep
"Your main threat right now is from the Keep itself which is stuffed full of danger."
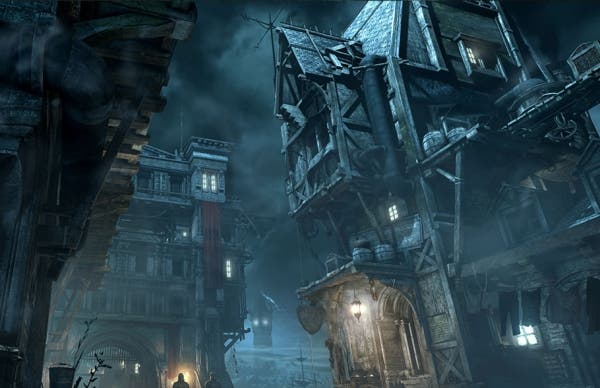
Ignore the chaos around you, and just make your way through the Keep without worrying about detection. Your main threat right now is from the Keep itself which is stuffed full of danger. Keep heading towards your objective marker, but watch out for explosions as you do so. Walkways will also collapse shortly after you land on them, so don't hang about.
Keep heading in an eastern direction, along a long pipe, until you come to a massive piston. Dart past it as soon as it retracts, and it goes without saying you need to be pretty zippy here. We won't draw you a picture - you'll quite possibly see it for yourself before you make it to the other side! As soon as you reach a crawl space, make your way through it to complete your current objective.
Find and Rescue Basso
We probably don't need to tell you to stay well away from any flammable sections here, but it's worth mentioning anyway. Get over to the south-west corner and turn the valve that you find. Now make your way north, then west, until you reach a control box. Hack it and then make your way through the open door. There's loads of lovely treasure in here, so grab all of it and then head back the way you came.
Keep following the path towards your objective, but note that the smoke here slowly damages Garrett over time. If you find yourself in real trouble, use the food you picked up earlier, otherwise just get through the smoke as quickly as possible.
Once you're out of danger, you'll find a locked door to your left. Pick the lock and you'll be able to get your hands on another two collectible items. The first is called Memories of the Dead (3/6) - Soldier's Memory, and you can get it off the body of the dead soldier. The second one is called City Heritage Plaques (12/16) - The Keep, and is on the eastern side of this room. If you're wondering where the other City Heritage Plaques are, you'll find these in The City section of the game.
Enter the lift and travel up, then have a good rummage around for loot when you reach your destination. Keep making your way towards your mission objective, then pull the lever you come across in order to rescue Basso.
Find the Great Safe
After another ride in a lift, climb up through the hatch in the roof, shuffle your way through the crawl space, and then leap down to the level below. If you now pull the lever in the centre of the room, you'll reveal the Great Safe itself.
Open the Great safe
"It's worth reading ahead a little here before tackling the safe in front of you, as you'll be under a little time-pressure to complete each step."
It's worth reading ahead a little here before tackling the safe in front of you, as you'll be under a little time-pressure to complete each step. Press the switch on one side of the safe, then run as fast as you can to the other side and press the second switch. As soon as both switches are down, go to the dials on the safe as soon as possible.
You need to enter two combinations here. On the left-hand dial, enter the combination 3-1-9, while the second combination dial needs to be set to 0-1-8.
After the cut-scene's finished playing out, make your way up the wall that's to your right, taking cover behind the crate to your left as soon as you're up on top. There's a guard here that's pretty easy to take out quietly - when he's not looking, sneak up and knock him out from behind. As soon as you've done this, hit the control panel button to turn off all the lights, giving you a little more shadow to sneak around in.
If you now make your way to the northern end of the guard's patrol area, you'll be able to get your hands on The Moral Coils (4/6) - Shale Snake Bracelet. If this doesn't tally up with what you've found, it means you've missed one from an earlier part of our walkthrough, or you need to find more in The City section. Either way, this is the final collectible item you can get hold of in this chapter of the game.
Now make your way back to the panel where you took the guard out. Depending on how patient you are, you can stealthily take out the search party one by one, but you'll likely find it quicker to just use Broadhead Arrows to deliver some swift head-shots. If you're looking to complete this chapter undetected though, you'll haev to take the long route.
Steal the Primal Stone
You're very close to the end of the mission at this point. Once you've taken out the last of those guards, go back to the safe and enter the combination for the right-hand dial once more. The door will open up, and you'll be able to loot the precious quest item: The Primal Stone.
Once you've finished looting it, you'll also be rewarded with a trophy or achievement to mark the successful conclusion of the chapter.
Struggling to kill the Freaks in Thief? Our guide to the asylum section of the game will get you through it without taking so much as a scratch.


