Metal Gear Solid 5 - A Hero's Way: Commander location, Shago village target location
How to clear the way to the Spetsnaz commander, locate your target in Shago, and extract him in the Hero's Way mission of Metal Gear Solid 5.
Welcome to Metal Gear Solid 5 - A Hero's Way, the third main story mission of the game, following on from Diamond Dogs.
A Hero's Way Mission checklist:
- Eliminated the Spetsnaz commander
- Neutralised the Spetsnaz commander from long distance (100m or more)
- Extracted the Spetsnaz commander
- Picked a haoma in the desert between Shago and Spugmay Keep
- Secured the processed materials hidden in Shago Village
A Hero's Way: Commander location
Choose the 'A Hero's Way' mission from your mission list. then prepare to select a landing zone. This walkthrough assumes that you'll be starting from the drop point to the north of Da Shago Kallai so, unless you want to be very confused, you should select that now.
Before proceeding, you're able to tinker with your equipment, buddy, vehicle and character settings - so make your preferred adjustments then commence the mission, setting the drop time to 0600. As Ocelot notes at the start of the mission, your target (the Spetsnaz commander) holds valuable intel - so we'll be extracting, rather than eliminating him, this time around.
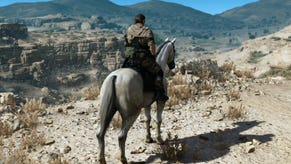
Once you've touched down, mount your trusty steed and begin making your way toward the yellow waypoint marker. As you close in on your destination, Ocelot notes that you're able to extract any wild animals you find in the field in order to earn an award - something to remember as you go about your business!
Clear out the watchtower
Not long into your journey, you'll spot a small Soviet outpost to your right - consisting of a tent, a watch tower, and a couple of guards. Given the prominence of the watchtower, it can be tricky to avoid detection so it's wise to clear out the guard post before proceeding.
As you approach the occupied area, use your binoculars to survey the scene, then dismount and sidle in close, using the concrete blocks as cover.
When all guards are down, extract any that you like the look of then loot the area for Common Metals and Fuel Resources. You should also find medicinal plants in the immediate vicinity which can be used to create medicines and poison for your weapons back at base. When you're ready to proceed, mount your horse and continue on to the waypoint marker.
Locate your target in Shago village
Once you reach the outskirts of Shago village, it's worth taking a moment to recon the area. There's a high mountain path to the north-east that offers an excellent view of the village. Find a good spot and activate your binoculars to scope out your next destination.
Mark all the guards and objects of interest as usual, then locate the largest ruined building in the area - it's a derelict courtyard with two watchtowers on its far side, plus wooden steps leading up to a second level. You should also find your main target situated in the covered portion of the building, just up the steps. Close by, there's a power generator which can be disabled to shut off lights and security cameras - but you risk alerting your opponents if you do so.
When you're ready, begin working your way to the Commander's position in the main building, using the numerous rows of concrete protrusions around the area as cover. Use the tufts of grass on your approach to the village in order to remain concealed - and take down any hostiles you encounter on your travels.
Pay particular attention to guards patrolling the rooftops in the area. These hostiles are able to spot you from a much greater distance, so you should certainly consider eliminating them before proceeding. As a bonus you'll find various resources inside each building too.
Once you finally enter the main courtyard area to the south-west of your starting position, look for the long, low row of sandbags and locate the delightful [Recorded in Toilet] cassette tape nearby.
Next, you need to climb the wooden steps ahead to reach the upper level of the area - note that the door to the right of the steps leads to a small series of rooms containing numerous resources (including Minor Metal and Biological Material) and some Rough Diamonds.
When you're ready, check that any guards occupying the watchtower directly above your target are facing away from your position, then climb the steps to the next level. Use the ladder to the right to deal with any soldiers in the watchtower above (this will make capturing your main target less perilous) then return to the level below.
Extract the Commander and escape
Next, take cover behind the crate to the right, wait for the Commander to come to a halt on his patrol, then knock him unconscious from behind. Once he's down, carefully lift him up and carry him out into the open. From here, you're able to extract the Commander with a 100% success rate. Do so now! Finally, grab the resources in the area and make your escape.
It's likely that any nearby guards will move in to investigate the Commander's whereabouts once he's been extracted, so quickly drop down to the ground and exit the courtyard heading north-east. Keep a close watch for enemies as you make your escape, and try to remain undetected. Next, locate the jeep parked just outside the courtyard, highlighted by the marker on your HUD.
When you reach it, hop in and tear out of the village, heading back toward your starting position. Once you're far enough out of the hot zone, the mission will automatically complete, earning you the At Mother Base [1] cassette tape and the chance to develop the Support Helicopter armament and D-Horse equipment as a reward.
Back out in the field, Ocelot reveals that new Side Ops missions have been added to your roster. Open your iDroid to investigate your new objectives: of particular note is the Extract Interpreter (Russian) mission. If you successfully complete this goal, you'll be able to understand the chatter from enemy soldiers as you go about your business.
Need help with The Phantom Pain? Our Metal Gear Solid 5 guide and walkthrough explains how to complete every main story mission, and explains their many optional objectives. We also have lists of Blueprint locations, Tape locations, Key Item locations, how to unlock S Ranks and a Metal Gear Solid 5 Achievement and Trophy list.
Side Ops: Extract Interpreter (Russian)
To begin, use the Helicopter option in your Mission menu to call for a chopper, then set the landing zone closest to your current position. Make your way over and board your ride.
Once you're back in the air, select the Extract Interpreter (Russian) mission from your Side Ops menu then set the landing zone just south of the Eastern Communications post on your map. Next, set the deployment time to 0600 and commence the mission.
When you finally touch down, hop onto your horse. Open your iDroid again and select the Extract Interpreter (Russian) mission to place a marker on your map (if it's not there already). With that done, return to the field and head toward your new destination.
As you near the small hut housing the interpreter, dismount your steed and drop to the floor. Activate your binoculars and scan the area, marking all hostiles. There's a steep rocky ledge just to the south of the compound, so make your way up and head along it until you're right alongside the main building. You'll need to stay prone in order to avoid being spotted by the enemies on patrol.
Begin by dealing with the non-essential guards in the area. When they're down, approach the interpreter from the rear and knock him unconscious. Next, extract him using your Fulton device then scour the main building for resources. Once your target is back at Mother Base, you'll be able to understand all Russian you hear in the field - and you can even interrogate soldiers to gain more intel to help on your adventure. To end the mission, summon a chopper and climb onboard.
Back in the air, you'll note that a new objective - Secure the [RIOT SMG] Blueprint - has been added to your Side Ops list. Feel free to tackle it - or the Extract the Highly-Skilled Soldier mission - at your leisure. For now, however, we'll simply push on to the fourth core mission in the game.
- The next part of our walkthrough explains how to complete C2W.
- Return to the index page for more entries in our Metal Gear Solid 5 walkthrough.


